Cooking With Mouth Sores

Poor old Flora - here she comes for dinner with a mouth full of ulcers.
Stress apparently. Definitely nothing to do with trouble, you know, down there. Definitely not.
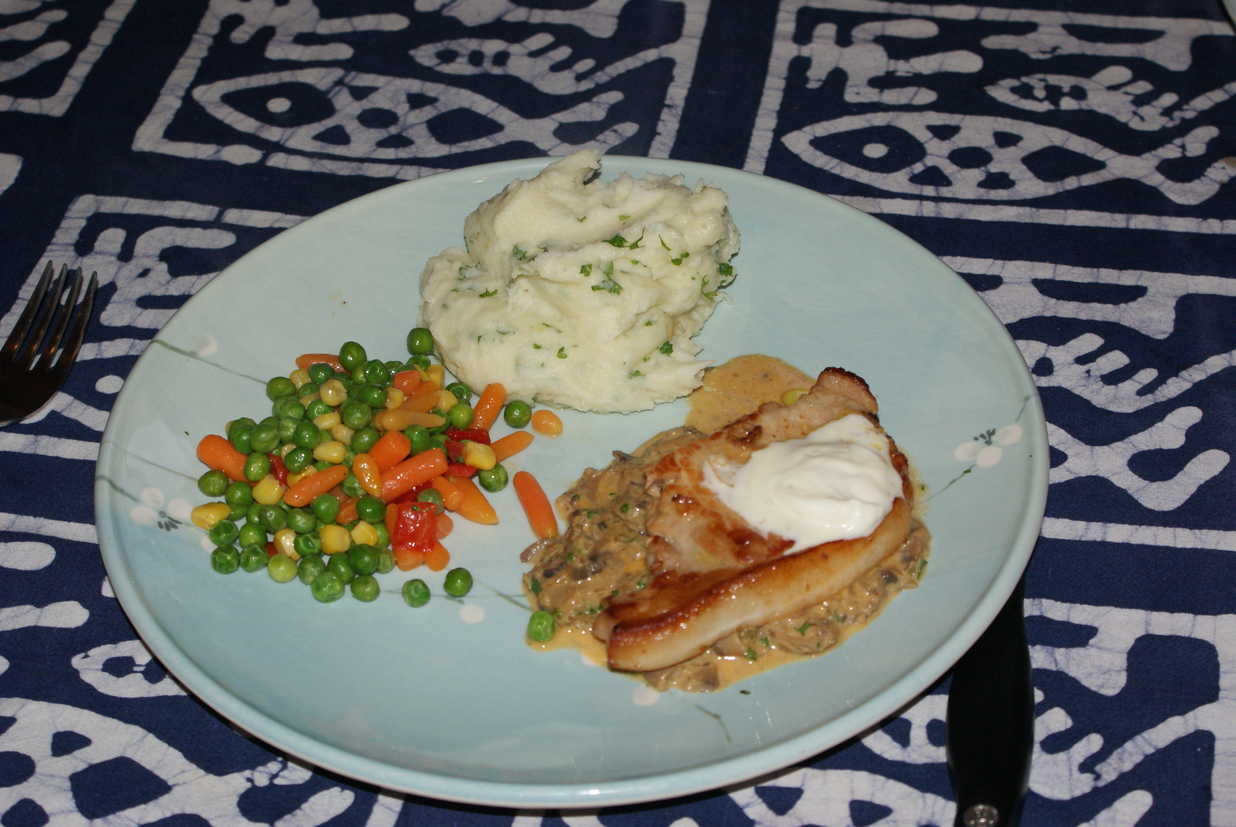
So I concocted a soft and gentle meal, nothing too spiky, nothing too spicy, nothing too acid, all creams and purée: A nice (if unauthentic) pork stroganoff, puréed potatoes, mixed veg and to follow; a soothing homemade vanilla ice cream.
Mostly wasted effort, though, as the ungrateful guest started her visit by helping herself to some distinctly ulcer-unfriendly pickled gherkin slices, and then spent the evening complaining that what she really fancied was take-away food like what they're always eating in The Big Bang Theory.
Pah.
Not a bad meal on the whole, though I think it could have done with some kind of crispy, crunchy greens (cabbage or kale?) on the side.
I'm ashamed to say that the the mixed veg were just out of a frozen packet that I heated in a small pot with a generous knob of butter. But the pork stroganoff is real enough.
Pork Stroganoff
main meat
Pork chops in a mushroom and sour cream sauce
Ingredients
- 4 pork chops
- olive oil
- 1 clove garlic, thinly sliced optional
- 1 onion, peeled, finely chopped
- 500g button mushrooms
- 2 tbsps butter
- 150ml white wine
- 1 tsp paprika
- 125ml sour cream
- 1 scant tsp Dijon mustard
- salt
- 2 tablespoons chopped parsley or chives
To make the sauce, halve the onion and chop finely.
Clean the mushrooms, separate the stalks and mince them up. Finely slice the heads.
Melt the butter in a large frying pan and gently sweat the onions for 10 minutes until they soften, add the paprika and stir through, then add the mushrooms (in batches if necessary) and sweat them gently for a further 10 minutes until they have leaked much of their water and reduced. Set the mixture aside in a pot.
Now add a little more butter to the frying pan and fry up the mushroom stalks until they dry out, then deglaze with the wine and simmer to reduce by half. Use a stick blender to purée this reduction to a smooth paste, adding a little of the onion mixture and more wine if required. Add this to the onion mushroom mixture in the pot. This whole purée thing is optional - just deglaze the onion mixture with the white wine if you can't be bothered with it but it will produce a thicker, smoother sauce.
Now cook the chops - you can just fry them over a moderate heat for 10 minutes, season, turn them for another 5 minutes, then rest.
Or you can do as I did, and brown the seasoned chops quickly in olive oil over high heat, then throw in a finely sliced garlic clove, scrape out the pan and wrap the whole lot tightly in tin foil and stick it in the oven to cook slowly until you're ready for it, say half an hour at Gas Mark 4.
When you're ready to serve, reheat the mushroom mixture in the pot for 5 minutes until well mixed, then add the sour cream and the mustard (both to taste), season, and cook stirring for a further 5 minutes. Add any juices from the chops when they are cooked.
Serve the chops with mushroom sauce spooned over, an extra dollop of sour cream, and scattered with herbs.
Melt the butter in a large frying pan and gently sweat the onions for 10 minutes until they soften, add the paprika and stir through, then add the mushrooms (in batches if necessary) and sweat them gently for a further 10 minutes until they have leaked much of their water and reduced. Set the mixture aside in a pot.
Now add a little more butter to the frying pan and fry up the mushroom stalks until they dry out, then deglaze with the wine and simmer to reduce by half. Use a stick blender to purée this reduction to a smooth paste, adding a little of the onion mixture and more wine if required. Add this to the onion mushroom mixture in the pot. This whole purée thing is optional - just deglaze the onion mixture with the white wine if you can't be bothered with it but it will produce a thicker, smoother sauce.
Now cook the chops - you can just fry them over a moderate heat for 10 minutes, season, turn them for another 5 minutes, then rest.
Or you can do as I did, and brown the seasoned chops quickly in olive oil over high heat, then throw in a finely sliced garlic clove, scrape out the pan and wrap the whole lot tightly in tin foil and stick it in the oven to cook slowly until you're ready for it, say half an hour at Gas Mark 4.
Interestingly, I decided to compare the two cooking methods - pan-frying a chop
and cooking a chop in the oven for half an hour at Gas Mark 4 (both defrosted frozen chops - if that makes any difference).
The oven-cooked chop was noticeably drier and tougher,
so although it can make the preparation a bit easier particularly if you don't have much hob space,
I'd have to recommend against it.
When you're ready to serve, reheat the mushroom mixture in the pot for 5 minutes until well mixed, then add the sour cream and the mustard (both to taste), season, and cook stirring for a further 5 minutes. Add any juices from the chops when they are cooked.
Serve the chops with mushroom sauce spooned over, an extra dollop of sour cream, and scattered with herbs.
The chops were ever-so-slightly tough, so maybe I left them too long in the oven or it was too hot and dried them out.
Or maybe you could skip the frying step and put the chops straight in the oven with the garlic - after all they'll be covered in sauce when you serve them so no one will know if they appear to have come from an albino pig.
Or maybe you could skip the frying step and put the chops straight in the oven with the garlic - after all they'll be covered in sauce when you serve them so no one will know if they appear to have come from an albino pig.
Or maybe, as I mention above, it's just a bit of a rubbish way to cook them?
The sauce is good. You can also add a squirt of lemon juice to it at the end if you like, and you aren't cooking for someone with an acid sensitivity.
Easy Puréed Potatoes
side staple veg
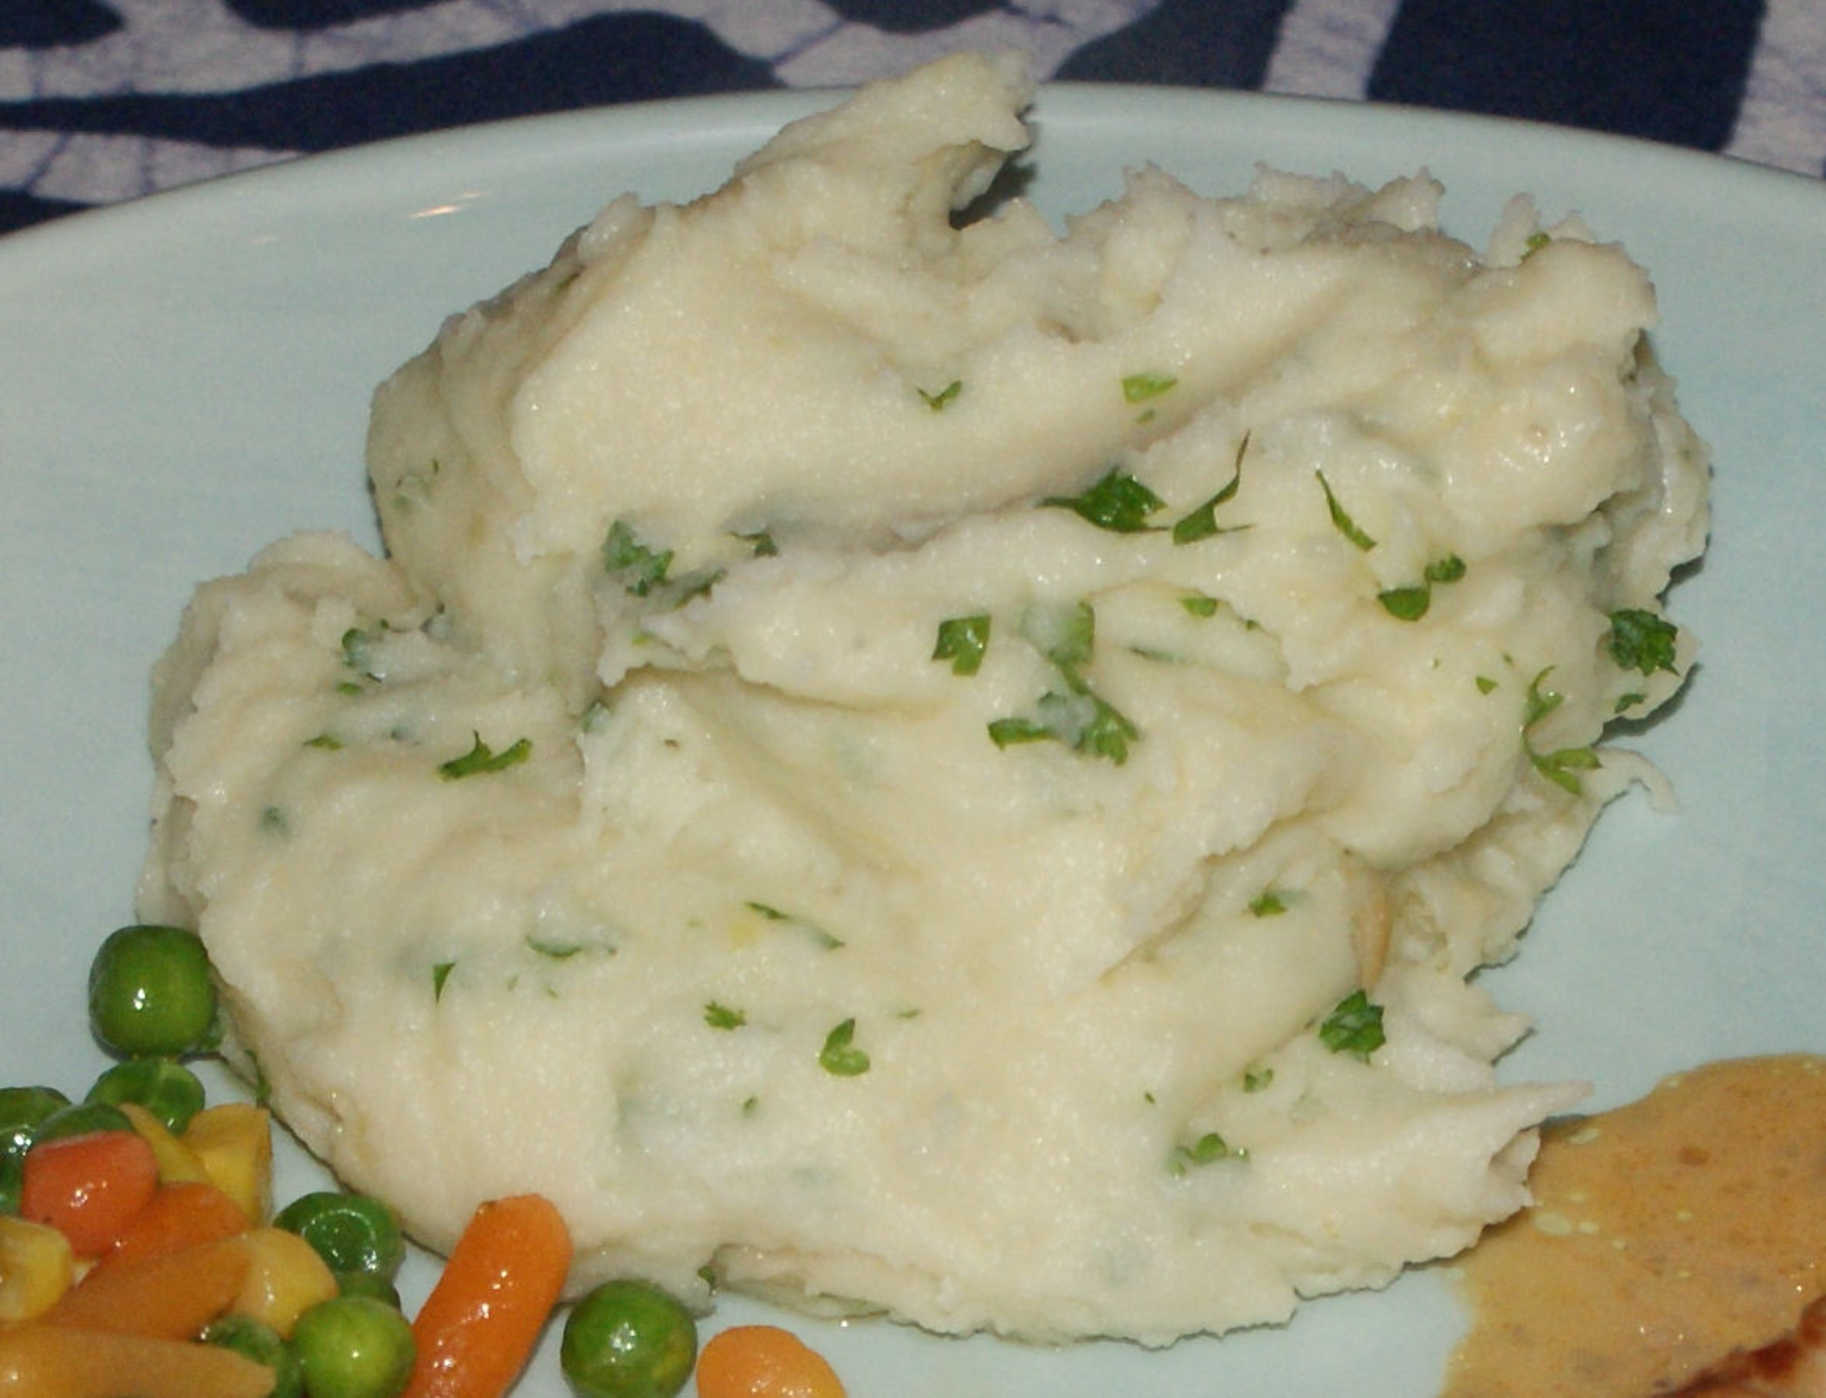
I normally prefer to bake the potatoes for mash, but I had a bag of smallish King Edwards that needed using up,
and couldn't be arsed to bake them all.
Serves 4
Ingredients
- 2 lb smallish potatoes in their skins
- butter. Lots of butter.
- 150ml single cream
- 1 head garlic
- salt. Lots of salt.
- 2 tablespoons chopped parsley
Bake your head of garlic at Gas Mark 4-6 for 30 minutes until soft and oozing, cut the top off the head and squeeze out the cloves
using the back of a heavy knife (or your fingers).
Meanwhile simmer the potatoes in their skins for about half an hour until they are extremely soft and their skins have started breaking open. Drain them and leave to cool a little until you can handle them.
Carefully scrape off the peel with a sharp knife, and run the potatoes through a potato ricer back into the pot over a low heat to dry out, then vigorously beat in your garlic and your butter - a generous amount of butter. As much butter as you think you could possibly stand. Then a bit more. Now you can cover this mixture with buttered paper until you need it.
To serve, heat the cream, put the potato in a pot over low heat and whisk in the hot cream in a steady stream until the mash is nice and smooth, season generously, stir in the parsley and serve.
You can simplify this by heating the cream in the pot and then mashing the potato into it, though you won't incorporate quite as much air that way.
You can also add the butter at this stage too, rather than beating it in earlier.
You might prefer the coarser result, more like mash than purée.
You can also add the butter at this stage too, rather than beating it in earlier.
You might prefer the coarser result, more like mash than purée.
Vanilla Ice Cream
dessert veg

If, like me, you have a pathetic freezer, make sure to put your ice cream machine sleeve in to freeze several days ahead of schedule.
Also make sure that the custard mix is really well chilled before churning it in the machine.
Also make sure that the custard mix is really well chilled before churning it in the machine.
Serves 4
Ingredients
- 1 vanilla pod
- 4 egg yolks
- 450ml single cream
- 150ml double cream
- 110g/4 oz caster sugar
Remember to put the ice cream machine sleeve in your freezer a day or so ahead of time.
Slit the vanilla pod down its length. Put in a pot with the single cream, bring slowly to a gentle simmer and leave to infuse.
Beat the eggs with the sugar until pale and fluffy.
Pour the strained cream into the egg yolks, stirring constantly, then set the bowl over simmering water (or if you're feeling brave in a pot directly over a very low heat) and whisk vigorously as the custard heats to 80°C, and thickens enough to coat the back of a spoon.
Don't let it curdle or turn to scrambled eggs. You might be able to rescue it by dumping the pot into cold water and whisking like a lunatic if this does happen. Or you might not.
Put in the fridge, then the freezer to cool and thoroughly chill.
Whisk up the double cream until it is thick (though not stiff), then stir it into the custard and finally pour it into your ice cream machine.
Put into the freezer until required, but take it out and set it in the fridge 15 minutes or so before serving so it's not too hard.
Rather nice, but unlikely as it seems, just a bit too creamy.
It's actually better made following the ingredients listed in the
Carved Angel Cookery Book:
- 3 egg yolks
- 300ml milk
- 150ml double cream
Cooking With Mother
Mum's up for a weekend visit.
Mostly visiting me, though she did spend a day with Rachel's Mum. Hey, just 'cos we split up doesn't mean our Mums have to!
We started off the weekend with a shopping trip to the Farmers' Market, where I feasted on Oink's Hog Roast rolls, and a California Coffee Company coffee. You know - the people that operate out of those ex-police boxes.
They make the best coffee. Except for Kilimanjaro Coffee on Nicolson Street. They make the best coffee.
But I still like the California Coffee Company's Java roast. In fact I've got a bag of their beans right here. Well. In the kitchen. I don't sit and hug it or anything. Not with the lights on, at least.
Anyway, we finished the day off with a very satisfying return visit to David Bann's most excellent vegetarian restaurant on St Mary's Street. The savoury courses were just great, and their Chilli Margaritas as good as I remembered. The desserts were a bit disappointing, but maybe that was only in comparison. They didn't seem to show quite the same sure-handed inventiveness in the matching of flavours.
I was particularly impressed by their beautifully aromatic tarragon-butter spinach, and a delightful banana chutney which perfectly complemented their Thai-style tofu fritters, which Mum ordered for a starter.
According to the waitress, who seemed well-informed so I trust her, they leave the bananas to almost-ferment, before mixing with turmeric, cumin, fennel and fenugreek.
Suitably inspired I decided to recreate Bann's tarragon spinach when I cooked Mum's leaving dinner tonight.
At the Farmers' Market we picked up some of Stichill Jersey's Eildon Blue Cheese which needs eating, that I thought that might go well with broccoli, and we also bought some rather nice looking whitecurrants (since all the gooseberries on offer looked sad and mouldy), that I decided need a crumble to bring out their best side.
The rest, as they say, is history...
Mostly visiting me, though she did spend a day with Rachel's Mum. Hey, just 'cos we split up doesn't mean our Mums have to!
We started off the weekend with a shopping trip to the Farmers' Market, where I feasted on Oink's Hog Roast rolls, and a California Coffee Company coffee. You know - the people that operate out of those ex-police boxes.
They make the best coffee. Except for Kilimanjaro Coffee on Nicolson Street. They make the best coffee.
But I still like the California Coffee Company's Java roast. In fact I've got a bag of their beans right here. Well. In the kitchen. I don't sit and hug it or anything. Not with the lights on, at least.
Anyway, we finished the day off with a very satisfying return visit to David Bann's most excellent vegetarian restaurant on St Mary's Street. The savoury courses were just great, and their Chilli Margaritas as good as I remembered. The desserts were a bit disappointing, but maybe that was only in comparison. They didn't seem to show quite the same sure-handed inventiveness in the matching of flavours.
I was particularly impressed by their beautifully aromatic tarragon-butter spinach, and a delightful banana chutney which perfectly complemented their Thai-style tofu fritters, which Mum ordered for a starter.
According to the waitress, who seemed well-informed so I trust her, they leave the bananas to almost-ferment, before mixing with turmeric, cumin, fennel and fenugreek.
Update:
I emailed that nice Mr Bann to ask him how to make his chutney so I could have a go for a curry party
(Oooh mister that burns!) and here's what he told me:
Mum's main course were chilli crepes served with a chocolate sauce. Not only did the sauce complement the crepes,
but it was also delicious with our side order of rosemary and thyme sprinkled chunky chips.
I think there may a meal with chips and chocolate sauce in the offing!Suitably inspired I decided to recreate Bann's tarragon spinach when I cooked Mum's leaving dinner tonight.
At the Farmers' Market we picked up some of Stichill Jersey's Eildon Blue Cheese which needs eating, that I thought that might go well with broccoli, and we also bought some rather nice looking whitecurrants (since all the gooseberries on offer looked sad and mouldy), that I decided need a crumble to bring out their best side.
The rest, as they say, is history...
Broccoli and Blue Cheese Soufflé
main veg cheese


The soufflés are quite small - Mum and I ate 2 and a half each quite happily,
but we didn't have much else with them. And then we were stuffed.
I'm not exactly sure about the milk quantity - I just used enough to lubricate the broccoli and start the white sauce.
I'm not exactly sure about the milk quantity - I just used enough to lubricate the broccoli and start the white sauce.
Makes 6
Ingredients
- 150g blue cheese
- 500g broccoli, before trimming
- 40g butter
- 40g plain flour
- 200ml milk or cream
- 4 eggs, separated
- grated nutmeg
For the red pepper sauce:- 2 red peppers
- a little cream
- pinch paprika or cayenne pepper
Put a baking tray in the oven and preheat to 200°C/Gas Mark 6.
Separate the eggs and whisk the egg whites until stiff.
Crumble the blue cheese.
Rub 6 x 200ml ramekins or one large dish with melted butter and, if you want, dust with grated parmesan cheese or fine white breadcrumbs.
Steam or blanch the broccoli until quite tender, remove most of their stems, and purée in a blender with a little milk.
Cook the butter and flour gently in a pan for 2-3 minutes, then gradually add a little milk, whisking until you have a thick paste. Cook a little, then add the broccoli, the cheese, a grating of nutmeg and a little salt and heat through. You should have a thick sauce at this stage. Add more milk if it is more like cement.
Off the heat whisk in the egg yolks, then whisk in a spoonful of the egg whites before carefully folding in the rest.
Pour into the ramekins almost to the rim then cook on the pre-heated baking tray for 8-10 minutes or 25-30 minutes if making one large soufflé.
Serve with the red pepper sauce.
The Red Pepper Sauce
Cut 2 red peppers in half and deseed them.
Place the pepper halves under a grill until the skin chars, and the flesh softens, then put them in a plastic bag to cool.
Peel the skin away from the peppers, then blend them together with a little cream and paprika or cayenne pepper.
Heat gently in a small pan.
Very tasty I thought.
Though they are difficult to turn out. It might be best to serve them in their ramekins, with the sauce on the side.
If you must turn them out, run a knife around the edge, turn them upside down on a small plate, then flip them back up again using a fish slice underneath them, and slide them onto the plates.
Tarragon Butter Spinach
side veg

Ingredients
- 150g/5 oz spinach
- 1-2 tablespoons butter
- a handful of tarragon probably about 6g, leaves stripped and finely chopped
Chop the tarragon leaves quite finely, and heat gently with the butter in a small pot.
Leave to infuse.
Wash the spinach, put in a large pot, cover and shake it around over the heat until it wilts.
Squeeze dry (if there is any extra water). Feel free to use the juice in your broccoli soufflé mixture. Set aside.
When you're ready to serve re-heat the spinach in the tarragon-flavoured butter and serve.
Wash the spinach, put in a large pot, cover and shake it around over the heat until it wilts.
Squeeze dry (if there is any extra water). Feel free to use the juice in your broccoli soufflé mixture. Set aside.
I finely chopped up my spinach at this stage, but the result was a bit too much like creamed spinach.
It's better only roughly chopped.
When you're ready to serve re-heat the spinach in the tarragon-flavoured butter and serve.
Lovely aromatic spinach - the flavours complement each other well.
I'm not sure if you particularly need to infuse the butter first, since spinach cooks so quickly anyway you might try just throwing the spinach and the chopped tarragon into a pan and wilting them together in butter.
I'm not sure if you particularly need to infuse the butter first, since spinach cooks so quickly anyway you might try just throwing the spinach and the chopped tarragon into a pan and wilting them together in butter.
Whitecurrant Crumble
dessert veg

Ingredients
- 450g whitecurrants
- 6 oz plain flour
- 3 oz butter
- 4 tablespoons demerara sugar
- caster sugar
Preheat the oven to 200°C/Gas Mark 6.
Clean the currants and put them in an ovenproof dish with a pinch of salt and a scattering of caster sugar - about a tablespoon.
Mix the flour and butter with your fingers until you have rough breadcrumbs then mix in the demerara with a knife.
Scatter over the fruit.
Bake for 30-40 minutes or until turning nicely golden on top.
Serve with custard.
Not bad. The currants are tart enough to work in a crumble, and the pips aren't too annoying.
Real Egg Custard
sauce dessert veg
The quantities here aren't critical, you want enough cream for the number of people you have to feed,
enough sugar to make it sweet enough for the dish you are serving it with
(you can add more sugar once you're heating the custard),
and as many egg yolks as you need to thicken it to your taste.
You can get it surprisingly thick if you add loads of yolks.
The quantities below are a good starter, though I would probably use 4 eggs and a little less sugar - I like my custard thin.
You can get it surprisingly thick if you add loads of yolks.
The quantities below are a good starter, though I would probably use 4 eggs and a little less sugar - I like my custard thin.
Serves 4
Ingredients
- 1 pint/600ml single cream though you can use milk if you're poor
- 6 egg yolks
- 125g/4 oz caster sugar
- vanilla pod, or Sauternes wine
If you happen to have some vanilla-ed caster sugar already made up, so much the better,
otherwise slit or cut the vanilla pod and put it into a saucepan
with the cream, bring to the boil and leave to infuse.
Whisk the egg yolks with the caster sugar, strain the vanilla-flavoured milk into the yolks then return to the saucepan.
Gently heat the custard whilst whisking vigorously until you it thickens. Don't let it curdle or turn into scrambled eggs. You can do this in a double-boiler if you like.
Apparently you can also use Sauternes (or other dessert wine) as the flavouring for special occasions.
Heat the wine and whisk it into the egg yolks before the cream.
Whisk the egg yolks with the caster sugar, strain the vanilla-flavoured milk into the yolks then return to the saucepan.
Gently heat the custard whilst whisking vigorously until you it thickens. Don't let it curdle or turn into scrambled eggs. You can do this in a double-boiler if you like.
You might be able to rescue curdled custard by plunging the pan into cold water and whisking like mad.
You could also try adding a teaspoonful of cold water to the mixture.
If you are afraid of scrambling your custard then a teaspoon of cornflour added to the cream will help to stabilise the mixture.
If you are afraid of scrambling your custard then a teaspoon of cornflour added to the cream will help to stabilise the mixture.
Apparently you can also use Sauternes (or other dessert wine) as the flavouring for special occasions.
Heat the wine and whisk it into the egg yolks before the cream.
Crab Ice Cream

I've been thinking about a seafood ice cream for a while now, as you do.
Partly for my long-maturing stuffed-squid meal, and partly for the hell of it.
I ultimately want to do something with wasabi crackers (like those chinese prawn crackers, but wasabi flavoured)
and maybe oyster ice cream as a starter,
but I decided to have my first stab at making one for a dessert and I went for crab,
though I also thought prawns might work.
I invited Aidan and Jude around for a first attempt at making our planned Erin's Signature West Coast dish. Over here on the East Coast - since we didn't get the chance when we were on the West Coast. That's to be a black pudding and scallop stack with a lime-butter sauce for your information.
I didn't tell them what the pudding was going to be!
menu
Starter
Goat's Cheese Parcels
Main Course
Scallops and Black Pudding Stack
Pak Choy in Soy Sauce
Lime Butter Sauce
Dill Mashed Potatoes
Dessert
Crab Ice Cream
That's right, ice cream. But with crab.
Goat's Cheese Parcels
Main Course
Scallops and Black Pudding Stack
Pak Choy in Soy Sauce
Lime Butter Sauce
Dill Mashed Potatoes
Dessert
Crab Ice Cream
That's right, ice cream. But with crab.
I started on the dessert the night before, making up the broth before going to bed.
I also remembered to get the ice cream machine sleeve into the freezer compartment days early
(hoping to to do better than the last time I tried to
use the damn thing).
Then I had time to make up the custard early in the morning and leave it chilling for several hours first in the fridge
then in the freezer to get it absolutely as cold as possible without freezing it, knowing how poor my freezer is.
This seemed to do the trick, because the ice cream machine successfully churned the mixture to ice cream in about 20 minutes. (Well, to be honest it wasn't quite frozen even then, but it was very thick and the machine couldn't churn it any more. Maybe I was a bit heavy on the egg yolks?). Then I stuck the sleeve in the freezer until dinner time, turning the contents around with a wooden spoon every so often when I remembered.
The ice cream was quite a lot of effort really, it's a pity the result was a bit underwhelming.
I made the guests try and guess the flavour, which they eventually got with a bit of prompting (and some incredulous muttering) and they were mightily impressed with the concept. But not the delivery.
I don't think the world is quite ready for seafood ice cream as a dessert. It's too much of a psychological dissociation when your mind is expecting pudding and your mouth is feeding you crab.
I still think it has potential as a starter, but I'm pretty much alone here. Aidan did suggest wasabi ice cream instead of my wasabi crackers. I guess there's gonna to have to be a lot of ice cream making going on. Maybe when Aline comes back and we get a new freezer?
Aidan kindly brought the starters, which were rather tasty hope I've got the recipe down Aidan?
I started the mash off nice and early by baking King Edwards well ahead of time for 90 minutes at Gas Mark 6 before running them through a potato ricer and then leaving them to one side in a small bowl, liberally smeared with butter and covered with cling film. When ready to reheat the potato I boiled up some milk and double cream in a large pan, then added the potato and some roughly chopped dill fronds and mashed the potato around until it had warmed through, adjusting the seasoning at the end.
I made up the lime butter sauce half an hour ahead and kept it in a warmed thermos flask.
I fried the black pudding and apple rings just before the guests arrived and put them in a low oven to keep warm.
Preparing everything in advance this way meant that I needed only to stir-fry the pak choy, reheat the riced potato and fry the scallops to serve up the dinner.
The sauce is pretty nice, and quite popular with the other guests, but it's very limey. I found it a little bit too tart for the meal, I think I'd try a Mornay sauce next time.
I decided to try out a couple of different ways of frying up the scallops, just for comparison:
However, it's a lot easier to control the slow cooking in butter, it may take a bit longer (and cost a fortune in butter), but you can better manage the cooking speed, and they don't really need that much attention. When you're frying them over high heat it's quite easy to overcook the scallops and turn them into little rubber bullets.
So especially if you've got a lot of other stuff going on I think the deep-butter technique is going to work best.
Thanks Og!
As per usual, I managed to completely forget about taking photos of the end product. So I had to make the meal all over again the next day using some leftover black pudding. But it did give me the chance to try the black pudding stacks with a Mornay sauce instead and I also added a layer of crispy pancetta to the stack, which I managed to forget the first time around! I also served it with celeriac purée instead of mashed potato this time. Just 'cos I didn't want to throw half a celeriac away. It was perfectly good that way too.
I rather liked the Mornay sauce (though don't make it too thick), but then I missed the limeyness of the first meal. Maybe I could try a Mornay sauce with a hint of lime! Ugh no! Or a lime-butter sauce with a bit less lime?
Meh. Life's too short.
This seemed to do the trick, because the ice cream machine successfully churned the mixture to ice cream in about 20 minutes. (Well, to be honest it wasn't quite frozen even then, but it was very thick and the machine couldn't churn it any more. Maybe I was a bit heavy on the egg yolks?). Then I stuck the sleeve in the freezer until dinner time, turning the contents around with a wooden spoon every so often when I remembered.
The ice cream was quite a lot of effort really, it's a pity the result was a bit underwhelming.
I made the guests try and guess the flavour, which they eventually got with a bit of prompting (and some incredulous muttering) and they were mightily impressed with the concept. But not the delivery.
I don't think the world is quite ready for seafood ice cream as a dessert. It's too much of a psychological dissociation when your mind is expecting pudding and your mouth is feeding you crab.
I still think it has potential as a starter, but I'm pretty much alone here. Aidan did suggest wasabi ice cream instead of my wasabi crackers. I guess there's gonna to have to be a lot of ice cream making going on. Maybe when Aline comes back and we get a new freezer?
Aidan kindly brought the starters, which were rather tasty hope I've got the recipe down Aidan?
I started the mash off nice and early by baking King Edwards well ahead of time for 90 minutes at Gas Mark 6 before running them through a potato ricer and then leaving them to one side in a small bowl, liberally smeared with butter and covered with cling film. When ready to reheat the potato I boiled up some milk and double cream in a large pan, then added the potato and some roughly chopped dill fronds and mashed the potato around until it had warmed through, adjusting the seasoning at the end.
I also boiled up some celeriac with the intention of mashing that in to my potato, but I didn't cook it nearly enough
(even though it was simmering for a good 20 minutes).
I should have known better -
after all you need to take a very different approach to making celeriac purée.
I made up the lime butter sauce half an hour ahead and kept it in a warmed thermos flask.
I fried the black pudding and apple rings just before the guests arrived and put them in a low oven to keep warm.
Preparing everything in advance this way meant that I needed only to stir-fry the pak choy, reheat the riced potato and fry the scallops to serve up the dinner.
The sauce is pretty nice, and quite popular with the other guests, but it's very limey. I found it a little bit too tart for the meal, I think I'd try a Mornay sauce next time.
I decided to try out a couple of different ways of frying up the scallops, just for comparison:
- My usual method of quick-frying in (or brushed with) a little clarified butter (or pancetta fat) over high heat in a griddle.
- A method suggested by John Ogden who used to own the Seafood Temple in Oban — Gently fry the the scallops in an inch or two of butter turning occasionally, until they turn opaque.
However, it's a lot easier to control the slow cooking in butter, it may take a bit longer (and cost a fortune in butter), but you can better manage the cooking speed, and they don't really need that much attention. When you're frying them over high heat it's quite easy to overcook the scallops and turn them into little rubber bullets.
So especially if you've got a lot of other stuff going on I think the deep-butter technique is going to work best.
Thanks Og!
As per usual, I managed to completely forget about taking photos of the end product. So I had to make the meal all over again the next day using some leftover black pudding. But it did give me the chance to try the black pudding stacks with a Mornay sauce instead and I also added a layer of crispy pancetta to the stack, which I managed to forget the first time around! I also served it with celeriac purée instead of mashed potato this time. Just 'cos I didn't want to throw half a celeriac away. It was perfectly good that way too.
I rather liked the Mornay sauce (though don't make it too thick), but then I missed the limeyness of the first meal. Maybe I could try a Mornay sauce with a hint of lime! Ugh no! Or a lime-butter sauce with a bit less lime?
Meh. Life's too short.
First attempt at Erin's West Coast signature dish
Scallops and Black Pudding
main fish meat
Scallops, apple rings, pancetta and black pudding stacks

Although this never quite got made on board Erin, we always planned to try it out during our West Coast holiday.
It would have worked pretty well on board to be honest. There's nothing here you couldn't do in a cramped galley on a storm-tossed sea.
Except eat it of course.
Except eat it of course.
Serves 6. Or 4 with a couple of spares
Ingredients
- 6" Stornaway black pudding
- 1 apple
- 8 scallops
- 6 slices pancetta
- lime butter sauce or thin Mornay sauce
- nutmeg
Heat the oven to 180°C/350°F/Gas 4.
Place the pancetta slices on a baking tray, and if you want them to be extra flat put another baking tray on top of them to hold them down (feel free to put greaseproof paper on either side), then bake them in the oven until they are browned and crisp - about 7 minutes.
Remove from the tray and set them on kitchen paper until required. You can keep the fat from the baking tray to brush over the scallops if you want.
Turn the oven down low.
Slice the black pudding into rounds roughly ¾" thick - one per person.
Peel the apple, slice it into rounds, about ⅓" thick, set them aside in a bowl covered with lemon juice and water to stop them browning.
Fry the black pudding slices until they crisp up, then put them in the oven.
Fry the apple rings (you can use the same fat, but you might want to pour off the excess) until they caramelise, then lay a slice of pancetta and an apple ring atop each of the black pudding rounds and return them to the oven.
Fry up the scallops and put one or two on top of the black pudding stack.
You can either fry the scallops on a very hot frying pan (but clean the one you've just used) or griddle using a little clarified butter or the pancetta fat,
or you can cook them more slowly in a good depth of butter in a small saucepan.
Pool a little of the sauce in the middle of each plate, place a black pudding stack on each puddle, grate over a little nutmeg and serve.
Pretty good - although the pancetta is optional, it definitely helps to bring some texture to the dish.
Personally I think I prefer Mornay sauce, but the lime-butter was popular. It might be worth trying to add a little lemon/lime into the Mornay for the best of both worlds.
Nope. Don't do that it just tastes weird!
Personally I think I prefer Mornay sauce, but the lime-butter was popular. It might be worth trying to add a little lemon/lime into the Mornay for the best of both worlds.
Nope. Don't do that it just tastes weird!
Crab Ice Cream
dessert fish


Not exactly a success - it was fun trying out, and I think there's some potential there
(though not everyone agrees with me), but I wouldn't try this at home kids!
Serves 6
Ingredients
- 1 crab - around 700g
- 4 shallots, chopped
- 1 leek, carefully washed and chopped
- 4 celery stalks, chopped
- 4 tomatoes, chopped
- ½ head garlic, cloves peeled
- 4 carrots, chopped
- cognac
- vermouth
- white wine
- zest of ¼ orange
- ½ star anise
- handful dill
For the custard:- 5 smallish egg yolks
- 100g caster sugar though I added more on tasting - probably 20g
- 300ml double cream
To Serve:- parmesan crisps
- passion fruit
Kill your crab, then boil it in salted water for 2 minutes.
Some rather horrible stuff squidges out of the crab during this process. Probably it's normal. Probably.
Pull off the gills dead man's fingers and any intestines and discard them. Wash out any nasty fluids from the shell.
Cut the body in half and crack open the claws and legs and prise out any tasty white meat with a skewer or tweezers and reserve it. Try not to get any bits of shell mixed up in it.
When you've collected enough meat, chop up any of the bigger pieces of crab, then start frying.
Heat some olive oil or butter in a large stock pan and fry all the crab pieces and shell for a few minutes until they are dried out and starting to crackle.
Now add the shallots, then the leek, then the garlic, then deglaze with a shot of cognac, a glass of vermouth and a glass of wine.
Carry on frying until the pan dries out again, then add the tomatoes, the carrots, some fennel would be good, the zest, anise, dill and cover with water.
Cover, set to a gentle simmer for 2 hours, giving it an occasional skim, then strain the broth.
Reduce the broth to 300ml, add 300ml double cream and a scant teaspoon of saffron though I think that might have been a touch too much and bring back almost to the boil then take off the heat to cool a little.
Mix a little of the hot broth into the eggs, then pour the eggs into the broth pan and reheat, stirring constantly, until the custard reaches 80°C and begins to thicken to coat the back of a spoon. At this stage you can add more sugar (as I did) if the custard does not taste sweet enough.
Cover with cling film and leave to cool, then chill it right down for a few hours.
Now you can pour it into your ice cream machine and churn it up. I also added most of the shredded crab meat I had reserved earlier.
Keep it in the fridge until required, but preferably for not too many hours.
To serve, you can make some parmesan crisps to stick in the ice cream scoops, and dress them with a little passion fruit.
You are supposed to be able to kill a crab by laying it on its back and driving a knife through it just behind the eyes,
but I didn't have any luck with that. Maybe you have to drive harder to get through the shell.
Anyway I found it was more effective to drive a skewer or a chopstick through the hole at the pointy tip of the triangular apron
below the crab's eyes on its belly.
Break off the crab's legs, pull off the apron then prise the crab's body out of its back shell.Pull off the gills dead man's fingers and any intestines and discard them. Wash out any nasty fluids from the shell.
Cut the body in half and crack open the claws and legs and prise out any tasty white meat with a skewer or tweezers and reserve it. Try not to get any bits of shell mixed up in it.
When you've collected enough meat, chop up any of the bigger pieces of crab, then start frying.
Heat some olive oil or butter in a large stock pan and fry all the crab pieces and shell for a few minutes until they are dried out and starting to crackle.
Now add the shallots, then the leek, then the garlic, then deglaze with a shot of cognac, a glass of vermouth and a glass of wine.
Carry on frying until the pan dries out again, then add the tomatoes, the carrots, some fennel would be good, the zest, anise, dill and cover with water.
Cover, set to a gentle simmer for 2 hours, giving it an occasional skim, then strain the broth.
I did this by first straining through a colander to get rid of the bigger bits,
then through four layers of muslin, then repeat through the muslin until the stock is clear enough.
I ended up with 1½ pints of broth.
I ended up with 1½ pints of broth.
Reduce the broth to 300ml, add 300ml double cream and a scant teaspoon of saffron though I think that might have been a touch too much and bring back almost to the boil then take off the heat to cool a little.
I did a little test first with just a couple of tablespoons of each to find out if the mixture would curdle when it boiled up -
but it seems to be pretty stable.
Meanwhile beat or whisk together the egg yolks and the sugar for 10 minutes until it is thick and creamy.Mix a little of the hot broth into the eggs, then pour the eggs into the broth pan and reheat, stirring constantly, until the custard reaches 80°C and begins to thicken to coat the back of a spoon. At this stage you can add more sugar (as I did) if the custard does not taste sweet enough.
Cover with cling film and leave to cool, then chill it right down for a few hours.
Now you can pour it into your ice cream machine and churn it up. I also added most of the shredded crab meat I had reserved earlier.
Keep it in the fridge until required, but preferably for not too many hours.
To serve, you can make some parmesan crisps to stick in the ice cream scoops, and dress them with a little passion fruit.
OK, this wasn't exactly a success. Interesting, and entertaining yes, but not particularly nice.
Not as a dessert anyway. The combination of salty and sweet flavours is a bit too weird when your brain is expecting pudding!
I think it might work as a starter, maybe with salad, but the truth is the ice cream was just much too crabby, Especially with the bits of crab meat. I think I'd leave them out if I try this again, and maybe use about half the size of crab.
I see that Heston Blumenthal has a crab ice cream recipe in which he uses skimmed milk powder instead of cream (and about a dozen egg yolks). Maybe that would help?
The passion fruit goes pretty nicely though, and I thought the parmesan crisps were a nice touch.
Pak Choy with Soy Sauce
side veg vegan
Pak Choy fried with soy sauce and garlic
This is quite a good simple way of serving pak choy.
You need about 1 bulb of pak choy, 1 garlic clove and 1 tablespoon of soy sauce per person. Ish. 3 bulbs seemed enough for 4 people really. Make sure to keep the leaves reasonably small or they won't wilt.
The original idea is from Gordon Ramsay, which was to fry the pak choy tossed in soy sauce and garlic from the start. I didn't find that worked very well - the soy sauce burned before the pak choy was cooked.
My method is better.
Serves 4
Ingredients
- 3 bulbs pak choy
- 3 cloves garlic
- 3 tablespoons soy sauce
- 2 tablespoons olive oil plus for frying
Grind the garlic cloves with a generous twist of black (or mixed) peppercorns to a paste in a pestle and mortar.
Separate the pak choy leaves and wash them well. Cut the larger ones in half or smaller. Which means most of them. Stir-fry the pak choy in a little olive oil in a frying pan or wok until they char a little, and begin to wilt. Add the soy sauce mixture, allow it to reduce and thicken then turn off the heat.
Serve.
If you're in a hurry you can just press the garlic, but a smooth paste is nicer.
Mix with the soy sauce and olive oil.Separate the pak choy leaves and wash them well. Cut the larger ones in half or smaller. Which means most of them. Stir-fry the pak choy in a little olive oil in a frying pan or wok until they char a little, and begin to wilt. Add the soy sauce mixture, allow it to reduce and thicken then turn off the heat.
Serve.
Rather nice.
Lime Butter Sauce
sauce veg
A good sauce to add to the inventory, but be careful not to over-lime it.
Serves 6
Ingredients
- 1 shallot, chopped
- 100ml white wine
- 250ml double cream
- 50g butter, chilled, cut into cubes
- 40ml lime juice (1½ limes) or 60ml lemon juice to taste
- 1 scant teaspoon cornflour dissolved in a little water
Chop the shallot, and simmer in a small pot with the wine until it has reduce to about one half. Strain.
Feel free to add a little stock or spare bits of scallops to the wine.
Mix with the cream, add a little of the dissolved cornflour to help prevent curdling though it did seem reasonably stable without and bring it to a reasonable thickness (bearing in mind that the lime juice will thin the sauce further).
Whisk in the butter, a small piece at a time.
Remove from the heat and stir in the lime juice.
Season to taste.
A good flavour, but quite tart sauce. Adjust the lime juice as necessary.
You can keep the sauce warm in a bain marie or a thermos for up to an hour before serving.
If the sauce curdles you can try and rescue it by vigorously whisking in a teaspoon or two of water.
You can keep the sauce warm in a bain marie or a thermos for up to an hour before serving.
If the sauce curdles you can try and rescue it by vigorously whisking in a teaspoon or two of water.
Celeriac Purée
side veg
It takes quite a lot of cooking to get celeriac soft enough to mash,
so this is a good approach that avoids leeching all the flavour away in boiling water.
Serves 6
Ingredients
- 1 celeriac, peeled and chopped into 1" pieces
- 3-4 tablespoons butter
- ½ pint or so milk
- sprig rosemary
- salt & pepper
- nutmeg
Cut up the celeriac, and place in a pan with a generous amount of butter and sweat gently for 5 minutes, without colouring.
Add milk almost to cover, the sprig of rosemary and leave to simmer gently for 20-30 minutes until celeriac is soft and the liquid absorbed.
Discard the rosemary, mash or purée the celeriac, season to taste and serve with a grating of nutmeg.
Add milk almost to cover, the sprig of rosemary and leave to simmer gently for 20-30 minutes until celeriac is soft and the liquid absorbed.
Discard the rosemary, mash or purée the celeriac, season to taste and serve with a grating of nutmeg.
Really rather nice.
Goat's Cheese Parcels
starter veg cheese
Goat's cheese with garlic and herbs in filo pastry parcels

Ingredients
- 4 sheets filo pastry
- olive oil
- 1 teaspoon fresh thyme
- 1 teaspoon fresh marjoram
- 1 clove garlic, pressed
- 85g/3 oz firm goat's cheese, cut into 1cm cubes
- jam to serve
Preheat the oven to 200°C/400°F/Gas 6.
Press the garlic clove, and mix with the cheese, herbs and a little oil in a bowl.
Lay the filo sheets on a damp surface to prevent them drying out and cut into 4 squares.
Put a little mixture into the middle of each rectangle and fold up into wonton-shaped parcels, twisting the top to seal them up.
Brush with oil and bake for 4 minutes until the pastry crisps up.
Serve warm with a little dollop of jam.
They're pretty nice - it's best if the insides are still hot and slightly melty.
You could use more than one layer of filo to wrap them if you like, but a singleton works best. Make sure the oven is hot enough or the parcels will go soggy before the pastry crisps. And be sure to cube the cheese, not mash it or they'll go soggy then too. Won't they Mum?
You could use more than one layer of filo to wrap them if you like, but a singleton works best. Make sure the oven is hot enough or the parcels will go soggy before the pastry crisps. And be sure to cube the cheese, not mash it or they'll go soggy then too. Won't they Mum?
Gourmet Cooking On Boats
Away again on Erin, we are doing a couple of feeder races to take the boat down to Blyth for
East Coast Sailing Week,
and there's only the four of us this time with a guaranteed overnight stop in the safety and comfort of Eyemouth harbour
so I've carefully planned a gourmet meal within the strict constraints of
Erin's onboard cooking rules.
I was going to include a Lime Thyme Risotto, but decided that was a bit too much trouble and risked violating rule 1, so went with the safer mashed potato option.
In the end no one had room for a baked dessert and only managed to squeeze in tiny petits filous instead.
I shall leave you to guess where I hid the bacon.

menu
Main Course
Duck Breasts in a Cherry Sauce
Buttered Leeks
Lime Thyme Mashed Potato
Side Salad
Dessert
Baked Bananas with Rum and Lime
For a lightweight finish :)
Duck Breasts in a Cherry Sauce
Buttered Leeks
Lime Thyme Mashed Potato
Side Salad
A rocket salad dressed with a balsamic vinaigrette
Dessert
Baked Bananas with Rum and Lime
For a lightweight finish :)
Duck Breasts in Cherry Sauce
main fowl nautical
Pan-fried duck breasts in a cherry and port sauce

It seems that every chef has a different preferred way of cooking duck breasts,
from roasting them skin-side down all the way in the oven,
through frying them skin-side down only and finishing them off in the oven,
to flipping them frantically from skin to flesh side à la Heston Blumenthal.
Some slap into a hot pan, some cook slowly from cold. Some don't seem to think a bout in the oven is necessary at all.
I guess you pays your money, you takes your choice.
Personally I find it hard to get duck breasts' done-ness just right.
They usually seem to be too thick to cook through properly in the frying pan without drying them out too much, so finishing off will probably be required.
You can either do this in the oven as I do, or you can simmer the breasts in the sauce you are about to make.
The best bet for getting your ducks perfectly cooked for all concerned is to use a meat thermometer. For wild breasts (not those intensive salmonella-farmed ducks) and bearing in mind that the temperature will carry on rising a little after you remove the meat from the heat:
Whichever method you choose, be sure to leave the breasts for a few minutes rest and relaxation between cooking and serving.
Some slap into a hot pan, some cook slowly from cold. Some don't seem to think a bout in the oven is necessary at all.
I guess you pays your money, you takes your choice.
Personally I find it hard to get duck breasts' done-ness just right.
They usually seem to be too thick to cook through properly in the frying pan without drying them out too much, so finishing off will probably be required.
You can either do this in the oven as I do, or you can simmer the breasts in the sauce you are about to make.
The best bet for getting your ducks perfectly cooked for all concerned is to use a meat thermometer. For wild breasts (not those intensive salmonella-farmed ducks) and bearing in mind that the temperature will carry on rising a little after you remove the meat from the heat:
- 120-130°F/49-54°C for rare
- remove at 122°F/50°C for Karl, letting the final internal temperature rise to 125°F/52°C
- 135-145°F/57-63°C for medium
- more than 155°F/68°C for well done
Whichever method you choose, be sure to leave the breasts for a few minutes rest and relaxation between cooking and serving.
Serves 4
Ingredients
- 4 duck breasts
- 200g cherries, stoned, halved or 50g dried cherries
- 400ml chicken stock
- 1 cup/300ml port
- 1 glass berry-flavoured Genever
- pinch thyme
- 20g cold butter, cut into cubes
- minced onion/shallot/garlic optional
Preheat the oven to 200°C/400°F/Gas 6.
Cut the cherries in half, discarding their stones or put your dried cherries to soak in port or red wine if you fancy that.
Put the chicken stock in a small saucepan and reduce it to about a third so that it starts to thicken up slightly.
Throw in a few strands of stripped thyme leaves, and the cherry halves and set to one side.
Score diamond-pattern slashes into the skin of the duck breasts with a sharp knife, without cutting down to the flesh.
Rub the breasts all over with salt and pepper.
Place the breasts skin-side down in a cold heavy frying pan or skillet over a medium heat.
Drain off some of the oil and save for roasting potatoes, then turn the breasts and cook for a further 4-5 minutes until lightly browned and the flesh feels springy.
Meanwhile finish the sauce -
Lightly fry the shallots if you are using them in the duck pan until colouring, then deglaze the pan with the Genever and the port, simmer 5 minutes until the alcohol is reduced and beginning to thicken, then add the stock and cherries and simmer for another 5 minutes until nicely thickened. Add back any juices that have drained out of the duck while it was roasting and resting. Whisk in a few lumps of cold butter to make the sauce glossy.
Slice the duck diagonally (if you can be bothered) and serve over a drool of the sauce.
Cut the cherries in half, discarding their stones or put your dried cherries to soak in port or red wine if you fancy that.
Put the chicken stock in a small saucepan and reduce it to about a third so that it starts to thicken up slightly.
Throw in a few strands of stripped thyme leaves, and the cherry halves and set to one side.
Score diamond-pattern slashes into the skin of the duck breasts with a sharp knife, without cutting down to the flesh.
Rub the breasts all over with salt and pepper.
Place the breasts skin-side down in a cold heavy frying pan or skillet over a medium heat.
Starting the (room-temperature) breasts in a cold pan is a chef's tip for rendering out more fat from the skin.
I've also seen it suggested that you do this on a very low heat for 20-30 minutes, occasionally draining off excess fat, before turning the heat up high to crisp the skin, then flipping the breasts to cook the other side.
It's possible this method will cook the breasts well enough all the way through that they won't need more cooking in the oven before resting and serving.
But you'd have to check.
Allow the breasts to fry in the pan for 10 minutes or until most of the fat has rendered out and the skin has crisped and turned golden-brown.I've also seen it suggested that you do this on a very low heat for 20-30 minutes, occasionally draining off excess fat, before turning the heat up high to crisp the skin, then flipping the breasts to cook the other side.
It's possible this method will cook the breasts well enough all the way through that they won't need more cooking in the oven before resting and serving.
But you'd have to check.
Drain off some of the oil and save for roasting potatoes, then turn the breasts and cook for a further 4-5 minutes until lightly browned and the flesh feels springy.
At this point the duck is probably still rather too rare for most tastes, (especially the skipper's if you're cooking this on a boat).
So you will have to continue cooking until all signs of pinkness have gone sigh.
Put the breasts skin-side up uncovered in the oven for 5-8 minutes or until they are cooked to your satisfaction,
then set aside covered in foil to rest for 2-4 minutes before serving them.Meanwhile finish the sauce -
Lightly fry the shallots if you are using them in the duck pan until colouring, then deglaze the pan with the Genever and the port, simmer 5 minutes until the alcohol is reduced and beginning to thicken, then add the stock and cherries and simmer for another 5 minutes until nicely thickened. Add back any juices that have drained out of the duck while it was roasting and resting. Whisk in a few lumps of cold butter to make the sauce glossy.
Slice the duck diagonally (if you can be bothered) and serve over a drool of the sauce.
This was absolutely delicious, though my sauce was slightly too thin
(it didn't seem to want to go any thicker - possibly because I was using ready-made stock),
and the duck was overcooked for my taste (though probably not the skippers!).
I think you might consider adding a little cherry jam or conserve to get the sauce that bit thicker, or try reducing the stock harder before adding the cherries (you don't want the cherries actually disintegrating).
I think you might consider adding a little cherry jam or conserve to get the sauce that bit thicker, or try reducing the stock harder before adding the cherries (you don't want the cherries actually disintegrating).
Buttered Leeks
side veg nautical
Simple but delicious leeks.

A simple, traditional, and delightful way to cook leeks. You could also use it for cabbage with a little extra stock.
Serves 4
Ingredients
- 2 leeks
- a 30g/1oz wedge of butter
- thyme optional
- salt and white pepper
- cream optional
Cut away the root, dried-up outer leaves and anything too green from the leeks.
Slice into fat rounds about 1" or so wide.
Wash the leeks thoroughly, drain, and put in a pan with a healthy knob of butter, a generous sprinkling of thyme leaves and season enthusiastically with salt and white pepper.
Stir the butter through and cook, covered, over a low heat for 10-15 minutes until meltingly soft.
You can cook them uncovered towards the end if they're looking a bit soggy, and you can stir through a little cream before serving for an extra rich version.
So easy. So tasty!
Baked Bananas with Rum and Lime
dessert veg nautical
Bananas baked with sugar, rum and lime.

Ingredients
- 6 firm bananas
- zest of 1 lime
- juice of 2 limes
- 3 tablespoons dark-brown muscovado sugar
- 50ml/2 fl oz rum
To Serve:- juice of ½ lime
- 2 tablespoons rum
- ice cream or whipped cream
Peel the bananas and halve lengthways.
Sprinkle the lime zest, half the juice and half the sugar into a shallow baking-dish.
Lay the bananas on top in a single layer.
Pour on the rest of the lime juice and all of the rum, and add the remaining sugar.
Put in an oven preheated to 220°C/425°F/gas mark 7 and bake for 15 to 20 minutes or until the bananas are soft.
Stick the dish under a hot grill until bubbling — about three minutes.
Drizzle on more lime juice and rum and serve immediately with ice cream or whipped cream.
I didn't actually try this, since everyone was too stuffed with duck breasts and cherry sauce,
but it looks like a convenient alternative to Erin's more usual
Flaming Rum Bananas.
Emptying The Freezer
Slowly but surely my, or rather my cute landlady Aline's, fridge-freezer is dying.
It started with one of the shelves cracking and breaking, scattering broken glass and jam all over the floor, then I noticed that my gin is no longer coming out of the freezer compartment as syrupy as I like it, and that my beers aren't cooling quickly enough while I wait for my baths to run. Then the freezer failed to make sorbets for the Hobbes' crew's Mexican Meal, and now it's all dark in there.
It might be the lightbulb, or it might be the little button which is supposed to pop out to turn the light on when you open the door, but is all cracked and broken on my fridge, and sometimes pops out, and sometimes just gives you an electric shock when you accidentally touch the exposed metal terminals inside.
Well, at least it still has power!
So I'm in the process of inventing ways of using up all my frozen food before the fridge turns itself off or explodes.
Broad Bean Couscous
main veg
A hot broad bean salad with cucumber, peas and mint

Since I'm clearing out my freezer I happened to have whipped up some yoghurt sauce earlier to eat with one of my fabulous frozen
Spicey Cottage curries.
I added a dozen sliced finger chillies (rolling out their seeds first) to the curry before microwaving it
so I really needed the yoghurt sauce.
I basically whizzed up
I know it sounds like I added a lot of chilli to what ought to be a cooling sauce, but I just kept throwing stuff in until I liked the taste. So I like it hot. So sue me!
But now I have a tasty yoghurt sauce that I thought might go well with couscous, and some broad beans...
I basically whizzed up
- juice of half a lemon
- half a red onion, roughly chopped
- 2 cloves garlic, chopped
- teaspoon or two of tamarind concentrate
- teaspoon mint sauce
- teaspoon amchoor (mango powder)
- teaspoon or two garam masala
- half teaspoon ground cumin
- half dozen green chillies, seeds removed
- half teaspoon chilli powder
- large bunch coriander, stalks removed, leaves washed
- salt and ground mixed peppercorns
I know it sounds like I added a lot of chilli to what ought to be a cooling sauce, but I just kept throwing stuff in until I liked the taste. So I like it hot. So sue me!
But now I have a tasty yoghurt sauce that I thought might go well with couscous, and some broad beans...
Serves 1 greedy bastard
Ingredients
- 1 onion, roughly chopped
- couple bay leaves
- 2 cloves garlic, crushed and chopped
- couple handfuls frozen broad beans
- couple handfuls frozen peas
- bunch mint, chopped
- 1 cucumber
- couscous to taste
- yoghurt sauce that you happen to have lying around!
Roughly chop the white onion
though I'm sure spring onion would do, but you probably wouldn't want to boil those so much
and set it to simmer with the bay leaves in a little water.
Peel, crush then chop up the garlic.
Add the garlic to the pot, followed by the broad beans, followed by the peas.
Peel, deseed and chop a cucumber and add it to the pot.
Cook everything together briefly until the cucumber starts to soften and the beans are tender.
Add the chopped mint, season and stir the mixture into your couscous.
Add enough boiling water to just cover the couscous and leave to stand for 10 minutes until the water is absorbed. to be honest I just chucked mine on top, but I think this would leave less juice behind
Fluff the couscous, season and stir through a little walnut or avocado oil and serve with a yoghurt sauce.
Not too bad.
I decided to try out just boiling the onions, rather than frying them up for a change. The result was slightly anaemic-tasting, but quite delicate and summery.
I think it would work just as well chilled as a salad, though with probably a bit less boiling of the onion, cucumber and mint.
I decided to try out just boiling the onions, rather than frying them up for a change. The result was slightly anaemic-tasting, but quite delicate and summery.
I think it would work just as well chilled as a salad, though with probably a bit less boiling of the onion, cucumber and mint.
Beef Tagine
main meat
A quick and dirty stewing steak tagine
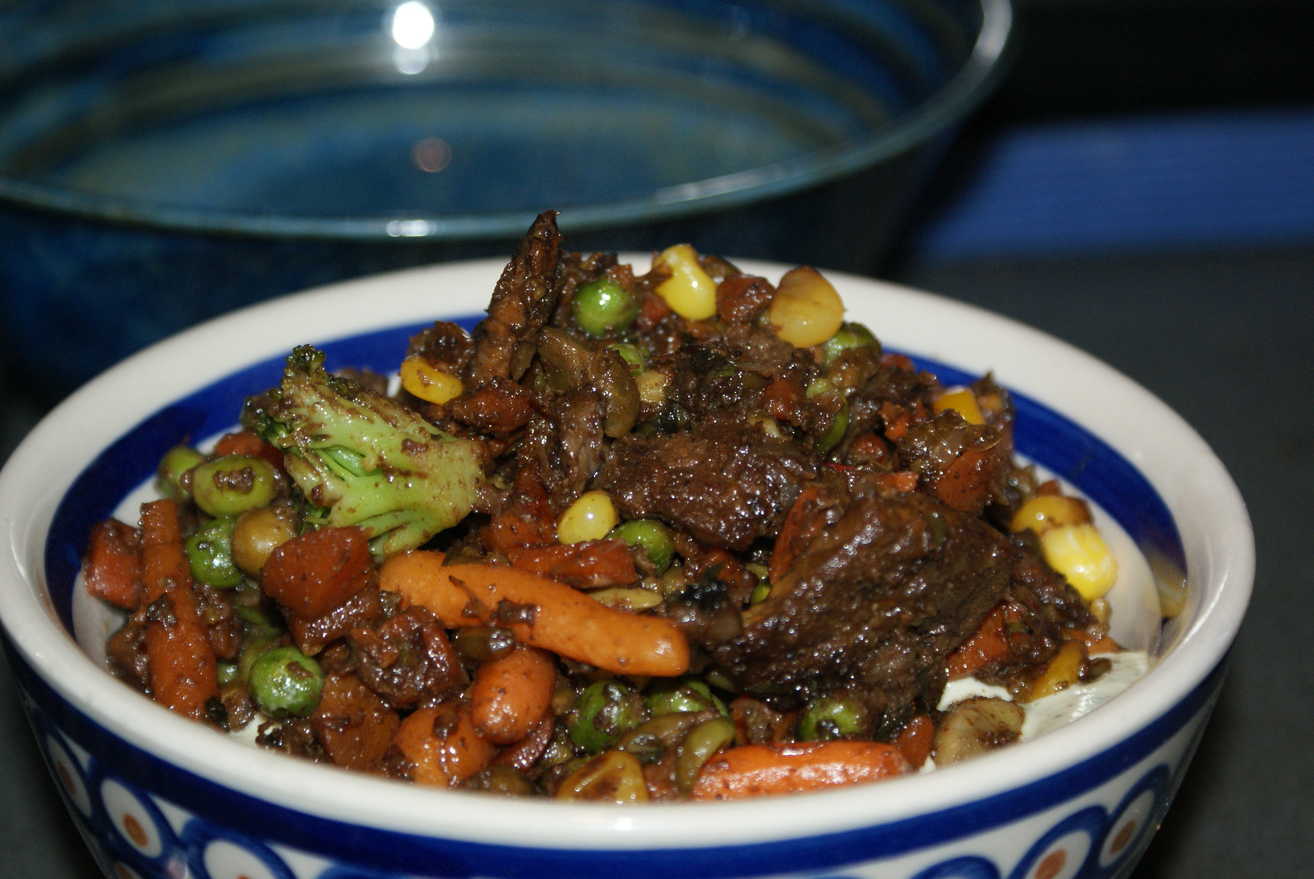
Since I am emptying the freezer, the meat and the mixed veg came right out of frozen packages.
Otherwise I might have been inclined to add chickpeas, flaked almonds, squash, maybe prunes.
I was deliberately trying to stay away from tomatoes though.
You'll need couscous (feel free to throw some onions and herbs into it) and a yoghurt sauce with this too.
Here's another perfectly tasty yoghurt sauce I made earlier (though really, it's hard to go wrong!):
I was deliberately trying to stay away from tomatoes though.
You'll need couscous (feel free to throw some onions and herbs into it) and a yoghurt sauce with this too.
Here's another perfectly tasty yoghurt sauce I made earlier (though really, it's hard to go wrong!):
- 1 clove garlic
- juice of 1 lime
- 2 green chillies, deseeded
- 1 teaspoon mint jelly
- 1 scant teaspoon dried mango powder (amchoor)
- 1 teaspoon garam masala
- generous handful coriander leaves and some stalks
- yoghurt
- salt
Serves 4
Ingredients
- half head garlic
- 1lb stewing steak, cut into 2" pieces
- juice of a lemon
- 1 teaspoon concentrated tamarind
- mixed vegetables
- thin slices preserved lemons
- 2-3 kaffir lime leaves that you found in the bottom of the freezer
- coriander/mint leaves
Rubbing Spices:- 1 teaspoon garam masala
- ½ teaspoon salt
- 1 teaspoon ginger powder
- 1 teaspoon cumin powder
- pinch chilli powder
- ½ teaspoon paprika
- a generous grind mixed peppercorns
Rub the steak all over with the spices and leave to marinate in the fridge overnight or longer.
Towards the end, add some chopped herbs and thin slices of preserved lemons.
Serve with couscous.
Since my cheap frozen stewing steak was already in thin slices, I didn't bother cutting it up before seasoning,
but you might want to.
Heat some oil in a large pan, fry the meat until it is browned, add garlic fry briefly,
add lemon juice and tamarind, add the mixed vegetables and lime leaves. Cover tightly and cook on low for a couple of hours until tender.Towards the end, add some chopped herbs and thin slices of preserved lemons.
Serve with couscous.
Meh.
It was all a bit too tamarindy for my taste (I used 2 or 3 teaspoons of tamarind concentrate), but it was easy enough, and I think I could make something nicer out of it.
It was all a bit too tamarindy for my taste (I used 2 or 3 teaspoons of tamarind concentrate), but it was easy enough, and I think I could make something nicer out of it.
Actually, on a second try with a batch I had frozen, and with the addition of some more frozen mixed veg,
I've decided it is really rather nice!
Cooking On Boats
I'm just back from a loooooong 10 days voyage onboard Erin.
We started out with the race to Orkney,
which we abandoned in favour of getting on with our holiday due to boredom and a general lack of wind,
putting in to Wick harbour for a night of rest, relaxation and scallops. Or rest and relaxation anyway.
Aidan scored two dozen great big fresh scallops straight off an unloading fishing boat for a tenner,
and I learnt how to open them by holding them with the flat shell uppermost, getting your sturdy sharp knife into a handy gap
and cutting the flesh away from the top shell, slicing from the scalloped edge inwards,
until the shell opens at the hinge (unlike opening an oyster where you crack open the hinge first).
Then you can use your thumbs to pop away the skirt with any grit and black organs to leave the meaty white muscle and the orange/grey coral,
which you can cut free and quickly rinse.
 Unfortunately I also learnt that you should never attempt a barbecue without using just as much charcoal as it will physically hold.
So we will speak of half-barbecued, leathery scallops no more.
Next stop Stornoway where we picked up our holiday supply of Charles McLeod's most succulent and delicious black pudding. We were a bit worried after a previous disappointing experience with a Stromness butcher's dry and tasteless Orkney black pudding but we needn't have worried. The black pudding of Lewis fully earned its reputation.
I had been charged with the task of developing Erin's signature West Coast dish, and rather fancied attempting a stack of
In any case, wouldn't Erin's true signature dish be rather more Dolmio oriented?

And so we munched our way around the Outer Hebrides:
- Lunching on Stornoway hot-smoked salmon whilst anchored off the Shiant Islands where we watched Guillemots harrass Golden Eagles attempting to feast on their children.
- Visiting Tobermory and enjoying both the deep-fried scallops from the (quite rightly) Les Routiers award-winning Fish and Chip Van on Fisherman's Pier and the night life at the Mishnish (Hi Alyson Filth! If that's your real name. That's the name I have in my phone anyhow.)
- Stopping off in Lismore to visit Luke's Grandparents and have an idyllic barbecue (using enough coals this time), giving me the chance to snag a bunch of Grandad's herbs and (thanks Luke!) Grandma's fennel kedgeree recipe, and giving Judith a chance to completely block their toilet with an enormous poo.
- Finishing up in Oban, on the sunniest day I've ever seen there, we lunched at EE-USK whose shellfish is just fabulous (More Scallops!), accosted a nice girl heading off to Belfast on the Jubilee Trust's Lord Nelson rust bucket, er, schooner (Hello Emma! If that's your real name).
We finally got the hell out of Dodge in Gus's (if that's his real name) shiny new BMW, sadly constrained by the number and speed of trucks, lorries and FUCKING CARAVANS.
I naturally did my fair share of cooking onboard, getting quite inventive with lime (there are always limes aboard - for the GinAndTonics don't you know) and bovril, foolishly attempting a roast dinner and finally making a nice beef stew on time, so I can now pass on Erin's simple shipboard cooking rules:
Despite these explicit restrictions, it is sometimes nice to break out of the Dolmio straitjacket, smuggle some garlic, balsamic vinegar, flour or (shudder) spices on board and just go wild. So for those moments of madness I give you my recommendations for an easy life Cooking On Boats:

So we will speak of half-barbecued, leathery scallops no more.
Next stop Stornoway where we picked up our holiday supply of Charles McLeod's most succulent and delicious black pudding. We were a bit worried after a previous disappointing experience with a Stromness butcher's dry and tasteless Orkney black pudding but we needn't have worried. The black pudding of Lewis fully earned its reputation.
I had been charged with the task of developing Erin's signature West Coast dish, and rather fancied attempting a stack of
- black pudding,
- caramelized apple rounds, or possibly baked parmesan disks
- pancetta (BACON!),
- scallops
- lime-butter or Mornay sauce
In any case, wouldn't Erin's true signature dish be rather more Dolmio oriented?

And so we munched our way around the Outer Hebrides:
- Lunching on Stornoway hot-smoked salmon whilst anchored off the Shiant Islands where we watched Guillemots harrass Golden Eagles attempting to feast on their children.
- Visiting Tobermory and enjoying both the deep-fried scallops from the (quite rightly) Les Routiers award-winning Fish and Chip Van on Fisherman's Pier and the night life at the Mishnish (Hi Alyson Filth! If that's your real name. That's the name I have in my phone anyhow.)
- Stopping off in Lismore to visit Luke's Grandparents and have an idyllic barbecue (using enough coals this time), giving me the chance to snag a bunch of Grandad's herbs and (thanks Luke!) Grandma's fennel kedgeree recipe, and giving Judith a chance to completely block their toilet with an enormous poo.
- Finishing up in Oban, on the sunniest day I've ever seen there, we lunched at EE-USK whose shellfish is just fabulous (More Scallops!), accosted a nice girl heading off to Belfast on the Jubilee Trust's Lord Nelson rust bucket, er, schooner (Hello Emma! If that's your real name).
We finally got the hell out of Dodge in Gus's (if that's his real name) shiny new BMW, sadly constrained by the number and speed of trucks, lorries and FUCKING CARAVANS.
I naturally did my fair share of cooking onboard, getting quite inventive with lime (there are always limes aboard - for the GinAndTonics don't you know) and bovril, foolishly attempting a roast dinner and finally making a nice beef stew on time, so I can now pass on Erin's simple shipboard cooking rules:
- All food must be ready to eat the instant the crew is hungry.
- There shall be no food ingredients used onboard unknown to Dolmio. A small jar of mixed herbs provides all the adventure cuisine requires.
- Corollary: Dishes too Eastern, too Southern, too vegetarian or just too bloody foreign are not to be trusted.
Irish stews, stroganoffs, goulashes and (certain) pasta dishes are acceptable, curries, tagines, and kebabs are not.
Beans (unless of the baked variety when they are compulsory) and, bizarrely, flour are largely frowned upon.
Spice is a terrifying prospect to be treated with extreme caution.
- Corollary: Dishes too Eastern, too Southern, too vegetarian or just too bloody foreign are not to be trusted.
Irish stews, stroganoffs, goulashes and (certain) pasta dishes are acceptable, curries, tagines, and kebabs are not.
- Each meal is required to include a goodly portion of meat.
Meat consists of beef, chicken, pork or sausages.
Lamb, duck or venison are dubious alternatives.
Mutton, veal, horse, whale, emu or any kind of offal are not meat and are prohibited.- Corollary: Vegetarians must bring their own food.
- Corollary: Seafood is prohibited aboard the boat. (I know, boats float above a convenient and endless supply of fish, lobsters and scallops. Go figure.)
- There is no possible higher culinary achievement onboard than chicken with peppers and onions in a jar of Dolmio sauce. This may be served over rice or pasta.
- Crunchy, firm, Al Dente, tangy, zesty and tart are all terms synonymous with undercooked.
- All dishes must contain bacon.
Despite these explicit restrictions, it is sometimes nice to break out of the Dolmio straitjacket, smuggle some garlic, balsamic vinegar, flour or (shudder) spices on board and just go wild. So for those moments of madness I give you my recommendations for an easy life Cooking On Boats:
- The pressure cooker is your friend
You can reduce the cooking times for stews or root vegetables by a factor of three or four. It isn't enough to simply have dinner ready for a planned time; once the skipper notices that you have started cooking he will expect dinner in the time it would take to warm Dolmio sauce. Therefore either start cooking while everyone's busy so they don't see what you're up to (and prepare to field questions such as What's that awful smell?) or COOK FAST. -
Keep It Simple Stupid.
The Dolmio principle - one big pot of protein and another of starch is the place to start; stew and boiled potatoes, sauce and pasta, goulash and rice kind of thing. Make sure that what you're making can be abandoned at any stage, to put up a spinnaker for example, or will happily wait for the crew to come to table if they are delayed by circumstances well within the skipper's control. Over-boiled potatoes make perfectly acceptable mash by the way, if mixed with enough butter.
Once you're feeling adventurous, go for an extra side pot of green vegetables. But make sure you boil the fuck out of them. Crunchy vegetables are not to be trusted. -
Treat It Tidily Stupid
Organise your dishes so that everything cooks sequentially going into pots, pans or the oven as you prepare the ingredients - so choose recipes wisely. This avoids the disaster of an unexpected tack (unexpected to the cook, obviously everyone on deck knows perfectly well what is going on, but to them you slave in an invisible magic kitchen) dumping all your bowls of lovingly prepared components into the bilges.
The best way to arrange this is to have one large pot for browning/crisping/frying and a large warming dish securely lodged in the sink. Cook each batch of ingredients as soon as they are prepared in this pot, then decant to the warming dish when done, freeing the pot for the next batch. Return everything from the warming dish to the pot at the end for their final simmering/stewing/burning. -
Too much visible effort is not to be trusted
Cook food you can prepare, set cooking then leave alone while you clean up, do the washing and set the table for an unhurried and effortless final delivery. -
The oven is not to be trusted
It is useful for keeping things warm, baking sausage rolls or pastries or even cooking things securely wrapped in tin foil but don't even think about using it to roast a dinner.
Something I learnt on this last trip - if the skipper randomly brings aboard a bunch of parsnips, telling you he enjoys them roasted and is a particular connoisseur of their quality, lose them overboard at the first opportunity.
It takes an hour to successfully roast par-boiled vegetables even in a reliable oven, and your ship's oven will randomly half-burn both you and the vegetables and cover the galley in a thin film of grease.
The skipper will certainly notice both the grease, and the fact that his dinner was not ready two hours ago, but will completely fail to notice the quality of your parsnips. -
The sea is not to be trusted
On days which show any sign of getting rough, cook a big pot of stuff early and set it to one side so you can quickly reheat and serve it in less time than it takes to become ill. -
Be inventive
The ingredients (officially) on board to cook with are very limited, so be adventurous with what you have. Fruit will enhance most dishes and is surprisingly undetectable, and those bottles of port and blackberry Genever that've been hanging around since the last New Year jolly can be smuggled into sauces quite easily. But be warned, flambéing is STRICTLY PROHIBITED. If seen. -
Salt is your friend
This one's for Aidan (that IS his real name). Who hates and fears salt.
I'm hoping there will be photos to follow - as usual I failed to bring a camera of my own.
C'mon crewmates - send me your piccies!
C'mon crewmates - send me your piccies!
Roast Pork Chops Dinner
main side meat nautical
A roast dinner for unreliable ovens on boats.
This dinner will take at least 1½ hours to prepare, more like 2½ hours if you have to hoist spinnakers half way through
boiling your veg. On the plus side, once everything is roasting in the oven there isn't a lot to do.
Serves everyone. Eventually.
Ingredients
- 1 pork chop per person
- apple sauce
- garlic
- mustard
- olive oil, lots of olive oil
- carrots
- potatoes
- parsnips
Heat the oven to whatever approximates Gas 6, put in a roasting tray with a generous amount of olive oil and a couple of slices of bacon
see rule 6 above.
Peel your vegetables and par-boil them. Drain. Cut into roasting-sized pieces. Add them to the roasting tray.
During this process you will burn yourself, burn some of your veg,
and if you are really lucky slip and spill boiling oil all over the floor.
Leave them to roast for an hour, basting regularly, or until the proportion of burnt vegetables exceeds the proportion of undercooked vegetables.
Meanwhile get on with the pork:
Line an oven tray with tin foil, fry the pork chops in batches in a little olive oil over a high heat just to give them a little colour. You can skip this step if you don't care that your pork looks slightly anæmic or your crew are vampires.
Add each fried batch to the oven tray.
Peel and finely slice some garlic cloves.
Season the pork chops, smear with mustard and scatter over the garlic.
Tightly cover with tin foil and put into the oven.
Make your apple sauce, which will keep for as long as required.
Serve when the veg is ready.
Don't try this at sea folks.
Savoury Apple Sauce
sauce veg nautical
A nice apple sauce for cooking on boats. That have limes for GinAndTonics.
The onion is an unusual addition, but seemed to work nicely for a slightly savoury sauce to go with pork chops.
Serves 6 on the side.
Ingredients
- 1 smallish onion, grated
- 2 apples, peeled, chopped
- juice of 1 lime
- sugar
- butter
- salt
Peel and finely grate the onion into a small pot and set to simmer gently with a generous knob of butter.
Meanwhile, peel and core the apples and cut into pieces. Add these to the pot.
Add the juice of a lime (or to taste).
Season the sauce, add sugar as desired - maybe a tablespoon - demerara if you have it, and leave to simmer until the apple breaks down and the sauce thickens.
Meanwhile, peel and core the apples and cut into pieces. Add these to the pot.
Add the juice of a lime (or to taste).
Season the sauce, add sugar as desired - maybe a tablespoon - demerara if you have it, and leave to simmer until the apple breaks down and the sauce thickens.
Anne particularly enjoyed this sauce, she likes it tart though, and I hadn't added any sugar.
This is a good shipboard sauce since once it is cooked you can cover and set it aside for as long as needed.
Gently reheat before serving.
This is a good shipboard sauce since once it is cooked you can cover and set it aside for as long as needed.
Gently reheat before serving.
Lime and Caper Chicken
main fowl nautical
A one-pot tangy chicken cacciatore for cooking on boats.
You must have limes aboard - otherwise how can you drink your GinAndTonics?
Serves a crew of 6
Ingredients
- 6 pieces of chicken, preferably with skin on
- peel and juice from 2 limes
- juice of 1 orange
- 2-3 teaspoons capers, crushed
- salt and pepper
- ½ teaspoon mixed herbs
- 4 cloves garlic
- 2-3 slices smoked bacon
- olive oil
- 2 onions
- 2 bell peppers
- starch to serve
Cut deep gashes into your chicken pieces, skin on would be best.
Grate the peel and squeeze the juice from 2 limes, Roughly crush a couple of teaspoons of capers. Mix everything together, add half a teaspoon of mixed herbs and season with salt and pepper.
Set aside to marinate for half an hour or so.
Fry a few chopped up slices of smoked bacon in a little olive oil to extract the fat, and when the meat is shrivelled and hard scoop it out and discard.
Shake the chicken pieces free of marinade and fry in the bacon fat until nicely browned.
While the chicken is frying, roughly chop the onions. Then set the fried chicken aside in the warming dish, reheat the pot adding more oil if required and fry the onions until lightly browned.
While the onions are frying, de-seed and roughly chop a couple of bell peppers, add the cooked onion to the serving dish, reheat the pot, add more oil if required and fry the peppers gently until they soften.
While the peppers are frying, peel and slice a few cloves of garlic and throw them in to the pot too.
When the peppers are ready, add everything from the warming dish back to the pot, add any leftover marinade, add the juice of an orange, and simmer for 20 minutes or until the chicken is cooked through and the sauce has evaporated and sufficiently thickened.
Serve with rice, or potatoes, or mash or pasta or even couscous. I suppose.
A bit tangy for some tastes, perhaps, but a nice change from Dolmio!
Bovril Broccoli
side nautical
Broccoli. Now with added Bovril. Perfect for cooking on boats.
Got a spare Bovril (or Oxo) cube on board?
Don't waste it - add it to your broccoli!
Serves a crew
Ingredients
- 1 Bovril (or Oxo) cube
- juice of 1 orange
- 1 large head broccoli
- ½ teaspoon ground black pepper
Mix the Bovril cube with just enough boiling water to dissolve it into a thick black sludge.
Separate the broccoli into florets and halve or quarter them as necessary.
Juice the orange.
Put everything in a small pot, add a generous grind of pepper, bring to the boil, cover, simmer until the broccoli is overcooked.
Drain off all evidence of Bovril.
Serve.
Separate the broccoli into florets and halve or quarter them as necessary.
Juice the orange.
Put everything in a small pot, add a generous grind of pepper, bring to the boil, cover, simmer until the broccoli is overcooked.
Drain off all evidence of Bovril.
Serve.
Remember crew - shipboard vegetables must be cooked until limp and disintegrating or they are poison.
By the way, when you are cooking up a pot of mushrooms in butter for breakfast or as a side dish
it's quite nice to just crumble a stock cube over them for extra flavour.
Oxo Mushrooms
side nautical
Mushrooms. Now with added Oxo. Perfect for cooking on boats.
Still not finished up all the Oxo?
Use the rest to give your mushrooms a deliciously deep and rich flavour.
Other stock cube varieties are also available.
Use the rest to give your mushrooms a deliciously deep and rich flavour.
Other stock cube varieties are also available.
Serves a crew
Ingredients
- carton of button mushrooms, wiped
- ½ an Oxo cube
- generous knob of butter
Wipe the mushrooms and cut in half or quarters if they're large.
Pop them in a pan with a generous knob of butter, crumble over an unseemly amount of Oxo cube,
cover tightly and let them simmer up gently until the mushrooms begin to collapse.
Excellent with breakfast.
Beef Bourguignot
main meat nautical stew
Like Beef Bourguignon. But not. A quick beef stew with port for cooking on boats.
Like Beef Bourguignon, but not.
A very straight-forward, but tasty stew,
and a good way to use up some of that left-over port you have washing around on board.
Serves a crew of 6
Ingredients
- 1 large pressure cooker
- olive oil
- ½ kg smoked bacon, sliced into lardons
- 2kg stewing steak, cubed
- 2 onions, roughly chopped
- 2 leeks, quartered, chopped
- 2 apples, peeled, cored, cut into eighths
- 6 garlic cloves, roughly sliced
- 6 button mushrooms, quartered
- 2 carrots, peeled, sliced, or a tin of carrots
- 6 potatoes, peeled, cut in eighths
- 1 cup port
- 1 teaspoon mustard
- salt and pepper
Heat a pressure cooker pot over high heat.
Cut the bacon into lardons and fry with a little olive oil until they release their fat.
Scoop out the cooked (but not shrivelled) bacon, leaving the fat, into a large warming dish and set aside.
While the bacon is frying, cut the stewing steak into reasonable chunks, about 1". Reheat the pot. Brown the steak in batches in the pot reheating and adding more olive oil as required. Set each batch aside into the dish when it is browned or starts leaking water like a steam engine.
While the steak is browning, roughly chop the onions, reheat the pot, add more oil and fry them next.
While the onions are turning glassy and beginning to caramelise, wash and quarter the leeks and chop into rough pieces, add the onions to the dish with the meat and start frying the leeks.
While the leeks are frying, peel the apples, cut them into eighths and remove the section of core. add the leeks to the dish, reheat the pan, add more oil as necessary and caramelise the apples.
While the apples are caramelising, peel and roughly slice the garlic, then add to the pot with the apples until they start to release their aroma.
Deglaze the pan with the port, let it bubble for a while and scrape off any browned bits from the pot then add back the contents of the warming dish.
Whilst the pot is reheating, peel and chop your carrots into chunks (or open the tin) and add to the pot.
Peel the potatoes, cut into eighths and add to the pot.
Wipe the mushrooms, cut into quarters and add to the pot.
Add a teaspoon or two of mustard, season to taste, add a little water if necessary which you can use to rinse the warming dish, I think you could also add a squeezed orange or two and some soy sauce if you have any I wanted an inch or two of liquid in the bottom, but not too much - and certainly not to cover. Put the lid on the pressure cooker, get it up to temperature and leave to cook for 30 minutes.
Give it a good shake every ten minutes to make sure nothing is sticking and burning.
Wash everything up, clean the surfaces, set the table.
Serve the stew. It won't need anything extra (though I did consider couscous - quick and easy) - the potatoes will have started to break down nicely and it should be rich and thick.
There was none of this leftover - which is definitely a good sign.
Moobs
I've been crewing on a terrific little Projection 762 called Hobbes for Kip Regatta and Scottish series,
and for Kip I had to wheedle myself two separate B&B's to stay in since the tiny town fills up apparently considerably earlier than I thought to book accomodation.
Anyhoo, since I have no full-length mirrors in my flat (I hold them in the same regard as TV) I was horrified to discover as I caught sight of my reflection heading for my shower in the Langhoose, that I have mysteriously developed Man Boobs.
Time for a diet methinks.
See that Raw Food Diet? I invented that. They stole it from me.
Waaaay back in the 80s, before everyone and their daughter had jumped on the raw food bandwagon, I invented the raw food diet on the simple principles that:
To be fair though, that may have something to do with the fact that I also allowed myself
So normally, I'd be right back on the salads, but these boobs look like they might actually require exercise to eradicate, so since I'm taking the next two weeks off work to get in all my year's unused holidays before the rollover, I will be adopting a strict regimen of fruit juice, soup, exercise and NO BEER.
Expect bad-tempered posts to follow.
First, though, I need to use up all the goodies in my pantry, suffer one of Erin's incredibly filling barbecues, and finish up all the leftovers.
Anyhoo, since I have no full-length mirrors in my flat (I hold them in the same regard as TV) I was horrified to discover as I caught sight of my reflection heading for my shower in the Langhoose, that I have mysteriously developed Man Boobs.
Time for a diet methinks.
See that Raw Food Diet? I invented that. They stole it from me.
Waaaay back in the 80s, before everyone and their daughter had jumped on the raw food bandwagon, I invented the raw food diet on the simple principles that:
- Cooked or processed food is effectively pre-digested. It must take more energy, and more time to digest raw food. The longer it takes to digest your food, the longer it will take to get fat on it. The more work you have to do to digest it, even raising it to body temperature (don't sneer) the less energy there is to make you fat.
-
All the stuff I like to overindulge requires cooking.
It's just not possible to overfill on potatoes, butter or even cream without the sausages, bread and cake to go with them. Honest. Thus eating only raw food also enforces a balance of diet.
To be fair though, that may have something to do with the fact that I also allowed myself
- pasteurised milk (well, you try finding untreated milk these days - our society is terrified of cows. They're mad you know!)
- cheese (hmm, debatable - cheese could be made without cookery)
- alcohol (yeah, that's just cheating)
- and according to Doctor Jenny, Pringles (c'mon everyone knows they're raw)
So normally, I'd be right back on the salads, but these boobs look like they might actually require exercise to eradicate, so since I'm taking the next two weeks off work to get in all my year's unused holidays before the rollover, I will be adopting a strict regimen of fruit juice, soup, exercise and NO BEER.
Expect bad-tempered posts to follow.
First, though, I need to use up all the goodies in my pantry, suffer one of Erin's incredibly filling barbecues, and finish up all the leftovers.
FYI - the regimen lasted for two weeks, and it was definitely working.
Before I joined Erin's Gin tour of the Outer Hebrides.
Sigh.
Sigh.
Butternut Squash Soup
soup veg
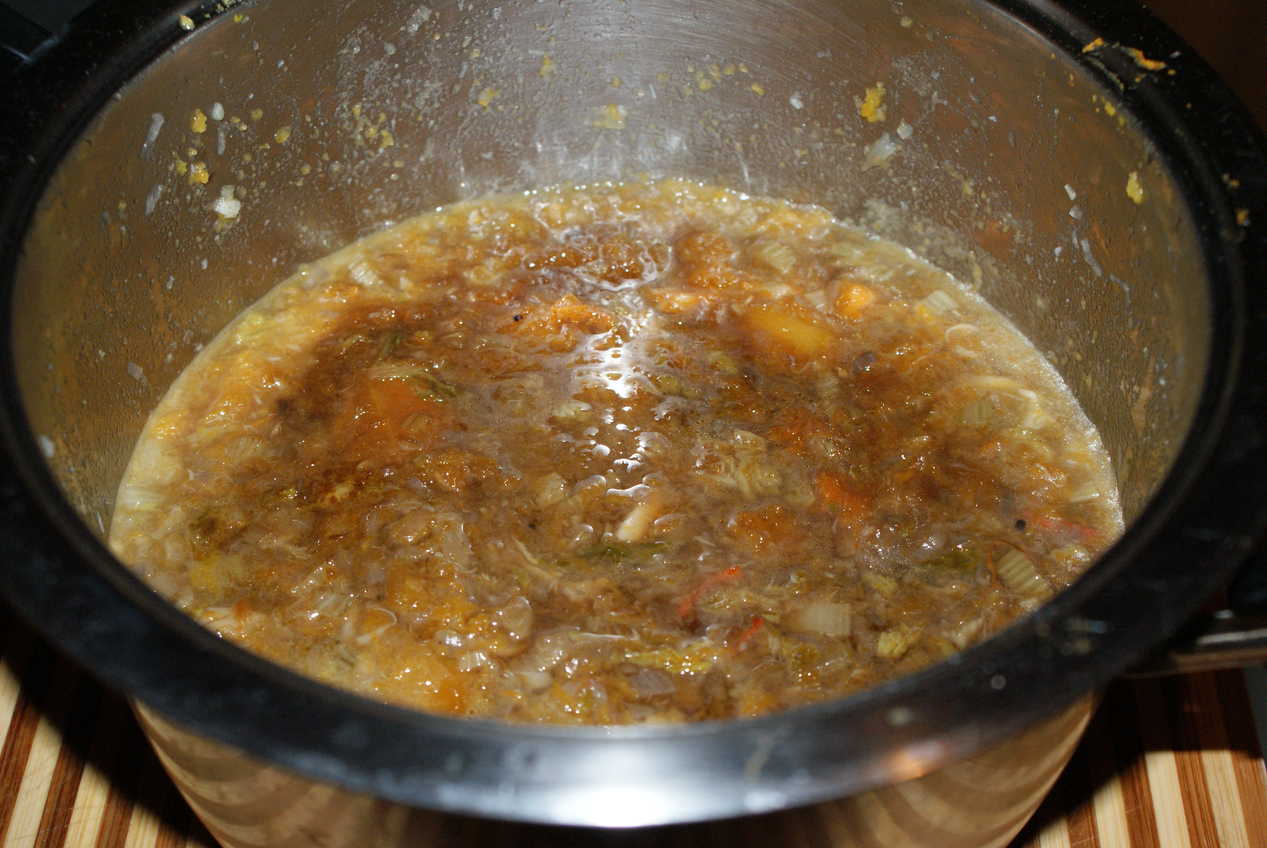
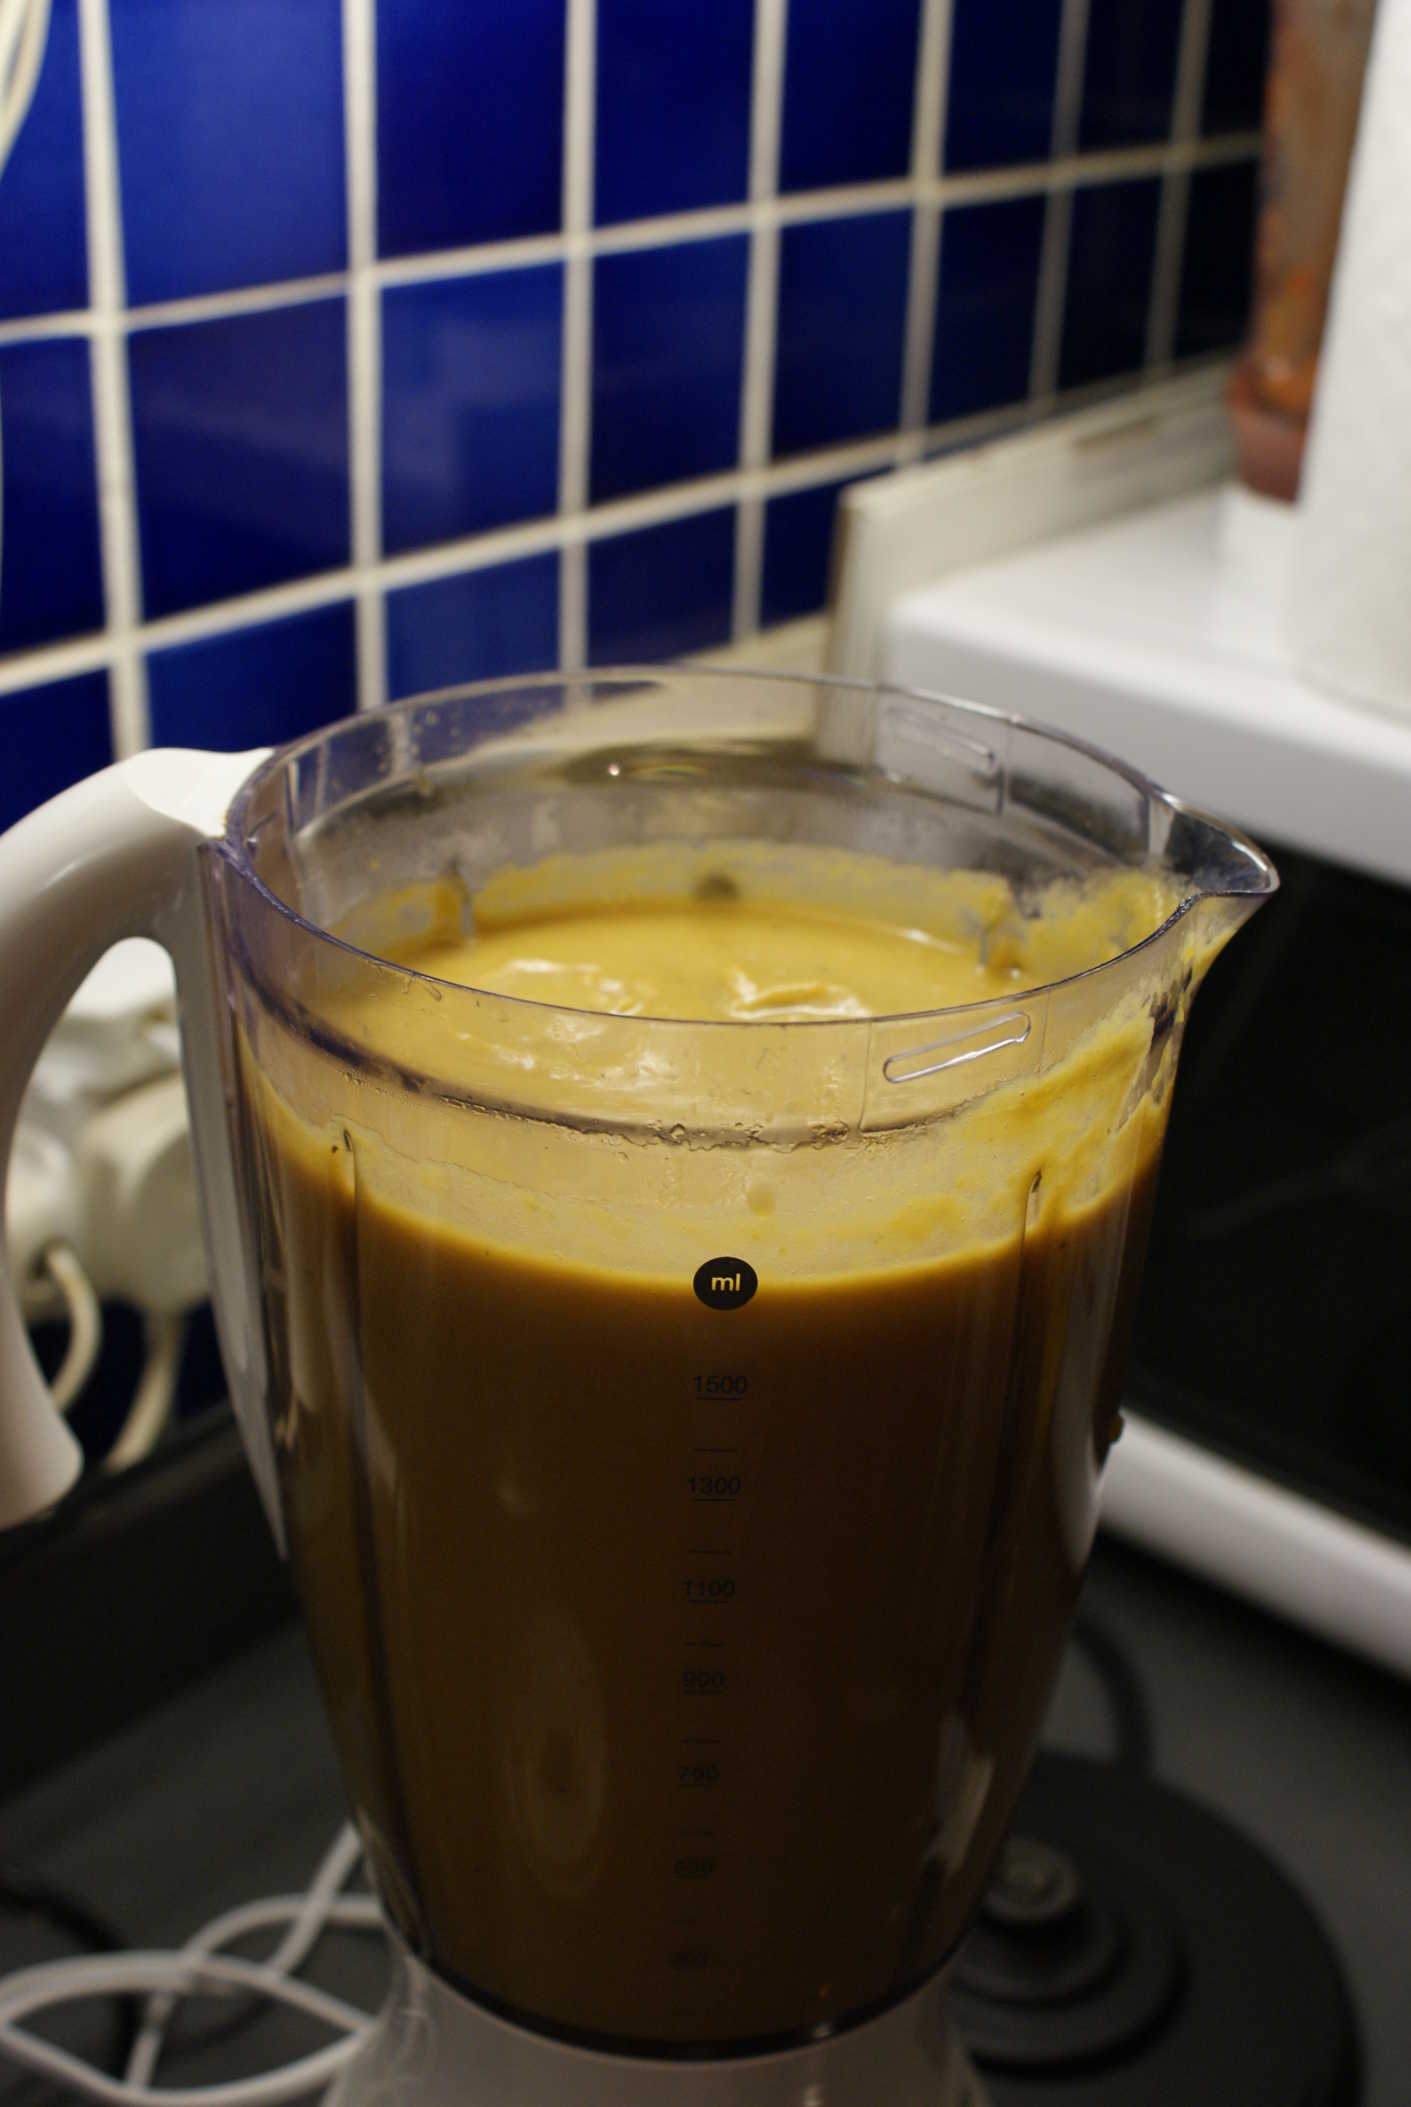
I've given my idealised recipe here.
It's not quite what I actually made but I was just using up a bunch of leftovers, which is why I threw in quite a lot more celery, used red onion rather than white (though it came out fine). I only had beef stock (no chicken), and I had a pot of yoghurt to use up (but I would have gone with sour cream if I'd had any). The soup kept me going for days with a variety of toppings!
I added the lime on day 2.
Serves 6
Ingredients
- 1 butternut squash
- 1 white onion, chopped
- 3 red onions, chopped
- ½ head celery, chopped
- 1 head garlic
- 2 cardamoms
- 1 stick cassia bark
- 1 green chilli, chopped
- chicken or vegetable stock
- juice and grated peel of 1 lime
- yoghurt or sour cream
- topping of your choice


The topping of your choice:- toasted walnuts
- toasted pine nuts
- crispy bacon pieces
- fried sage leaves
- a drizzle of herb oil
- flakes of smoked haddock


Cut the squash in half, scoop out the seeds, drizzle with olive oil and honey and roast at Gas 6 for 1 hour until cooked.
Add the head of garlic for the last 20 minutes until it is soft too.
Heat olive oil in a heavy pan and fry the cardamom and cassia with a grinding of mixed peppercorns until they release their aroma, then add a generous wad of butter and add the onions to soften, then the celery to soften, then the green chilli (if you like).
If you have any wine, add it now and reduce it a little before adding in the stock, the scooped out the flesh from the squash and the squeezed garlic cloves.
Add the juice and grated peel of the lime, some cream if you have it and mix it all together then blend it until smooth.
Reheat gently and serve with a dollop of yoghurt or sour cream and the topping of your choice.
You can whizz up some basil or chervil leaves with olive or nut oil to drizzle over, or grill and flake some smoked haddock - which goes nicely with butternut squash.
I think you could usefully leave out the chilli to be honest,
and it might benefit from reducing a glass of white wine with the onions and some cream.
Also, the flavour of mustard goes nicely.
But it's a tasty enough soup.
But it's a tasty enough soup.
Oriental Chicken Salad
salad fowl
A simple salad with Chinese lettuce and chicken strips marinated in soy sauce and rice vinegar

We had one of yacht Erin's fabulous barbecues over the weekend, and because the high winds had blown away all the other boats who might have joined in,
I ended up with quite a lot of chicken to use up.
So I tried out this salad (apparently one of our Nation's Favourites)
together with an extra couple of chopped tomatoes.
Serves 6
Ingredients
- 4 skinless, boneless chicken breasts
- 4 tbsp clear honey
- 2 tbsp rice vinegar
- 2 tbsp soy sauce
- 1 tbsp sesame oil
- 1 garlic cloves, crushed
- 2.5cm/1in piece fresh ginger, peeled and grated
- 2 tbsp sesame seeds, toasted
- small bunch of fresh coriander, roughly chopped
- 1 large carrot, cut into fine matchsticks
- 1 bunch of spring onions, shredded
- ½ cucumber, peeled, halved, de-seeded and cut into matchsticks
- ½ Chinese lettuce, finely shredded
Cut the chicken into strips and mix with the honey, vinegar and soy sauce.
Leave to marinate in a glass bowl for about 30 minutes.
Toast the sesame seeds for a few minutes in a dry frying pan until they just begin to colour.
Mix the vegetables, herbs, seeds, garlic, ginger in a large bowl.
Drain the chicken pieces from the marinade, heat the sesame oil in a wok or frying pan and fry the chicken over high heat for about 5 minutes
until nicely glazed and cooked through. Keep the chicken moving. Set the chicken aside.
Add the remaining marinade and cook gently but thoroughly then add to the chicken.
Deglaze the pan with more soy sauce, rice vinegar and some chopped tomatoes (if you like),
and add to the chicken.
Toss the warm chicken and remaining sauce with the vegetables and serve. You can also chill the chicken in its sauce to serve cold with the salad the next day.
Quite a tasty salad, surprisingly the raw ginger and garlic are fine in the salad, as long as you don't overdo them.
Banana 99s
dessert sweet veg
Barbecued bananas with a chocolate centre
These went down well on one of yacht Erin's barbecue-based sailing trips.
The Camping Cookbook suggests wrapping them in tin foil, but that didn't seem to be necessary.
Serves 2 per banana
Ingredients
- 1 banana
- 1 Cadbury flake
Throw the (unpeeled) banana on the barbecue, turning occasionally until the skin is charring and the flesh is going soft and squishy.
This works best if the barbecue has died down a bit.
Cut the banana in half at the middle, break the flake in half and shove the flake halves down into the banana flesh.
Put the banana back on the barbecue for a few minutes just to melt the chocolate.
Serve with a teaspoon so the guests can eat them by scooping out the chocolate banana from the (mostly intact) skin.
Serve with a teaspoon so the guests can eat them by scooping out the chocolate banana from the (mostly intact) skin.
Excellent!
Dinner Without Flora
So for her last night on earth, er I mean in my flat, Flora demanded a warming stew for dinner at 9 pm.
Precisely at 9pm. On the table.
So I made a nice beef daube for 9pm. Precisely. Too bad she didn't turn up.
Other plans apparently. Though she did offer me a present. I hope it's not another fucking duck.
Oh, just one thing worth noting -
Despite how marvellous it tastes this casserole gives me the most astonishing squits. Strange really - it was definitely properly cooked and everything, but there seem to be certain combinations of fat which just give me the runs. Probably you'd be fine. Probably Flora would have been fine.
I have the same problem when I make real French Mayonnaise with egg yolks and virgin olive oil. Straight through me!
If I use whole egg, or add in some other oil then everything's fine.
It's probably just me.
Probably.
Beef Daube
main meat
Beef Brisket Daube style stew with star anise, soy sauce and fish sauce


Now this stuff is rich. And I'm talking black treacle, crude oil, and Marmite rich.
So you won't eat much of it and you will need something starchy and absorbent to contain it.
I made up some dumplings with mine, but a good dose of mashed potato really helps.
It's also bloody salty. And I'm talking Tom Kitchin salty. So despite what John Torode says, given the richness of the sauce I really don't think you need to add any more salt. To anything. Though perhaps the fact that I couldn't find a pig's trotter and had to use a smoked hough didn't exactly help.
The brisket is pretty damn gorgeous though.
The whole thing takes about 3 hours to cook, 4 hours to make.
Which is long enough to fiddle around trying out a new Beetroot Rösti version to go with.

Serves 6
Ingredients
- 2kg brisket no, really cut into good 2" cubes
- salt and pepper well, pepper anyway
- 2 carrots, chopped
- 2 onions chopped
- 2 sticks celery chopped
- 6 garlic cloves, crushed
- 2 whole star anise
- 100ml port
- 400ml red wine
- 1 pig's trotter or maybe just a smoked hough
- 300ml beef stock
- 4 tablespoons dark soy sauce
- 1x440ml can Guinness or Murphy's stout!
- 2 tablespoons fish sauce !
- dumplings if you like
Preheat the oven to 190°C (Gas 5).
Trim excess fat from the brisket then cut it into big chunks, at least 2" cubes.
Heat a little olive oil in a frying pan or casserole dish and fry in batches (without filling the pan) until well browned.
Set aside.
Heat some more oil in the casserole. Add the star anise, the onions, then the carrots, then the celery and fry until just soft. Add the crushed garlic, stir through, then add the port and the red wine. Bubble the liquid until it is reduced by half.
Add the brisket and the pig's trotter to the casserole and cover with the stock. Return to the boil, skim if necessary, then add the soy sauce, stout and fish sauce.
Cook covered in the oven for 2 hours, until the meat is very tender.
Take out the casserole now, and strain it. Return the liquid to the casserole together with the trotter, and reduce it until the sauce thickens. Adjust the seasoning.
Lift out the trotter and keep the meat (apparently it goes well on toast). Return the other ingredients to the sauce, add the dumplings (if using) and return the casserole to the oven for a final 30 minutes.
Serve with mashed potatoes.
Set aside.
John suggests seasoning the beef really well first, but I think you could skip the salt.
I also used flour for the seasoning and I was happy with the result, but the sauce is already pretty rich - do you really need it?
Chop the vegetables into not too-large pieces, maybe ½".Heat some more oil in the casserole. Add the star anise, the onions, then the carrots, then the celery and fry until just soft. Add the crushed garlic, stir through, then add the port and the red wine. Bubble the liquid until it is reduced by half.
Add the brisket and the pig's trotter to the casserole and cover with the stock. Return to the boil, skim if necessary, then add the soy sauce, stout and fish sauce.
Cook covered in the oven for 2 hours, until the meat is very tender.
Take out the casserole now, and strain it. Return the liquid to the casserole together with the trotter, and reduce it until the sauce thickens. Adjust the seasoning.
Lift out the trotter and keep the meat (apparently it goes well on toast). Return the other ingredients to the sauce, add the dumplings (if using) and return the casserole to the oven for a final 30 minutes.
Serve with mashed potatoes.
The brisket really does turn meltingly soft, but it shrinks quite a lot so don't be afraid to cut big cubes,
and you really can use 2kg!
Dumplings
side ingredient
Old fashioned suet dumplings. Perfect for stews. Good with a hint of herbs.

Dumplings. Old school.
Pick your herbs.
Pick your herbs.
Makes 8 smallish dumplings
Ingredients
- 6 oz (175g) self-raising flour (or plain flour with baking soda)
- 3 oz (75g) shredded suet
- 1-3 tablespoons chopped parsley or other herbs or none!
- seasoning
- water to mix
Sift the flour into a bowl. Add the suet, parsley and salt and pepper to taste.
Gradually add sufficient water and mix with a knife to form a soft, pliable dough.
Divide and shape into 8 balls somewhere between walnut and golf ball sized using floured hands.
Add the dumplings to your stew, cover (though you don't have to in the oven, but you'll get crispier dumplings if you don't) and cook for a further 20 minutes, or until the dumplings are swollen, light and fluffy.
Add the dumplings to your stew, cover (though you don't have to in the oven, but you'll get crispier dumplings if you don't) and cook for a further 20 minutes, or until the dumplings are swollen, light and fluffy.
I have made these with butter before when I didn't have any suet.
They weren't quite as good, but maybe I need to work on the proportions - I used 50/50 chilled butter to flour.
You can use any herbs you fancy; sage, thyme, tarragon or lovage maybe. Or spices, or mustard, or spinach, or mushrooms, or tomato purée/sauce, or grated cheese ... or Bacon! Everything tastes better with Bacon!
You can use any herbs you fancy; sage, thyme, tarragon or lovage maybe. Or spices, or mustard, or spinach, or mushrooms, or tomato purée/sauce, or grated cheese ... or Bacon! Everything tastes better with Bacon!
Whilst you can use wholewheat flour (with baking soda) I personally don't think they taste very good.
Feeding Flora With Chicken Pie But No Cake
Girls are funny. They need instant feeding. INSTANT.
So it's a pity Flora wasn't here last week when I made Jenny's birthday cake to take to her Birthday Dinner at The Tail End Fish Bar. But Jenny took care of the leftovers from that!
Fortunately Flora is mostly happy to nibble on cheese while I work. Which has been known to take some time...
This time I was working on a Chicken and Leek Pot Pie recipe from Delia, partly 'cos I fancied a chicken pie, and partly 'cos I needed a chicken carcass to make stock to add to my collection. (I already have a very good beef stock in the fridge from the bones from my last dinner)
Of course then I needed a dish to use up those leftover legs too.
Chicken and Leek Pot Pie
main fowl
A Chicken, Leek and Mushroom pot pie with a puff pastry crust.

Not a bad Delia recipe - though it needs garlic!
Delia reckons you'll need a 1½ pint (7"x2½") casserole dish, but I used one about twice that capacity, though I did blind-bake a puff pastry casing into the dish before filling it. I like the soggy sauce-drenched pastry.
I didn't bother with the parmesan, and just went for 2oz mature cheddar in the sauce instead.
Serves 4
Ingredients
- 2 boneless chicken breasts, skin on
- 1 medium leek
- half-dozen button mushrooms
- or another leek
- 10 fl oz (275 ml) dry cider
- 2 medium carrots, peeled and cut into 1/8 inch (3 mm) slices
- 1-2 bay leaves
- sprigs of fresh thyme
- 8 oz (225g) block of fresh or frozen and defrosted puff pastry or more for a lining
- a little flour for dusting
- 1 small egg, lightly beaten
- 1 tablespoon finely grated Parmesan, for sprinkling
- salt and freshly milled black pepper
The Sauce:- 10 fl oz (275 ml) milk
- 3/4 oz (20g - 2 tablespoons) plain flour
- 3/4 oz (20g) butter
- a pinch of cayenne pepper and no more than a pinch - you're not making chilli here
- 1 clove crushed garlic
- 1-2 oz (25-50g) mature Cheddar, grated
- 1/2 oz (10g) Parmesan, finely grated
- a little freshly grated nutmeg
- salt and freshly milled black pepper
Pre-heat the oven to gas mark 6, 400°F (200°C).
First, pour the cider into a medium saucepan, along with the carrots, bay leaves, sprigs of thyme and freshly milled black pepper. If you're using a lot of thyme, you should tie it up, or put it in a small muslin bag so you can retrieve the sprigs after - they're not nice to get caught in your throat! Bring to simmering point, then cover with a lid and simmer gently for 5 minutes. Now take the tough green ends off the leeks, slice them in half lengthways and chop into 1/2 inch (1 cm) slices. Wash thoroughly to remove any hidden grit and drain them. If you are using mushrooms (and you should) wipe them down and cut them into eighths. Add the chicken and leeks to the pan and simmer, covered, for a further 15 minutes until the mushrooms begin to wilt and the chicken is cooked through.
If you want extra crust in your pie, then line the baking dish with pastry, cover with greaseproof paper or tin foild and fill it with baking beans and bake it blind for 15-20 minutes until browned - it can be still a little soggy though - it will cook more the second time around.
For the sauce, all you do is place the milk, flour, butter, garlic and cayenne pepper into a medium saucepan and place it over a gentle heat. Then, using a balloon whisk, begin to whisk while bringing it to a gentle simmer. Whisk continually until you have a smooth, glossy sauce, and simmer very gently for 5 minutes. I went the more traditional route and cooked the flour in the butter first, but perhaps this would give a whiter sauce? Then add the cheeses and whisk again, allowing them to melt. Then season with salt, freshly milled black pepper and some freshly grated nutmeg. Next, drain the chicken and vegetables, reserving the liquid, but not the bay leaf and thyme. Now pour the liquid back into the pan, bring it to the boil and reduce to about 2 tablespoons.
Meanwhile, skin the chicken and cut it into bite-sized strips. Now stir the cheese sauce into the cider, bring to a simmer, and stir the chicken, carrots and leeks into the sauce, before transferring the whole lot to the dish.
Next, to make a lid, roll the pastry out thinly on a lightly floured surface. Cut out a 9 inch (23 cm) round, then roll out the trimmings and cut a 1/2 inch (1 cm) strip. Now dampen the edge of the dish with water and press the strip of pastry around the rim. Dampen the strip and carefully lift the pastry lid over the top. Press it firmly over the edge to get a good seal all round, then trim, using a knife.
Finally, gather up the trimmings and re-roll them to cut into leaf shapes. Brush the surface of the pie with beaten egg, and arrange the leaves on top.
Now, brush the leaves with beaten egg, sprinkle with Parmesan and bake on the baking sheet for 20 minutes.
A straight-forward tasty pie!
I liked my extra crust, but I suppose then it's not really a pot pie - just a regular pie.
The sauce is surprisingly green - but I used a reasonable amount of the green parts of the leeks, I hate to see all that perfectly good leek go to waste!
I think you could try something other than carrots as the root vegetable - they're a bit dull really. Maybe try Jerusalem artichokes or parsnips?
Roast Chicken Legs with Tomatoes
main fowl
A simple dish of roast chicken legs with herbs and tomatoes

Quite a nice way of using up any leftover chicken legs. And meaty wings.
It's a bit fiddly to eat, but simplicity to turn out.
I added sliced potatoes to my dish, but it's good to have something else to soak up the juices. I baked some garlic bread, but a nice farmhouse loaf, lemon rice or couscous would work too.
It's a bit fiddly to eat, but simplicity to turn out.
I added sliced potatoes to my dish, but it's good to have something else to soak up the juices. I baked some garlic bread, but a nice farmhouse loaf, lemon rice or couscous would work too.
Serves 2
Ingredients
- 2 chicken legs, jointed
- sea salt and freshly ground black pepper
- a medium bunch of fresh basil, leaves picked, stalks finely chopped
- a big handfuls of red and yellow cherry tomatoes, halved, and ripe plum tomatoes, quartered
- half a bulb of garlic, broken up into cloves
- 1 fresh red chilli, finely chopped
- olive oil
- 2 new potatoes, sliced
Preheat your oven to 180°C/350°F/gas 4.
Season your chicken pieces all over and put them into a snug-fitting pan in one layer.
Throw in all the basil leaves and stalks, then chuck in your tomatoes.
Scatter the garlic cloves into the pan with the chopped chilli and drizzle over some olive oil.
Mix around a bit, pushing the tomatoes underneath.
Place in the oven for 1½ hours, turning the tomatoes halfway through,
until the chicken skin is crisp and the meat falls off the bone.
If you fancy, you can add some drained cannellini beans or some sliced new potatoes to the pan and cook them with the chicken.
Or you can serve the chicken with some simple mashed potato.
Squeeze the garlic out of the skins before serving.
You could even make it part of a pasta dish - remove the chicken meat from the bone and shred it,
then toss into a bowl of linguini or spaghetti and serve at once.
I'm not sure about his fondness for unpeeled garlic cloves - it's true that they seem to end up more nicely softened and sticky
when left in the skin than their peeled brethren, and although it's not too much of a faff to squeeze out your own cloves
while you eat the dish, (especially given how fiddly eating the chicken is anyway)
it would certainly be too much of a pain to do it before serving. And you'd better warn your guests about them.
He's wrong about the pasta though - the chicken makes a rubbish pasta sauce. Too heavy.
And why would you bother just using the chicken in, say, a cream sauce?
What - would you just throw all the other stuff away?
Dumbass.
And why would you bother just using the chicken in, say, a cream sauce?
What - would you just throw all the other stuff away?
Dumbass.
Jenny's Best Birthday Cake
sweet veg
Nigella Lawson's sponge birthday cake recipe with buttercream filling and chocolate icing.

A fairly straight-forward cake from Nigella, though nothing particularly stunning.
It's slightly unusual in its use of custard powder, but it seemed to work.
It's slightly unusual in its use of custard powder, but it seemed to work.
Serves a birthday party
Ingredients
- 200g plain flour
- 3 tablespoons Bird's custard powder
- 2 teaspoons baking powder
- 1/2 teaspoon bicarbonate of soda
- 4 eggs 225g soft butter
- 200g caster sugar
- 2-3 tablespoons milk
For The Buttercream Filling:- 125g icing sugar
- 4 teaspoons Bird's custard powder
- 75g soft unsalted butter
- 11/2 teaspoons boiling water
For The Chocolate Icing:- 60ml water
- 2 tablespoons golden syrup
- 125g caster sugar (or use 50g if using milk chocolate)
- 175g good quality dark chocolate (or milk)
- 1 pot hundreds and thousands or other decoration
Make sure everything you need is at room temperature before you start.
Preheat the oven to gas mark 4/180°C, and butter and line two 20cm sandwich tins.
Let the tins sit on a cooling rack for 5 minutes and then turn them out on to the rack, peeling away the paper.
For The Buttercream Icing
Process the icing sugar and custard powder to get rid of any lumps, and then add the butter, processing again to make the buttercream come together. Feed the boiling water down the funnel with the motor running to make the filling easier to spread. Then sandwich the cooled sponges together with the custardy buttercream.
For The Chocolate Icing
Combine the water, syrup and sugar in a saucepan, stirring to dissolve over a low heat.
Let it come to the boil and then take it off the heat.
Break up the chocolate into small pieces if you are not using chocolate buttons and then add to the pan, swirling it around to cover in the hot liquid. Leave to melt for a few minutes, and then whisk the icing to make it smooth and shiny. Pour over the buttercream filled cake, letting it drip down the sides, and then sprinkle generously with the hundreds and thousands or whatever decoration you fancy before the icing sets.
Stud with the appropriate number of candles. Light. Bask in the glow.
I think you really only need to line the bottoms - it's a fiddle to line the whole tin,
and you should be able to free the cake from the sides easily enough.
Put all of the above ingredients except the milk, into a food processor.
Process to a smooth batter, and then add the milk a tablespoon at a time to make a soft dropping consistency.
Divide between the two cake tins and bake for 20 minutes.
The cakes will have risen and feel spookily puffy; this is because of the cornflour in the custard powder.Let the tins sit on a cooling rack for 5 minutes and then turn them out on to the rack, peeling away the paper.
For The Buttercream Icing
Process the icing sugar and custard powder to get rid of any lumps, and then add the butter, processing again to make the buttercream come together. Feed the boiling water down the funnel with the motor running to make the filling easier to spread. Then sandwich the cooled sponges together with the custardy buttercream.
For The Chocolate Icing
Combine the water, syrup and sugar in a saucepan, stirring to dissolve over a low heat.
Let it come to the boil and then take it off the heat.
Break up the chocolate into small pieces if you are not using chocolate buttons and then add to the pan, swirling it around to cover in the hot liquid. Leave to melt for a few minutes, and then whisk the icing to make it smooth and shiny. Pour over the buttercream filled cake, letting it drip down the sides, and then sprinkle generously with the hundreds and thousands or whatever decoration you fancy before the icing sets.
Stud with the appropriate number of candles. Light. Bask in the glow.
Well, it's a cake, it didn't go wrong and the icing is pretty cool -
it sets firm (though not hard) and tastes pretty fine!
But really I prefer my cake soaked with alcohol à la Tiramisu or at least stickily moist, so this wasn't really my thing.
Still, Jenny seemed to enjoy it. Which is the important thing with birthdays - look at Eyore's balloon.
But really I prefer my cake soaked with alcohol à la Tiramisu or at least stickily moist, so this wasn't really my thing.
Still, Jenny seemed to enjoy it. Which is the important thing with birthdays - look at Eyore's balloon.
Prime Rib With Annick

Annick very kindly invited me to help paint anti-fouling onto the hulls of the Port Edgar Yacht Club's 707s,
and since she seemed underwhelmed by my peace offering of a bacon roll as I sailed merrily off into the river in my Laser,
I decided to pop into my favourite butcher in nearby Uphall
and score another of their delicious prime ribs for an apologetic dinner.
The nice butcher man trimmed me a beautiful 2kg (4lb 4oz to be exact) single prime rib for a mere £24.80 with a nice length of protruding bone for ease of handling (and a generously filled a bag of shin bones for stock).
Being a bit pressed for time, I decided to cheat a little with the chips (steak needs chips!) and deep-fry some potato wedges from par-boiled potatoes, which turned out pretty damn fine I have to say, so after after rushing home with my shopping I put some small unpeeled King Edwards on to par-boil whilst I threw together a mushroom salad, and started to prepare a fairly quick side dish of lemony green beans.
I also made up the reduction for a half-quantity of béarnaise sauce (chips need béarnaise sauce!), preheated the oven, cut the par-cooked potatoes into quarter wedges, and started warming up some clarified butter that I had rather fortunately made earlier. So things were nicely underway by the time Annick arrived.
Unfortunately, things went slightly downhill after that - women are sooo distracting - I'm not even sure they should be allowed in the kitchen.
The result was just fine though - I would have challenged anyone to tell the difference.
I stuck the sauce in a warmed thermos, put a pan of groundnut oil and a pan of water on to heat then when the oil was hot enough did the first round of deep-frying.
I was determined to get the meat as rare as I like it this time, and decided to ignore official temperature recommendations (and the guides on my meat thermometers) that claim beef is rare at 140°F/60°C (which is fucking nanny-state nonsense by the way) and aim for a more realistic ruby-red temperature of 120°F/50°C. Yumsk!
Once the steak was cooked and resting I got the beans on and did the second round of potato wedge frying whilst Annick waded in and laid the table.
And everything arrived together!
Though the mushrooms were a bit over-garlicked and I forgot to add oil to the beans, the fat chips were magnificent, the sauce was delicious and the steak - oh the steak - was bliss on a bone.
Annick asked me if I had mustard - so I introduced her to my meager collection of 7 varieties (I have a shelf in the fridge and a compartment of my cupboards devoted to mustards), but once she tasted the béarnaise sauce the pot stayed closed.
So there's validation for you.
The nice butcher man trimmed me a beautiful 2kg (4lb 4oz to be exact) single prime rib for a mere £24.80 with a nice length of protruding bone for ease of handling (and a generously filled a bag of shin bones for stock).
Being a bit pressed for time, I decided to cheat a little with the chips (steak needs chips!) and deep-fry some potato wedges from par-boiled potatoes, which turned out pretty damn fine I have to say, so after after rushing home with my shopping I put some small unpeeled King Edwards on to par-boil whilst I threw together a mushroom salad, and started to prepare a fairly quick side dish of lemony green beans.
I also made up the reduction for a half-quantity of béarnaise sauce (chips need béarnaise sauce!), preheated the oven, cut the par-cooked potatoes into quarter wedges, and started warming up some clarified butter that I had rather fortunately made earlier. So things were nicely underway by the time Annick arrived.
Unfortunately, things went slightly downhill after that - women are sooo distracting - I'm not even sure they should be allowed in the kitchen.
Sorry Annick - you were very helpful actually - doing all that washing up and helping out with the bean prep and table-laying. Thanks :)
I got the steak frying nicely and set off all the smoke detectors,
then once the rib was in the oven
I managed to curdle the béarnaise sauce by rushing it
(probably I shouldn't have bothered trying to get it nice and warm in the double boiler after whisking in the melted butter
and should have been satisfied with the result I had), but managed to rescue the situation by whisking up a new egg yolk
over the boiling water in a clean bowl and whipping the curdled mixture back in.The result was just fine though - I would have challenged anyone to tell the difference.
I stuck the sauce in a warmed thermos, put a pan of groundnut oil and a pan of water on to heat then when the oil was hot enough did the first round of deep-frying.
I was determined to get the meat as rare as I like it this time, and decided to ignore official temperature recommendations (and the guides on my meat thermometers) that claim beef is rare at 140°F/60°C (which is fucking nanny-state nonsense by the way) and aim for a more realistic ruby-red temperature of 120°F/50°C. Yumsk!
Once the steak was cooked and resting I got the beans on and did the second round of potato wedge frying whilst Annick waded in and laid the table.
And everything arrived together!
Though the mushrooms were a bit over-garlicked and I forgot to add oil to the beans, the fat chips were magnificent, the sauce was delicious and the steak - oh the steak - was bliss on a bone.
Annick asked me if I had mustard - so I introduced her to my meager collection of 7 varieties (I have a shelf in the fridge and a compartment of my cupboards devoted to mustards), but once she tasted the béarnaise sauce the pot stayed closed.
So there's validation for you.


Prime Rib
main meat
The most succulent of steaks, pan-fried on the bone then finished off in the oven.


This is just about the best hunk of steak on the cow -
a single prime rib or forerib from between the 6th and 12th ribs - perfect for 2-3 people.
It's too massive a lump of meat to fry all the way through, so it needs to be finished off in the oven.
2 or 3 of the ribs make a truly excellent roast too.
It's too massive a lump of meat to fry all the way through, so it needs to be finished off in the oven.
2 or 3 of the ribs make a truly excellent roast too.
Feeds 2 gloriously
Ingredients
- 1 prime rib with the bone still in (4lb)
- olive oil
- salt
And off we go...
- Prepare the meat
- Make sure to take the meat out of the fridge in good time so it is at room temperature when you start.
Rub it all over with salt and olive oil. - Preheat the oven
- Put a roasting tin in the oven (unless you can fit in your skillet) and get it up to 230°C/450°F/Gas 8
- Pan Sear
-
Close your kitchen door, open all your kitchen windows and turn the extractor fan up full.
Fire up your cast iron griddle (you won't have access to Rachel's Le Creuset skillet since you broke up with her) and leave it until it is too hot to hold your hand near, then sear each side of the monster joint until nice and crisped - about 5 minutes per side and don't forget the edges. - Oven Roast
-
Put the skillet in the oven if it will fit, otherwise transfer the steak to the hot roasting tin and stick it back in the oven.
Turn the oven down to 200°C/400°F/Gas 6 and cook the beast until the internal temperature of the meat reaches your target temperature (not forgetting it will continue to cook for a while afterwards).
Which means:- 50°F - 90°F for bleu
- 90°F - 120°F for rare
- 130°F - 135°F for medium rare
- 140°F - 145°F for medium
- 150°F - 155°F for medium well
- 160°F and up for well done. Or as I call it: burnt.
- Rest
- Everyone agrees your meat needs a nice rest after all that hard cooking. 15 minutes covered with foil out of the oven while you make your chips.
OMG Steak!
Although the steak was fucking magnificent,
I've since come across some
interesting ideas
for first cooking a decent hunk of beef (4lb is a decent hunk!) in the lowest possible oven until rare (110°F/43°C - 3/4 hours),
resting, and only then searing in the hottest possible oven setting until crisped (6-10 minutes) just before serving.
Must give that a shot...
Must give that a shot...
Mushroom Salad
salad raw veg vegan
A mushroom salad a bit like raw Mushrooms à la Grecque

This is a bit like a raw Mushrooms à la Grecque that Rachel's Dad's partner Joyce used to make.
Don't overdo the garlic though - it is possible to have too much!
Serves 4
Ingredients
- a dozen or so button mushrooms, quartered
- bunch curly parsley, chopped
Dressing:- juice of 1 lemon
- equal volume olive oil
- 1-2 crushed garlic cloves
- salt to taste
Clean and quarter the mushrooms, shake up the dressing and mix everything together.
Let the mushrooms marinate for a few hours before serving (if possible).
Not bad. Don't overdo the garlic.
Green Beans with Lemon and Capers
side veg
Hot Green Beans flavoured with lemon peel and capers
Serves 4Ingredients
- 300g green beans, topped and tailed
- grated peel from 1 lemon though orange might be nice too lime is definitely good!
- 2-3 teaspoons capers
- olive oil or melted butter
- maybe: some crushed anchovies
- maybe: a splash light soy sauce
- maybe: a little crushed garlic
Top and tail the green beans and cut them into bite-sized pieces if you prefer.
Cook the beans briefly in salted, boiling water. Drain.
Crush the capers slightly with the lemon peel and mix into the beans with the oil or butter.
Cook the beans briefly in salted, boiling water. Drain.
Crush the capers slightly with the lemon peel and mix into the beans with the oil or butter.
Not bad. Makes a nice addition to a leftover salad for the day after too.
Deep-Fried Potato Wedges
side staple veg vegan
Quick and dirty fat chips

I used King Edwards, just because I already had some, but I'm sure Maris Piper or other chip-centric potatoes would do the job.
They're pretty tasty so allow 3-4 potatoes per person - they'll get eaten!
They're pretty tasty so allow 3-4 potatoes per person - they'll get eaten!
Ingredients
- small potatoes - King Edwards are fine
- groundnut oil for deep-frying though I'm sure sunflower would work
- sea salt
Par-boil the unpeeled potatoes until they are tender, but not too soft (about 10-15 minutes).
Drain and cool them in cold water.
Cut them into quarters or sixths to make decent-sized wedges
Heat a deep pan of groundnut oil to 140°C/285°F and fry the wedges until cooked through and starting to colour but not browned.
Lift out the wedges and reheat the oil to 190°C/375°F. Fry the wedges until browned and crispy.
Shake the wedges dry and serve in a basket generously scattered with freshly-ground sea salt.
These turned out really well - it's awfully difficult to get chips just right if you don't (yet) have a wire chip basket,
but with fewer, larger wedges you can get them out with a slotted spoon before the last ones burn up.
Steak Salad
salad main meat
Grilled steak pieces and crumbled blue cheese on a salad of watercress, red onion and tomatoes with a balsamic dressing.


Not only a tasty way of using up all your leftover steak, but healthy too.
It must be healthy - it's a salad right?
It must be healthy - it's a salad right?
Ingredients
- leftover chunks of prime rib
- ripe St. Agur
Salad:- Watercress
- tomatoes, chopped
- red onion sliced
Dressing:- olive oil
- balsamic vinegar
- salt and pepper
Mix the salad ingredients, together with any handy leftover cold green beans with lemon and capers,
and toss with the dressing.
Grill or roast the leftover steak, slice into bite-sized pieces or strips and scatter over the salad. Crumble the St. Agur over the top.
Grill or roast the leftover steak, slice into bite-sized pieces or strips and scatter over the salad. Crumble the St. Agur over the top.
Pretty nice, you need to serve it pretty quickly while the steak is still a bit sizzly.
If you want you can grill the cheese on the steak too so it's all melty.
If you want you can grill the cheese on the steak too so it's all melty.