I'm Dreaming of a White Day Within the Window of Christmas

Well it snowed. Feebly. Early on Boxing Day morning.
Wooo!
When I was a kid it snowed on Christmas Day every year. All day. Just like in the bible.
How I miss those classic Christian holidays 😢
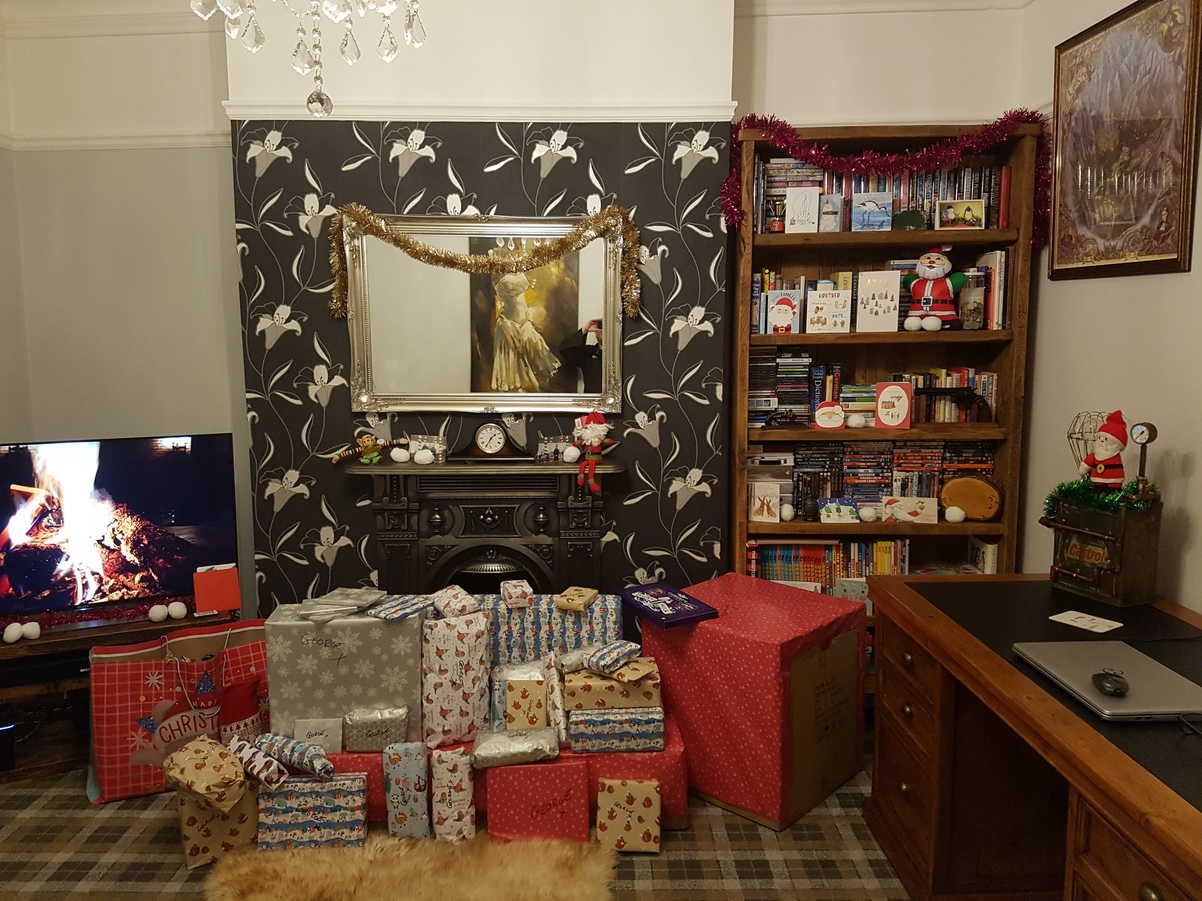
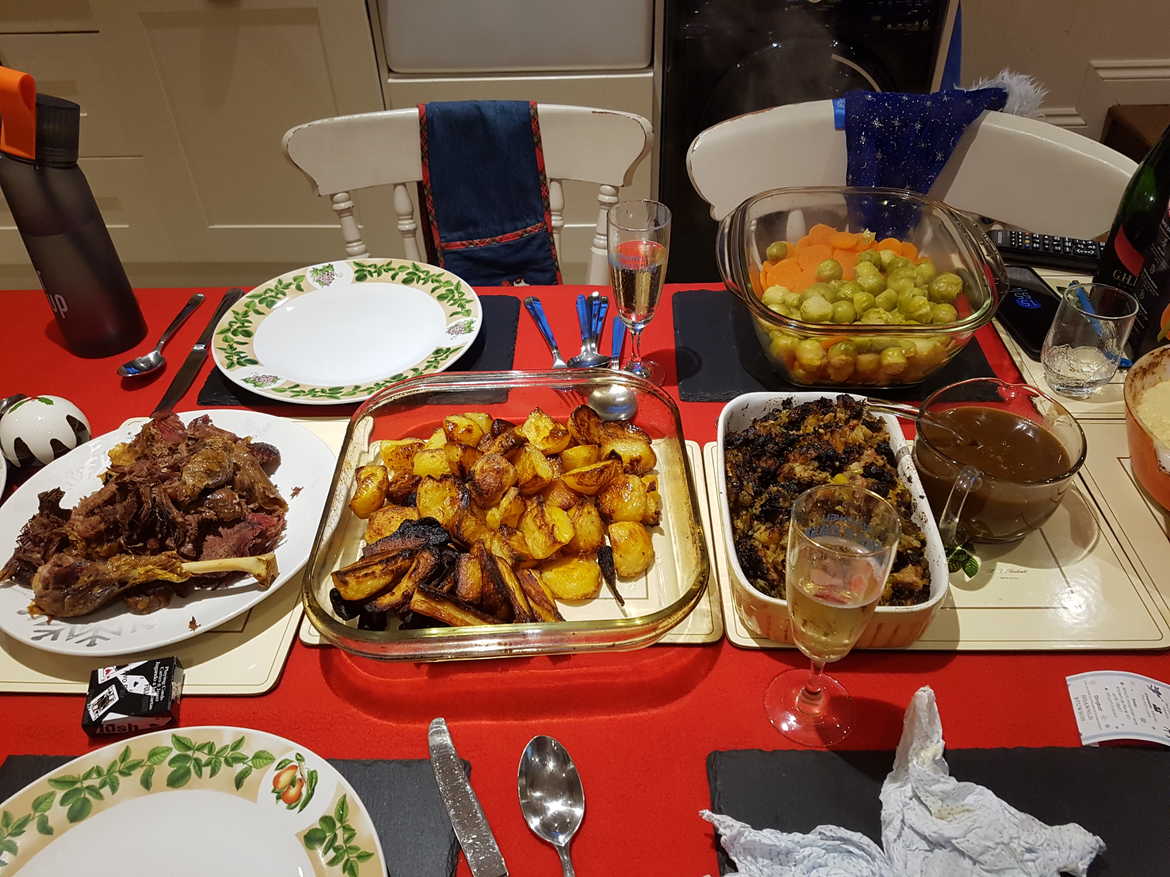
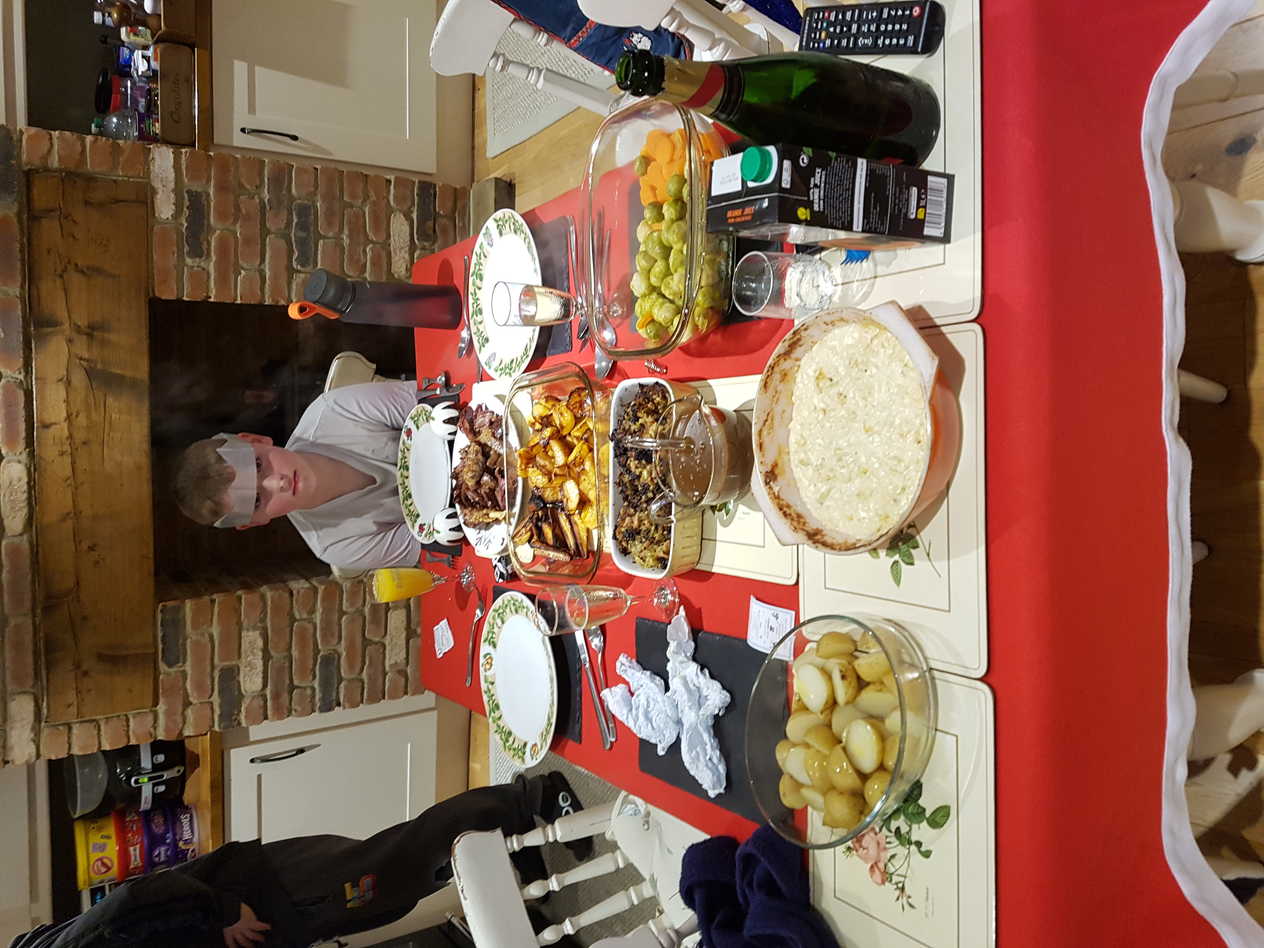
Well, you know the drill by now - presents, drink, comedy starter, goose dinner - table groaning under all the trimmings, crackers, pudding, grumpy child....

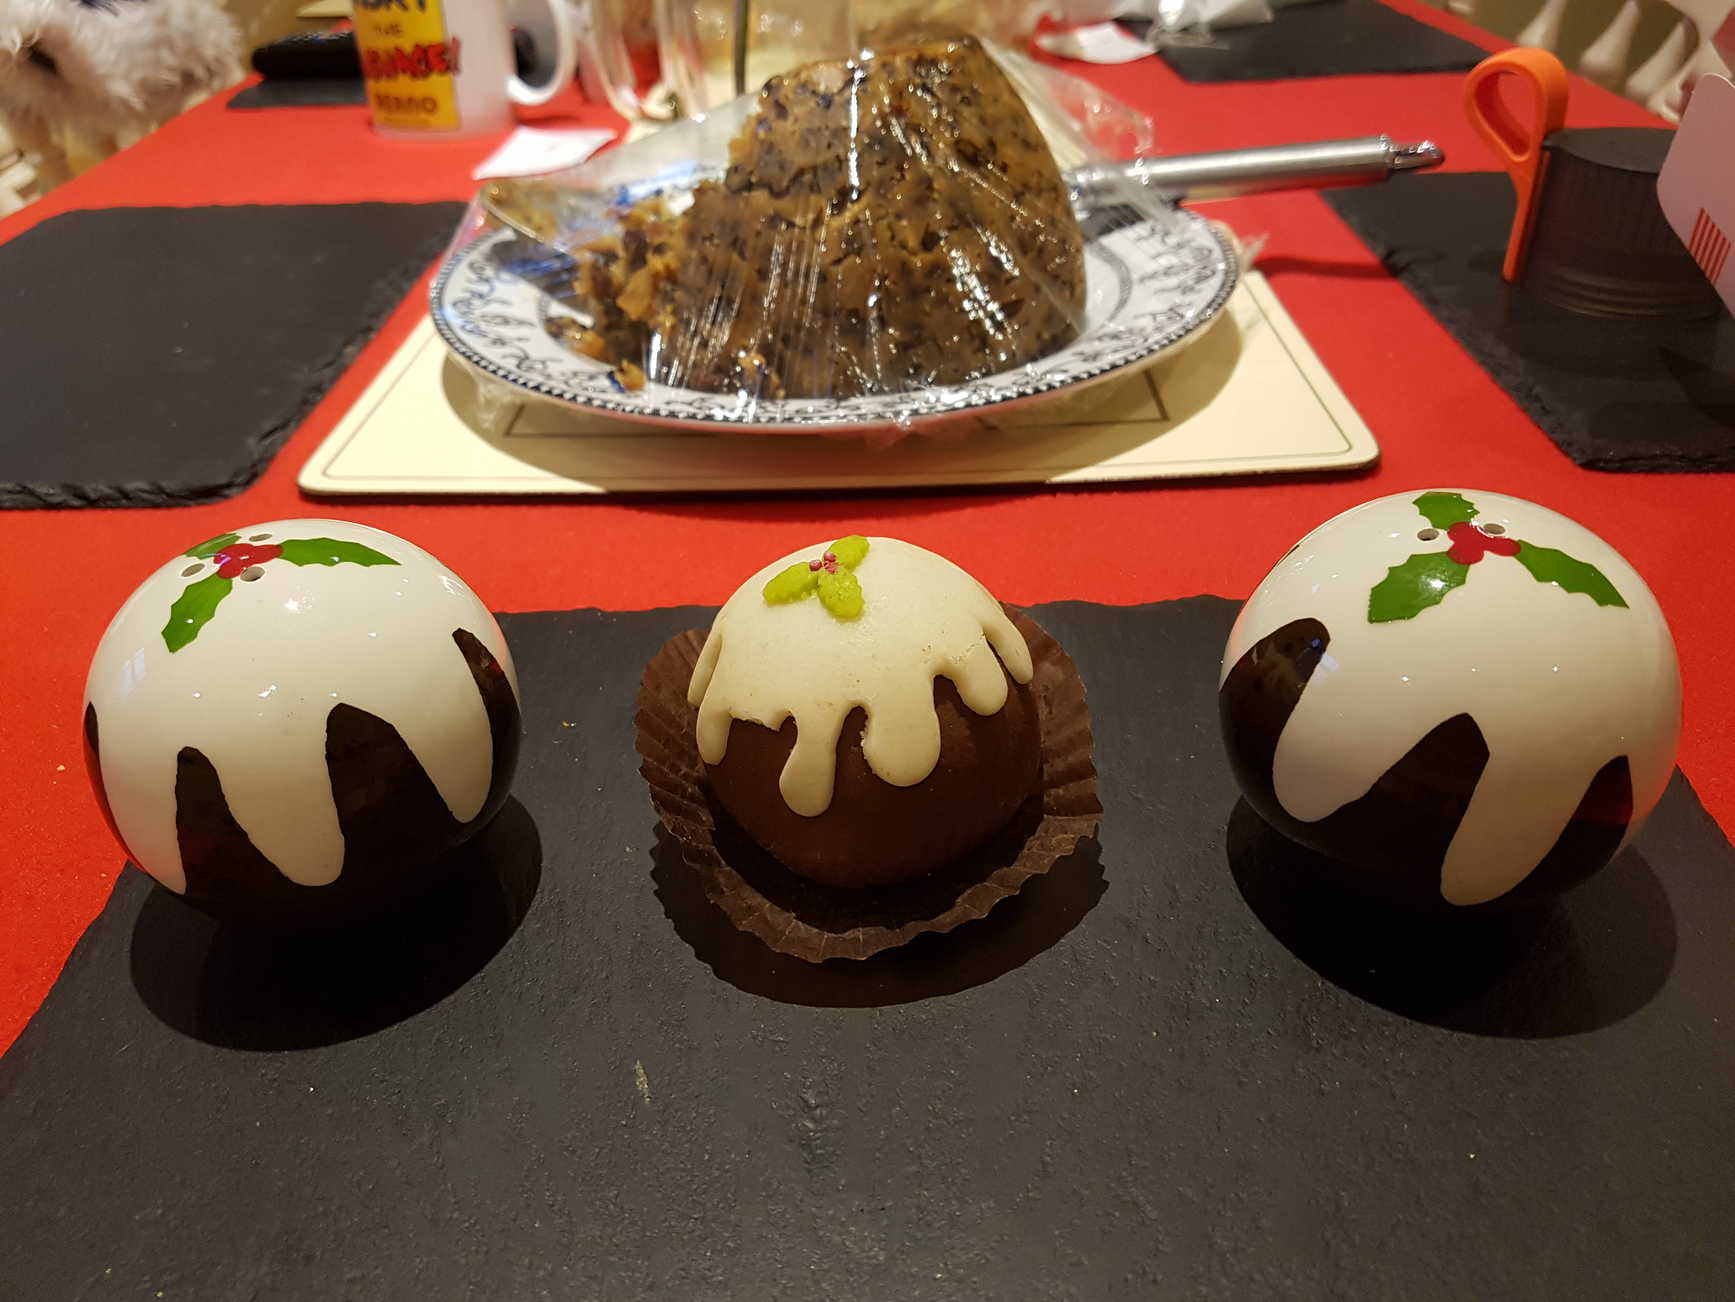

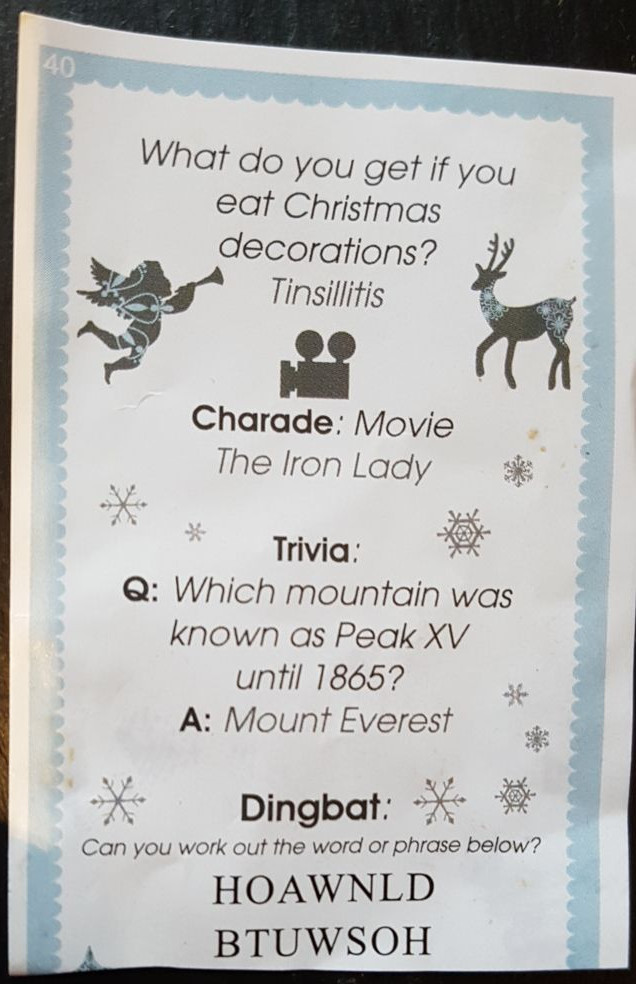
My Christmas cracker this year had an unnecessarily challenging dingbat puzzle which took me two days to solve.
Now you can enjoy it too!
These are quality crackers mind - I've been putting my bottle opener gift to good use every bath night, though the hat was still shit.
To go with this year's infeasibly massive cheese hamper (pre-ordered from Czerwik's Wine & Cheesemonger don't you know) I also found some really good, limited edition, truffle flavoured crisps that I liked.
They've gone now. Hope they come back next year (looking at YOU Local Fucking Supermarket™).
In keeping with my old-fashioned views on appropriate yule weather, I still send snail-mail cards at Christmas. Due to the rate at which my old friends have started moving, or dying, this year I decided to write my return address on the back of all of them, just in case. Colour me surprised when the card I sent to my relatives in Canada was returned to sender - address unknown.
I've been sending a card to the same house for decades without adding a return address so who knows how long ago they quietly moved? Or died?
So Merry Christmas and a Happy 2022 wherever you are Aunty Dawn.
Ya Dick!
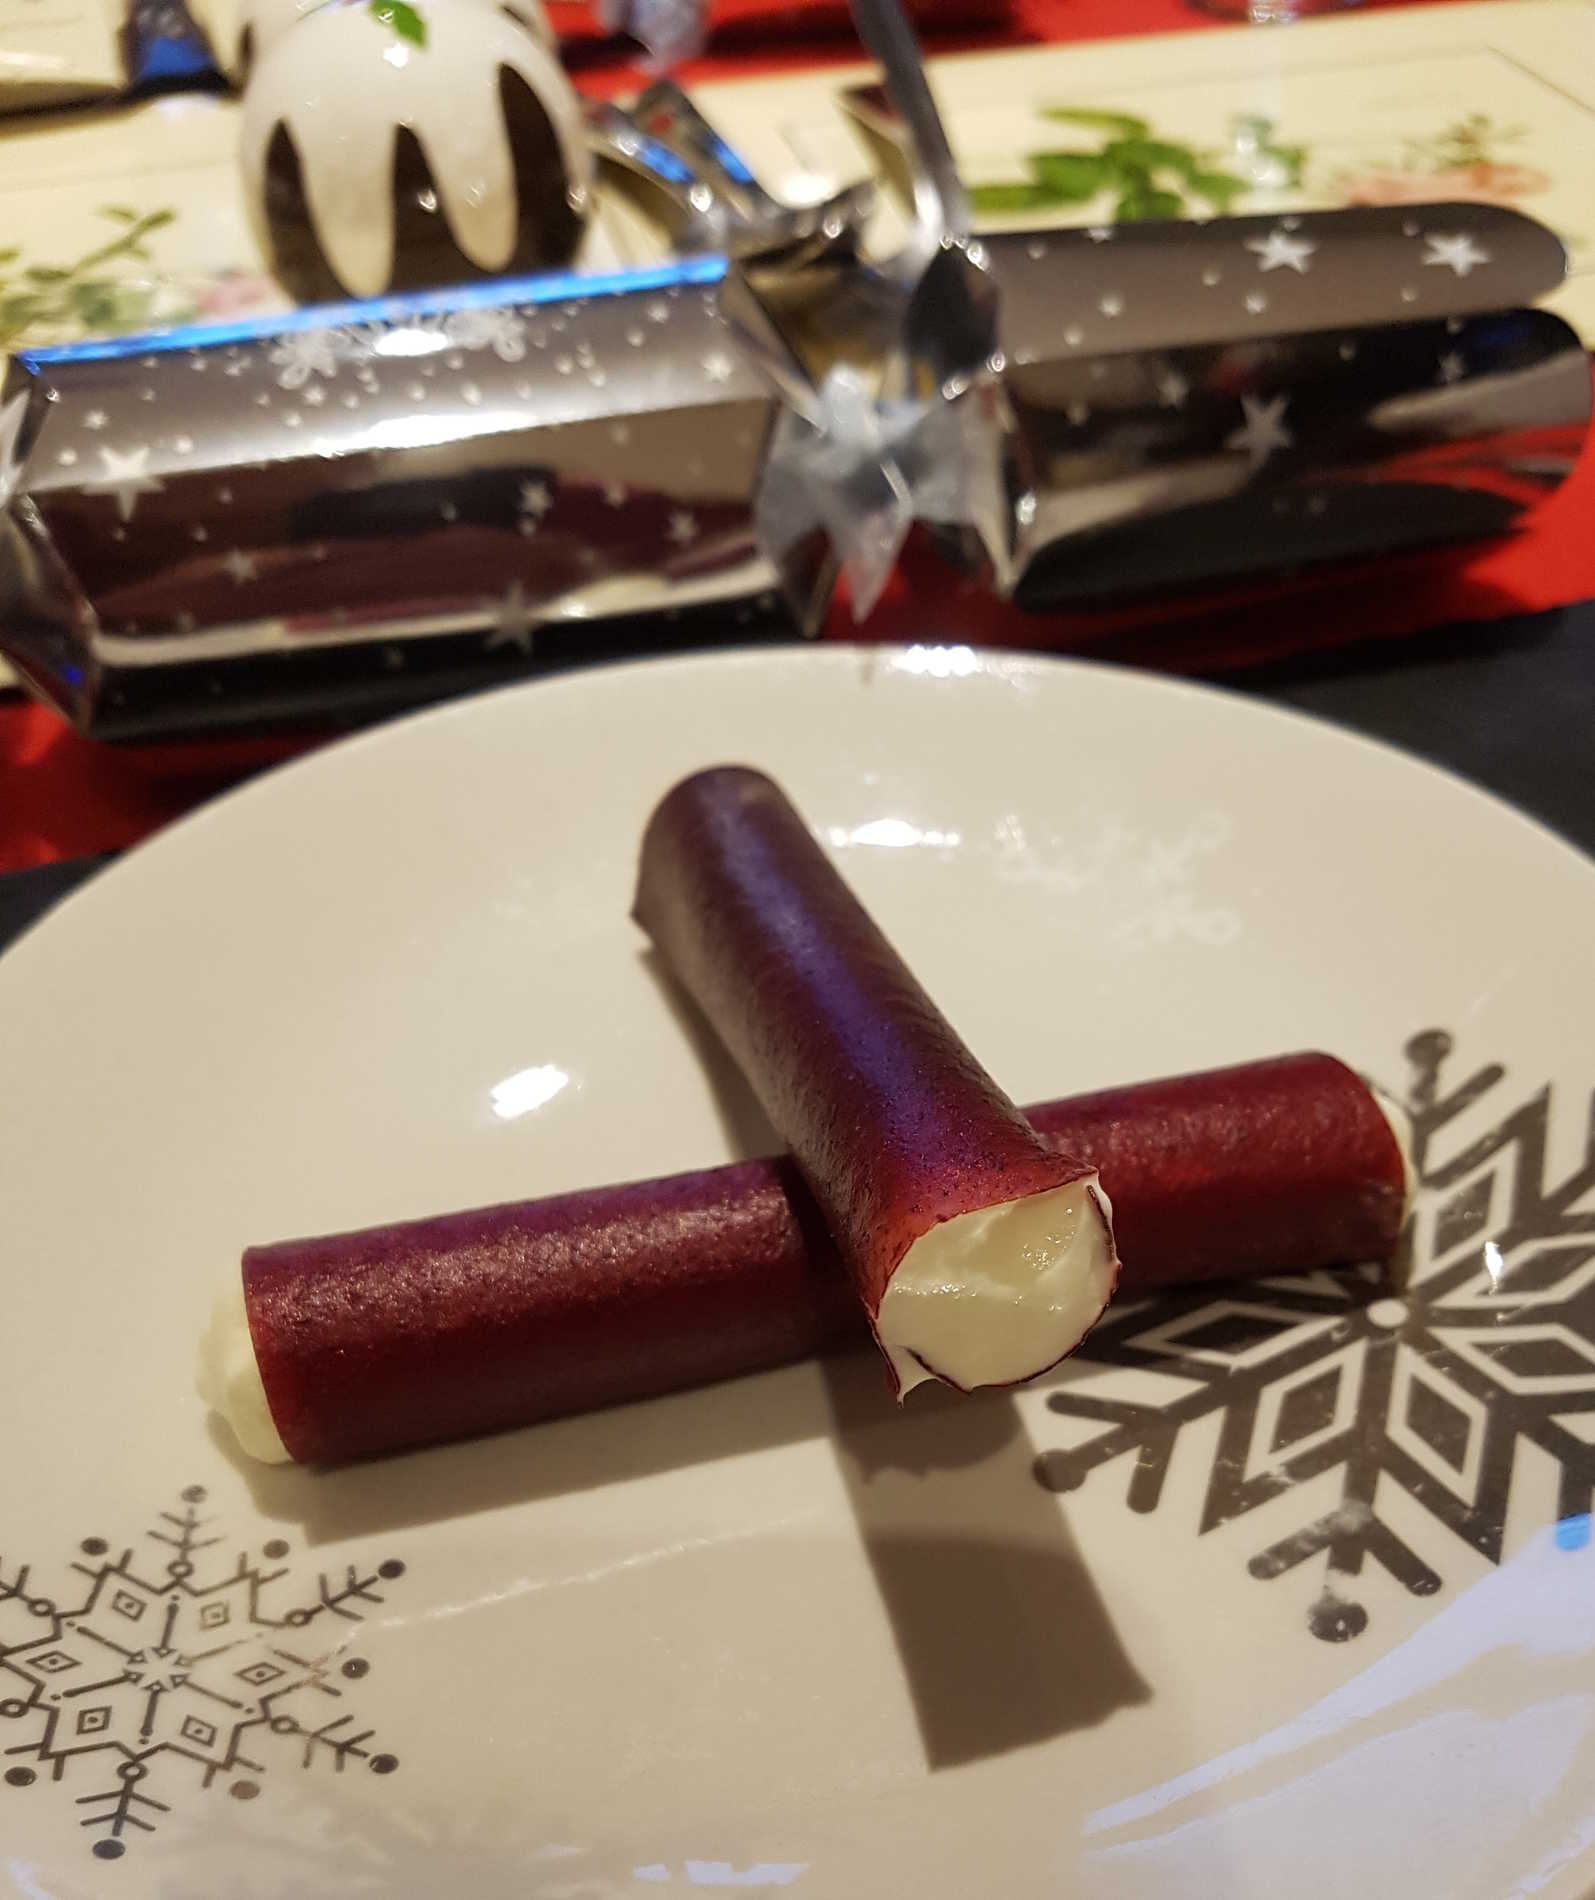
Cranberry Tuile with Stilton Foam
starter snack veg cheese
The original article's photos of this pretty red and white dish
looked perfect for Christmas, so I decided to give it a go.
As instructed I used a Grenache heavy fruity Côtes du Rhônes red wine, but I substituted 100g of mild and creamy blue cambazola for the stilton, since I was making it for diners who don't really like strong cheese and the foam I made was delicious. Though it did take two nitrous charges to foam properly, not the one.
Getting the purée spread smoothly and evenly and with the right thickness is the trickiest part. Except for rolling them into cigars. That's also the trickiest part 😉 I bought a smooth silicon mat which is pretty essential for the baking, and an extra-wide cake scraper for the purée spreading. This will make about enough purée to cover two 12" square baking sheets, producing about a dozen tuiles. (Or tuile-like shapes 🙂) But I think these would actually be better shorter than the 12cm suggested - maybe about half that length.
I didn't quite figure out the secret to always getting the tuiles uniformly crispy, as opposed to sadly leathery:
Obviously they need to be baked the correct amount of time - too little and they won't completely harden, too much and they'll shatter before you can roll them up. Which timing and success also depends on the thickness and even-ness of the layer you made.
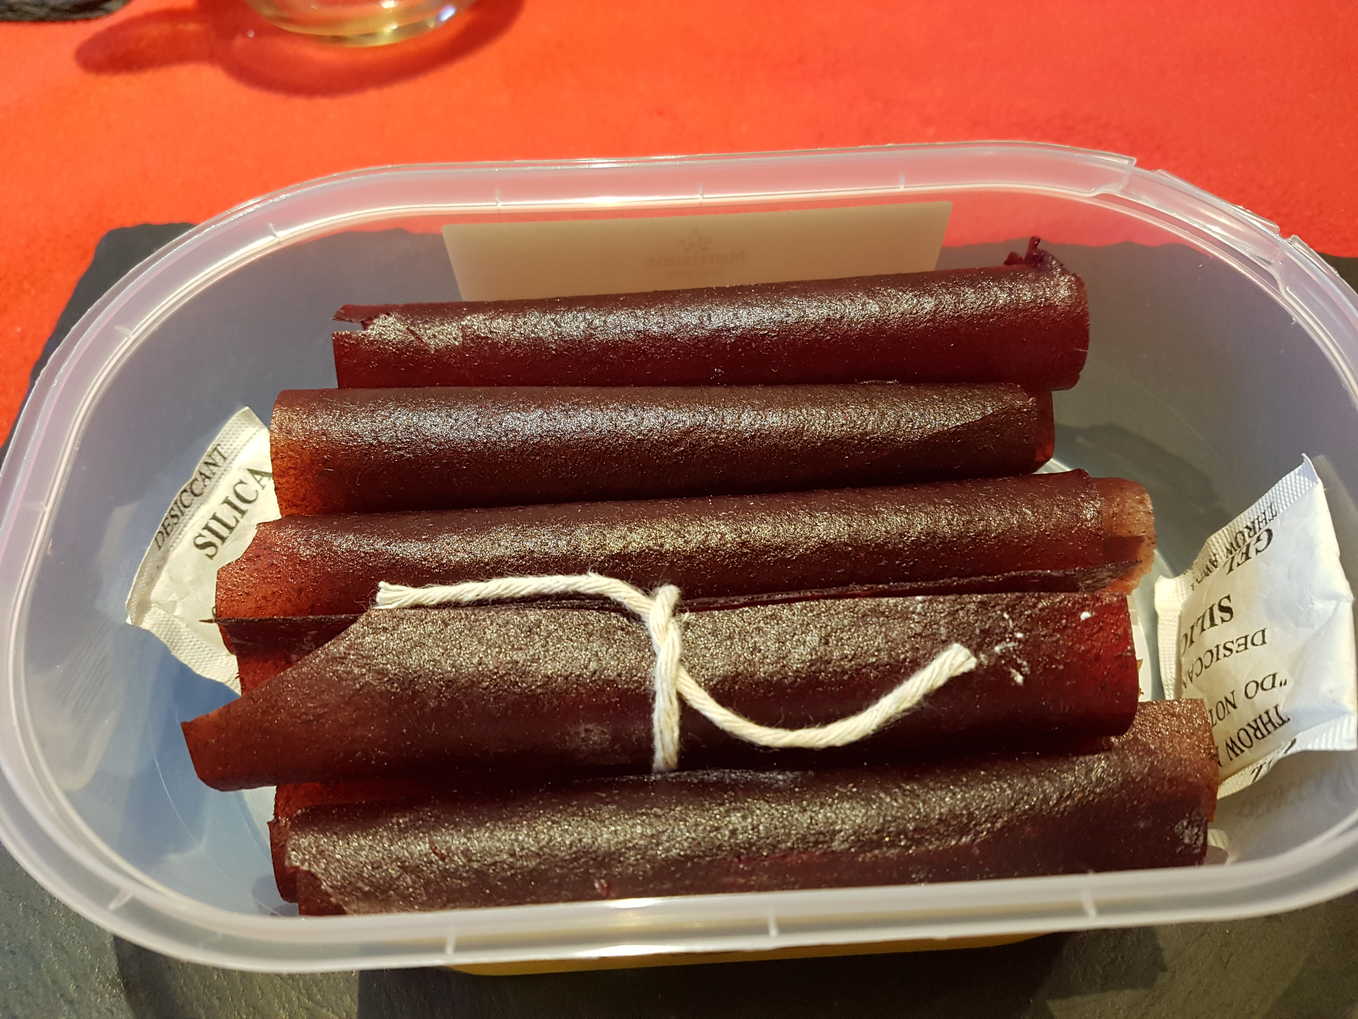
And obviously they must then be stored in a dry environment - I added a couple of silica gel packets to a tupperware container which I stored in the fridge, though that may not have been ideal.
And even more obviously they must be served immediately after filling.
But there was still some variation in mine.
As instructed I used a Grenache heavy fruity Côtes du Rhônes red wine, but I substituted 100g of mild and creamy blue cambazola for the stilton, since I was making it for diners who don't really like strong cheese and the foam I made was delicious. Though it did take two nitrous charges to foam properly, not the one.
Getting the purée spread smoothly and evenly and with the right thickness is the trickiest part. Except for rolling them into cigars. That's also the trickiest part 😉 I bought a smooth silicon mat which is pretty essential for the baking, and an extra-wide cake scraper for the purée spreading. This will make about enough purée to cover two 12" square baking sheets, producing about a dozen tuiles. (Or tuile-like shapes 🙂) But I think these would actually be better shorter than the 12cm suggested - maybe about half that length.
I didn't quite figure out the secret to always getting the tuiles uniformly crispy, as opposed to sadly leathery:
Obviously they need to be baked the correct amount of time - too little and they won't completely harden, too much and they'll shatter before you can roll them up. Which timing and success also depends on the thickness and even-ness of the layer you made.
And obviously they must then be stored in a dry environment - I added a couple of silica gel packets to a tupperware container which I stored in the fridge, though that may not have been ideal.
And even more obviously they must be served immediately after filling.
But there was still some variation in mine.
Makes about 8-12 of the full-length tuiles.
Ingredients
Cranberry tuile:- 20g of Isomalt sugar you can use up to 30g I reckon
Cranberry purée:- 200ml of red wine
- 250g of frozen cranberries
- 4 tbsp of caster sugar
Stilton foam:- 95g of Colston Basset stilton or something milder
- 250ml of double cream
- 150ml of whole milk
- 1 pinch of salt
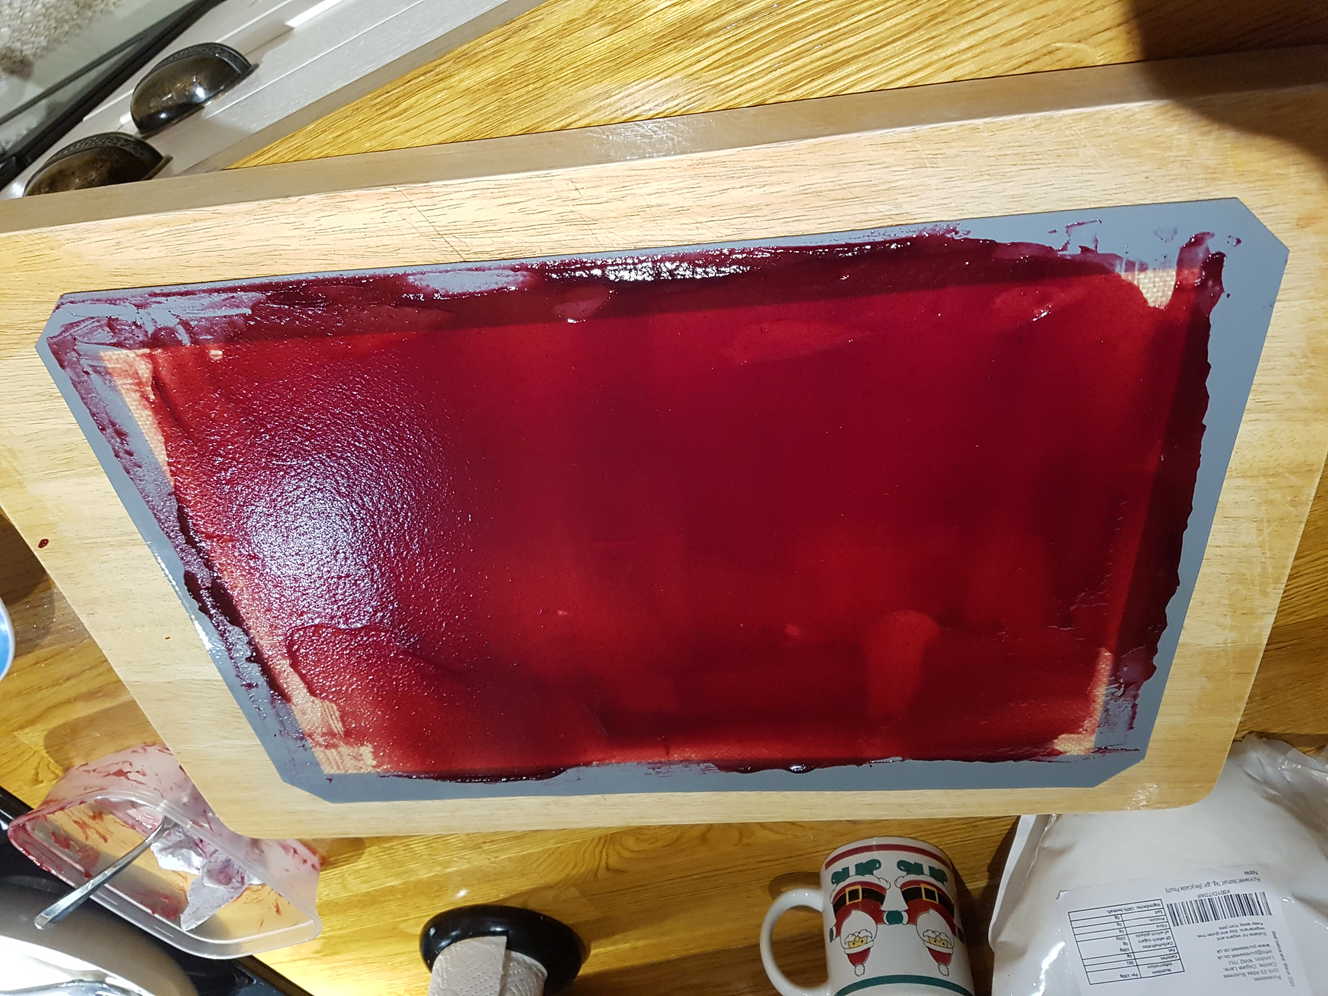
To make the cranberry purée, bring the wine to a boil and reduce it to 75ml.
Place the cranberries in a pan and pour over the reduced red wine whilst still hot. Bring to the boil, reduce the heat and cook until the cranberries start to collapse.
Whizz in a food blender until smooth.
Pass through a fine sieve, add sugar to taste, and cool. Store until required.
To make the cranberry tuile, heat the oven to 90°C. Put the cranberry purée and Isomalt sugar up to 30g seems to be fine, maybe even better into a pan and place on the stove, warming just enough for the sugar to dissolve, stirring continuously.
Pour onto a silicon baking mat and, using a 24cm/12inch step pallet knife, spread a thin, even layer of the mixture over the surface of the mat.
Cook for 45 - 50 minutes or until set.
Once set, remove from the oven and carefully peel the sheet of tuile off the mat and put it on a board. Cut out 6cm x 12cm 6cm x 7cm? rectangles and return these to the mat, shiny side down.
Put back into the oven and continue drying for a further 45 minutes or longer.
Oh, you can remove the tube can you?
I tried everything to prevent the rolled candy from sticking to my metal tube (except trying a wooden one?) - wiping it with a damp cloth (obviously a bad idea), brushing it with icing sugar, greasing it lightly with oil. Nothing worked.
In the end I just used the pipe as a loose guide for the rolling process, never pressing the tuile too firmly against the metal. Some of the cylinders stiffened up almost immediately, but I also had on hand some short pieces of string to tie around those which took a little longer to harden while I got on with the next one.
You need the candy rectangles to be wide enough to either overlap when rolled or have the ends just meet and press together. It's probably better to overlap the roll a little so there's no gap for the foam to squirt out of when you fill them. After a practice round I cut mine wider than suggested at 7cm to (gently) wrap around a 2cm diameter tube.
To make the Stilton foam, bring the milk and cream up to the boil, reduce the heat, add the cheese and allow to melt.
Mix using a hand blender, then pass the mixture through a fine sieve.
Pour into a ½ litre espuma gun, turn upside down, and charge once or twice! with an ISI charger.
Shake lightly and store in the fridge until required.
I tried everything to prevent the rolled candy from sticking to my metal tube (except trying a wooden one?) - wiping it with a damp cloth (obviously a bad idea), brushing it with icing sugar, greasing it lightly with oil. Nothing worked.
In the end I just used the pipe as a loose guide for the rolling process, never pressing the tuile too firmly against the metal. Some of the cylinders stiffened up almost immediately, but I also had on hand some short pieces of string to tie around those which took a little longer to harden while I got on with the next one.
You need the candy rectangles to be wide enough to either overlap when rolled or have the ends just meet and press together. It's probably better to overlap the roll a little so there's no gap for the foam to squirt out of when you fill them. After a practice round I cut mine wider than suggested at 7cm to (gently) wrap around a 2cm diameter tube.
I let my mixture cool in the foamer before sealing and charging. I don't know if it makes any difference.
To serve, fill the tubes with the Stilton foam using the espuma gun.
Arrange on a plate or bowl, and serve immediately.
Most excellent!
Though an awful lot of trouble for a couple of tuiles per person!
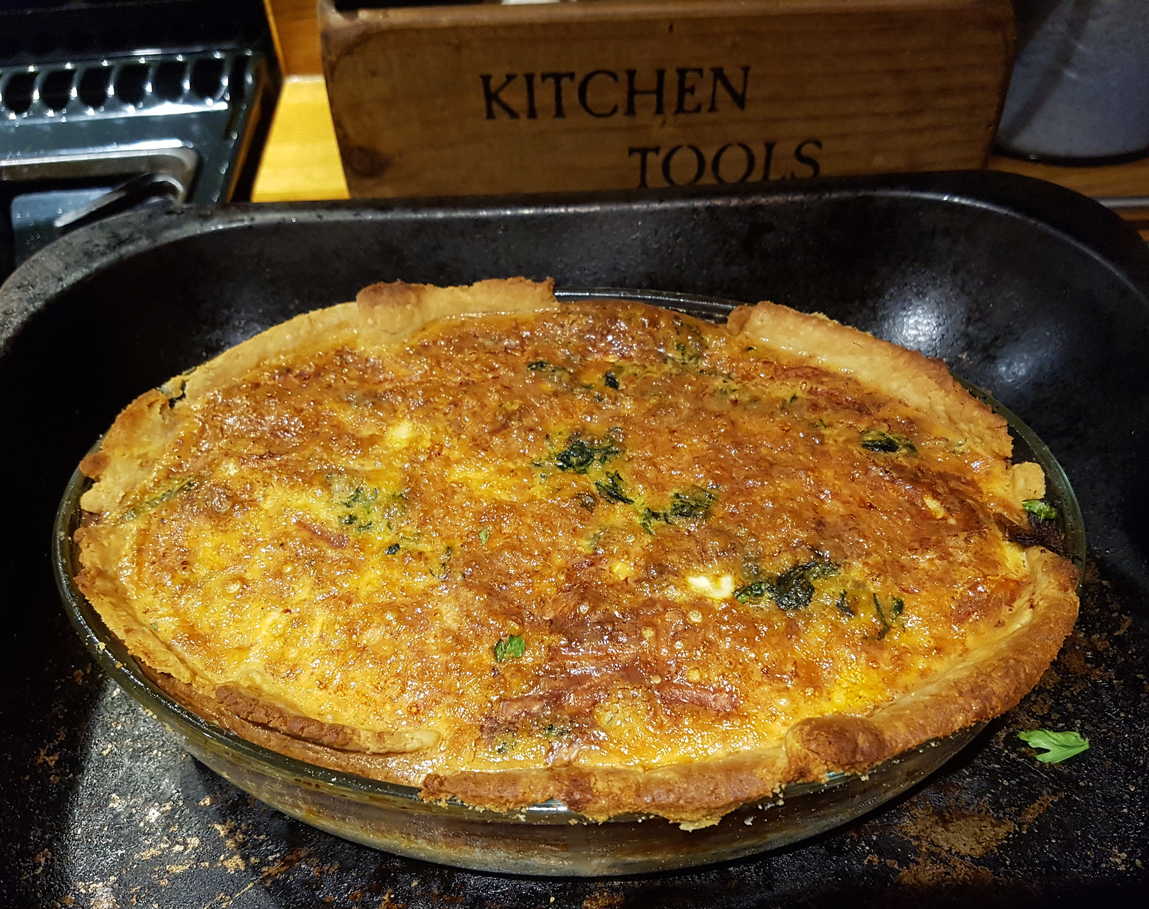
Leftover Christmas Quiche
main fowl cheese
Stuff all your leftover Christmas into one glorious quiche!
I had goose stuffing, herbs, cheese (no, not all my good Christmas cheeses - just the rubbish ones - Lancashire, some cheap cheddar, and a goat brie) and, bizarrely, spinach.
I had goose stuffing, herbs, cheese (no, not all my good Christmas cheeses - just the rubbish ones - Lancashire, some cheap cheddar, and a goat brie) and, bizarrely, spinach.
Serves 6
Ingredients
For the Pastry:- 6 oz plain flour
- 3 oz lard or butter, chilled, diced
- ½ tsp salt
- a few spoons cold water
For the Filling:- 200ml double cream
- 50-100ml milk
- 4-5 eggs
- salt &pepper
- cheese, sliced or grated
- Christmas leftovers
Sift the flour into a bowl, sprinkle in a little salt, and quickly rub in the diced fat. Don't overwork it.
When you reach coarse breadcrumbs, gradually cut in cold water with a knife until the mixture begins to cohere.
Gather into a ball, wrap in clingfilm and chill for half an hour.
Preheat the oven to 200°C/Gas Mark 6.
Roll out the dough and line a quiche dish or in my case a ludicrously deep oven dish. Chill again for 30 minutes if you can be bothered. Prick all over with a fork, line with baking paper or foil, fill with baking beans and bake in the centre of the oven for 10 minutes. Remove the beans and paper, return to the oven and bake for a further 10 minutes until the pastry is cooked and colouring lightly.
Turn the oven down to 180°C/Gas Mark 5 or lower, if you have a deep, fat quiche like mine.
Cover the base of the quiche with your chopped Christmas leftovers.
Whisk the egg with the milk and cream. Season with salt & pepper. Pour into the quiche to fill it up.
Test with a skewer to make sure the centre is hot. Don't overcook it though.
Serve hot or warm.
When you reach coarse breadcrumbs, gradually cut in cold water with a knife until the mixture begins to cohere.
Gather into a ball, wrap in clingfilm and chill for half an hour.
Preheat the oven to 200°C/Gas Mark 6.
Roll out the dough and line a quiche dish or in my case a ludicrously deep oven dish. Chill again for 30 minutes if you can be bothered. Prick all over with a fork, line with baking paper or foil, fill with baking beans and bake in the centre of the oven for 10 minutes. Remove the beans and paper, return to the oven and bake for a further 10 minutes until the pastry is cooked and colouring lightly.
Turn the oven down to 180°C/Gas Mark 5 or lower, if you have a deep, fat quiche like mine.
Cover the base of the quiche with your chopped Christmas leftovers.
I had a layer of stuffing, and then spinach which I microwaved on high for 1 minute then minced.
And various chopped herbs.
Scatter with your grated or sliced (as for a Brie) cheese.Whisk the egg with the milk and cream. Season with salt & pepper. Pour into the quiche to fill it up.
If you end up with insufficient liquid you should go back in time and use more eggs, milk, or cream in your mixture.
Put the dish on a baking sheet and bake for about 30 minutes or more like an hour for a deep dish until the custard is golden on top and set.Test with a skewer to make sure the centre is hot. Don't overcook it though.
Serve hot or warm.
Well, mine was pretty tasty. Like Christmas itself, your mileage may vary.
On the first round you want the sheet to be firm enough to hold together when you peel it off the silicon mat, but pliable enough to not break when you bend or cut it. I found it easiest to turn the silicon baking mat upside down, carefully pry loose one end of the sheet with a knife and then peel the mat away from from the cranberry sheet, rather than the other way around.
For the second round you need the rectangles just soft enough to work with, but for them to quickly harden up in perhaps 30 seconds. I peeled off one rectangle at a time from the baking sheet inside the oven, leaving the others there while I rolled that rectangle up. Then you don't need to rush, or worry about the others setting too soon.