
Season's Eatings

Yes, once again 'tis the season to stuff your bird and stuff your face.
We like a traditional goose for the Christmas bird in our house; lovely succulent meat, never dry. Plus you get about a year's worth of beautiful fat for your roasties. Anyway, if it was good enough for the Cratchits it's good enough for us!
Following our traditions I picked the stuffing and the starter. I quite liked the sound of Nigella's gingerbread stuffing so we went with that. We were slightly worried that it might turn out too sweet, so we replaced some of the gingerbread with regular bread, but to be honest it was still a bit overwhelmingly sweet and sticky. I think I might go back to something a bit more traditional next year.
Unusually this year we also had a roast duck.
Since my brother decided to have himself a family we are now forced to get dressed (get dressed! On Christmas day! The horror!) and treck the mile upon mile (yes: two miles) to his place for Christmas Dinner. So fearing there wouldn't be enough leftover bird to feed two families for one entire day, Mum and I decided to have a second Christmas dinner at home on Boxing day with a duck. We were taking no chances.
For starters we made up some of Aidan's goats cheese parcels, which seemed to travel well when Aidan brought them around to my place, but unfortunately Mum ignored all my careful instructions on how to cut up the cheese and instead mashed it to paste before I got the chance to stop her. So they were a bit soggier than I had hoped.

main fowl
A couple of things I relearned this Christmas about making gravy:
- If you make sure to keep some water in the bottom of the bird's roasting tin you'll get a nice rich dark stock under the layer of fat to make your gravy with. Without the water you might just end up with a burnt crust and unusably bitter fat.
- Gravy thickens with between 1 and 3 tablespoons of flour fried in an equal volume of fat for each pint of liquid. So a litre of gravy needs 2 tablespoons flour for thin and up to 6 tablespoons for extra thick gravy. If you're using cornstarch then you'll only need about 2 teaspoons per pint.
- You can finish your gravy with a variety of flavours:
- orange juice ideally a mandarin such as satsuma, clementine, or tangerine, lemon juice, or zest from either
- port or red wine, Madeira, Marsala, white wine or even cider probably best used to deglaze the roasting tin
- any other liquor or brandy
- Worcestershire sauce or mushroom ketchup
- mustard
- spices, tomato purée or ketchup possibly best fried with the flour
- redcurrant jelly, jam, or other preserve
- garlic and anchovies apparently!
- marmite or bovril if you're a complete philistine
- a whisk of butter to add a little gloss
- Apparently bird roasting times can actually be dramatically less than the standard 20 minutes per pound recommended by cookery writers since the dawn of time. Felicity Cloake even claims to have cooked a 6kg turkey in just two hours - unlikely as that seems. I have to say though, that the low temperature roasting times for our goose were pretty much as advertised. And we used a meat thermometer and everything.
Ingredients:
It's a bitter-sweet meal - marking as it does the end of Christmas. The delicious end of Christmas.
Nothing left after that but to start working on those leftover mince pies.


Roast Duck
main fowl

Our 6lb duck was just perfect after 2½ hours cooking,
with the last half hour at a slightly higher temperature to crisp it up.
Serves 4
Ingredients
- 1 duck
- herbs, garlic or fruit for stuffing optional
Pre-heat the oven to 220°C/425°F/Gas Mark 7.
Untruss the duck and remove the wing tips (if present).
Prick (or slash) the duck skin all over, at about 1" spacing. Make sure to pierce through the skin into the fat layer, but don't penetrate the bird's flesh. This is to make sure that the fat runs out and leaves the bird with a nice crispy skin, without losing any of the meat juices.
Reduce the heat to 180°C/350°F/Gas Mark 4 after 15 minutes or so once the fat has started to crackle, and cook the bird for about 20 minutes plus 20 minutes per lb, basting every 20 minutes or so if you like, or the skin is looking a bit dark.
You can turn the temperature back up again for 20 minutes at the end to get the skin crispy and golden.
Untruss the duck and remove the wing tips (if present).
Prick (or slash) the duck skin all over, at about 1" spacing. Make sure to pierce through the skin into the fat layer, but don't penetrate the bird's flesh. This is to make sure that the fat runs out and leaves the bird with a nice crispy skin, without losing any of the meat juices.
Reduce the heat to 180°C/350°F/Gas Mark 4 after 15 minutes or so once the fat has started to crackle, and cook the bird for about 20 minutes plus 20 minutes per lb, basting every 20 minutes or so if you like, or the skin is looking a bit dark.
If you like you can turn the bird a couple of times too - we started the bird on it's breast then flipped it onto it's back about halfway
- but I'm not convinced it's necessary.
The bird is ready when the juices run clear when penetrated between thigh and breast
and the temperature of the thickest part of the bird reaches 75°C/165°F.You can turn the temperature back up again for 20 minutes at the end to get the skin crispy and golden.
You don't really want to stuff a duck as it will suck in too much fat, but feel free to throw a handful of herbs,
garlic, tart cherries, orange or lemon rind or pieces into the cavity to infuse a little flavour.
Gingerbread Stuffing
ingredient side

This makes an edible but very sweet, dense, heavy stuffing.
Very sweet.
A bit too sweet if you ask me.
It might be worth trying with regular bread replacing some of the gingerbread, but I think I'll be doing a different stuffing this time next year.
Very sweet.
A bit too sweet if you ask me.
It might be worth trying with regular bread replacing some of the gingerbread, but I think I'll be doing a different stuffing this time next year.
Fills 1 Goose
Ingredients
- 500g (3 medium-sized) onions
- 2 eating apples, peeled and cored
- 45g butter
- 1 x 15ml tablespoon vegetable oil
- 750g streaky bacon
- zest of 2 clementines/satsumas
- 2 x 400g gingerbread loaves (such as McVitie's Jamaica ginger cake), loosely crumbled
- 2 eggs, beaten approx.
- ½ teaspoon freshly ground pepper
Using a food processor or by hand, finely chop the onions and apples.
Put the butter and oil in a large, wide saucepan over a medium heat and fry the chopped onions and apples until soft, about 10-15 minutes.
Finely chop the bacon in the processor, or by hand, and add this to the softened onion and apple mixture. Cook everything, stirring frequently, for about 5 minutes more.
Add the zest of the clementines/satsumas.
Take the pan off the heat and let it cool a little before mixing in the gingerbreadcrumbs. You can let this get properly cold now if you want.
Just before you want to cook the stuffing, add the beaten eggs and pepper,and use it to stuff the cavity of your bird, or cook all of it (or what's left after stuffing your bird) in a buttered baking dish. I don't stuff the bird but put all of my stuffing in a very generously buttered old Le Creuset terrine, with internal dimensions of approx. 25cm x 9cm x 7cm deep.
Bake it in a hot oven (200°C/gas mark 6) with your turkey for about the last 45 minutes. If the stuffing's going into a full oven - which it no doubt is - there should be no need to cover the dish. If the oven is less full, and therefore hotter and less steamy, you could cover with foil for the first 30 minutes.
Let the cooked stuffing sit in its terrine for a good 10 minutes out of the oven before turning it out and slicing it. Or just spoon from the dish if that's less stressful. (I love a slice of this, cold, in a Christmas night or Boxing Day turkey sandwich.)
Sweet and sticky, just like Nigella.
Snowed In Sunday

I Went to visit Doctor Jenny in the arctic wastes of Dundee this weekend.
She's been assiduously trying to lure me up there for weeks now with the promise of fine dining in the Bridgeview Station Restaurant that she's discovered. There may be ulterior motives however - Jenny's new cottage has an AARGA and she's been trying to figure out how to actually use it for anything other than burning toast, so I said I'd bring up something to cook in it.
After she told me some horror stories about roasting a chicken for 6 hours, I decided to make a Raan - since it's already marinated in yoghurt to break down the fibres and soften the meat I figured it would be the most forgiving of time and temperature. Jenny bought an oven thermometer and reckons that here AARGA sits sullenly around 180°C, so I figured a good 3½ hour roasting would do for the joint, plus half an hour R&R (for the joint, not for us. Jenny's not that kind of girl).
AARGAs are funny things. Massive iron blast furnaces of undeterminate and uncontrollable temperatures, Jenny's AARGA started off too hot for the slow cooking of the Leg of Lamb, and ended up too cool to simmer beans. Jenny's AARGA also has only two hobs on top that, though large, are not quite large enough to cook more than half of two pans at the same time.
Since most of my cooking involves frantic last-minute frying that became a bit of a problem, so I had to schedule the hob-work more carefully than usual.
Fortunately keeping things warm is the AARGA's speciality.

I made up a quarter batch of tandoori paste, burnt it whilst frying, threw it away, made up another quarter batch of tandoori paste, then smeared up my Raan and sealed it in about 20 plastic bags before putting it in the boot of my car.
Now my car smells like an Indian takeaway.
I also planned a Kalpna Bainghan Bharta which goes quite well with the leg of lamb, and uses up some of the leftover tandoori paste too. So I puréed up a batch of onions, garlic and ginger to take with me.
You can never be sure what you'll find in Jenny's house.
I figured I'd decide what staple (rice/chapatis/naans) and other dishes I'd make when I got there, and I went for rice (Jenny had a jar of long-grain rice) and a dal (Jenny had a jar of green lentil-pea-things).
We got the lamb in the top oven (uncovered) at 4 o'clock (optimistically announcing dinner for eight), went shopping (Jenny loves shopping), Put the pricked and greased aubergines and onions in the oven about 5:30, got the dal simmering about 6:00 and started frying up the Bharta (which took quite a long time).
I cooked up the rice in some ghee to nicely coat the grains, simmered them covered with twice their quantity of water and a little salt, squeezed onto one of the hobs for five minutes or so until the water had disappeared to the level of rice, then stuck it into the AARGA's warming oven at about 7:15.
The lamb came out to rest at 7:30 (so far so on time!), the augergine and tomatoes went into the bharta and I started frying up the tarka to finish off the dal. Unfortunately after so much cooking effort the poor AARGA had cooled off to tepid, so the tarka took rather longer to caramelize the onions than I had anticipated, and the dal wasn't finished until 8:30. Still, the rice, bharta and raan went onto the table at 8:00 sharp.
Another partial success!
For dessert we used some of the meringues I had left over from Stir-up Sunday (and which I had re-baked to try and dry them out some) to make a messy Eton. And we learned that it isn't a good idea to mix in the meringues too early lest they dissolve completely into the cream and fruit.
Bugger.

We had not planned on finding the first snows of winter piling up on Jenny's doorstep and covering all the land, and we had not planned on getting trapped on a steep icy hill with sliding cars blocking our progress ahead and behind. Eventually after a Landrover appeared and towed the cars out of our way, we gave up and returned to Jenny's for a second breakfast.
So we discovered two things:
- Jenny was wise to have just bought a 4x4 if she ever wants to leave her home in the winter months.
- 4x4 vehicles are not magic, and may still do massive skids narrowly missing trees and drainage ditches if you take icy corners too fast.
Hey - I get my jollies where I can!


Dal
curry side veg
Spicy Indian lentil soup
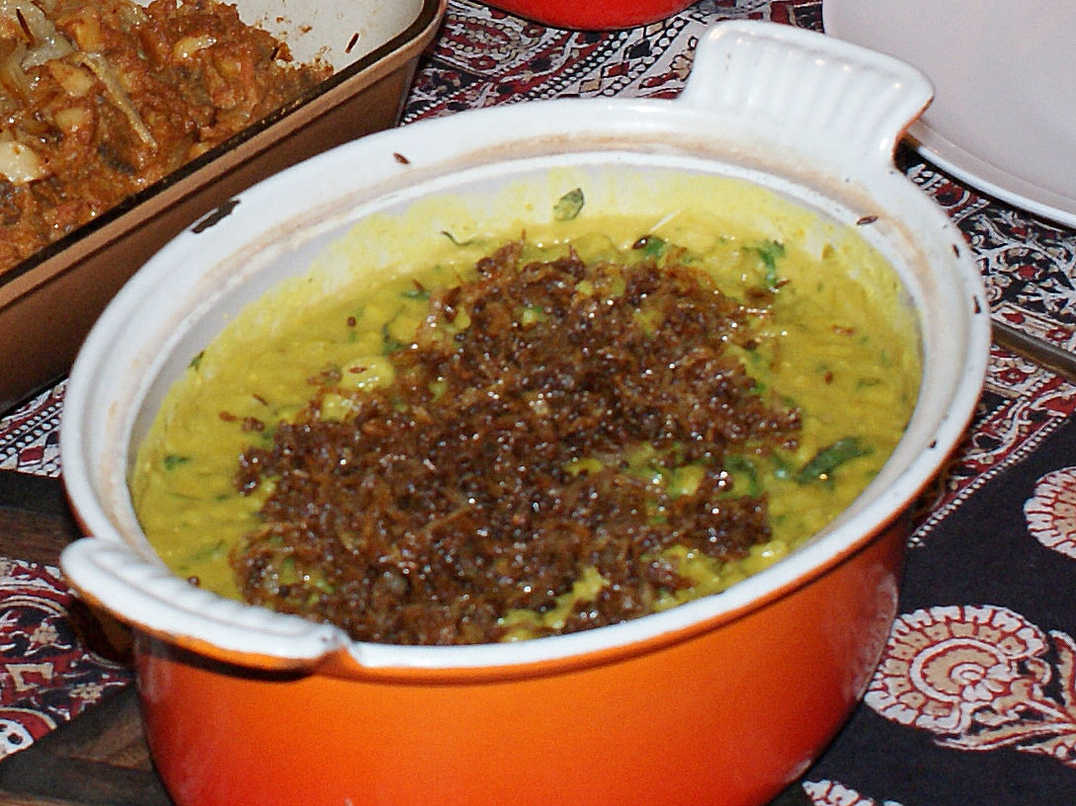
Here's a Dal I made up from the stuff at the back of Jenny's cupboard.
Obviously you can use any legumes you like, with any spices you like - I fancied the small jar of aniseedy powder I found labelled 5 spices though it wasn't any I recognised.
You can also add any vegetables you like to the lentils (cauliflower, potatoes, tomatoes), use any flavoured liquid (stock, coconut milk, juice, wine), and fry tomato purée with your tarka if you fancy.
There are probably as many Dals in the world as there are lentils.
Ok, pans of lentils.
Serves 8
Ingredients
- 2 cups lentils/beans/peas I used some un-labelled split green peas. Though they might have been green lentils
- 2-3" fresh ginger, peeled, sliced into fat disks
- 2-3 fresh chillies, whole or sliced
- 1 teaspoon turmeric
- 2-3 cloves garlic, peeled, crushed
- ½ teaspoon salt
For the Tarka:- 6 cardamom seeds
- 1 teaspoon cumin seeds
- 1 teaspoon mustard seeds
- 2 onions or equivalent shallots, thinly sliced
- 1 teaspoon that aniseedy mixed-spice powder you found at the back of the cupboard
To Serve:- spoonful or two of yoghurt, or lemon juice, or vinegar
- fresh coriander to serve
Wash your lentils well and pick over to remove any boulders.
Cover with water in a fairly large pot and bring to the boil.
Skim away any foam which rises, then add the slices of ginger, crushed garlic cloves, chillies deseed a couple of chillies and slice them in if you want the Dal hotter, and simmer gently for 1-2 hours depending on the lentils. You want the beans to be on the verge of falling apart.
To Serve:
Before serving make the Tarka:
Heat a couple of tablespoons of ghee and add the cardamom seeds for a bit, then the smaller seeds until they sizzle and release their aroma.
Add the sliced onions and fry gently until they turn golden and caramalize this can take a while - watch they don't burn!
Meanwhile crush up some of the lentils in the pan to make a bit of sauce, adjust the consistency with more water if necessary,
adjust the salt, add some yoghurt and chopped coriander and stir through.
When the onions are ready, add the powders, stir briefly, then pour the hot Tarka over the lentils so it sizzles, and cover to contain the delicious flavours.
Warn your guest not to eat the whole cardamoms or ginger slices. Unless they want to.
Serve.
Tasty.
I quite liked the touch of yoghurt to lift the flavours.
I quite liked the touch of yoghurt to lift the flavours.
Stir-Up Sunday

Did you know today was Stir-Up Sunday?
I did. It's when all good Christians get the whole family together to stir their Christmas puddings. I volunteered my services to the Eldorado clan but they weren't interested. Even disgusted. Apparently Christmas puddings break their No Raisins rule.
Another one for the list.

Ah tradition. Without you we are weak!
So I picked through my venison stripping out as much fat as I could, covered it with 1½ cups of cognac, and stuck it in the fridge to wait for me to get my arse in gear. Which eventually started on Tuesday, when I boiled up my candied fruit peel and finally used up all the egg whites left over from making ice cream to bake an oven-load of meringues just in time for Flora's scheduled Toastie Evening.
I suppose I ought to explain - Flora has a new Toastie machine, and has been wanting to show it off, so she brought it round along with half the contents of her parents' fridge and we loaded it up until we couldn't eat any more.
So we had two rounds of toasties:
Chicken Supreme
I wrapped some thawed-out chicken breasts in bacon and fried them up,
whilst I softened some sliced onions together with diced mushrooms and a sliced red pepper,
then made it into a sauce with cream and grainy mustard.
and Goats Cheese and Proscuttio
with sliced tomatoes.
The chicken supreme toasties were far too dry
(though they were improved by a dash of Worcestershire sauce)
but the goats cheese filling was rather tasty


And then we had Eton Mess. Or maybe Citrus Fruit Mess. Since I had a load of leftover citrus fruits - what with making all that candied peel. I just cut up the fruit into bite-sized pieces (already handily peeled), sugared them, whipped some double cream until it was thickening (but not stiff), and stirred it through the fruit and broken bits of meringue.
The dessert was reasonably acceptable, but I'd still go for strawberries, indeed I will shortly.
Flora really liked the candied peel and took a bunch home. Which was fine since I seem to have made about a pound of the stuff, despite needing only 1½ oz!
Come Thursday when I started preparing for a visit to Doctor Jenny the candied peels had dried out nicely so I went ahead and made up my real mincemeat (finally!) poured in an extra fl oz of cognac, covered it with cling film and left it in a tupperware container in the fridge.
So more Stir-Up Thursday really.
Black Pudding And Foie Gras

Last Christmas Mum got me the delightfully plush Black Pudding & Foie Gras cookbook. I've fancied trying out its eponymous dish for a while now, and finally got around to it this weekend.

Ex-Jenny Alex is an old friend and lives just round the corner, which makes it all the more embarrassing that I rarely see him. Work-and-play-mate Alex is someone I visit regularly but have felt guilty for some time about not returning the favour and inviting him over.
So a great opportunity to make some amends.
Foie Gras being roundly despised these days and illegal to produce in Britain (though personally I think that unlike Lance Corporal Jones' Dervishes those saucy French Geese just love it up 'em), it's a bit hard to get hold of. But it's my second favourite food so it's worth making the effort. Fortunately George Bower came through with the goods. A snip too at a mere £30. Oooh. Taste the suffering.

Well I have a giant pumpkin left over from Hallowe'en, so that's the soup sorted. Thanks Chef Bocuse!
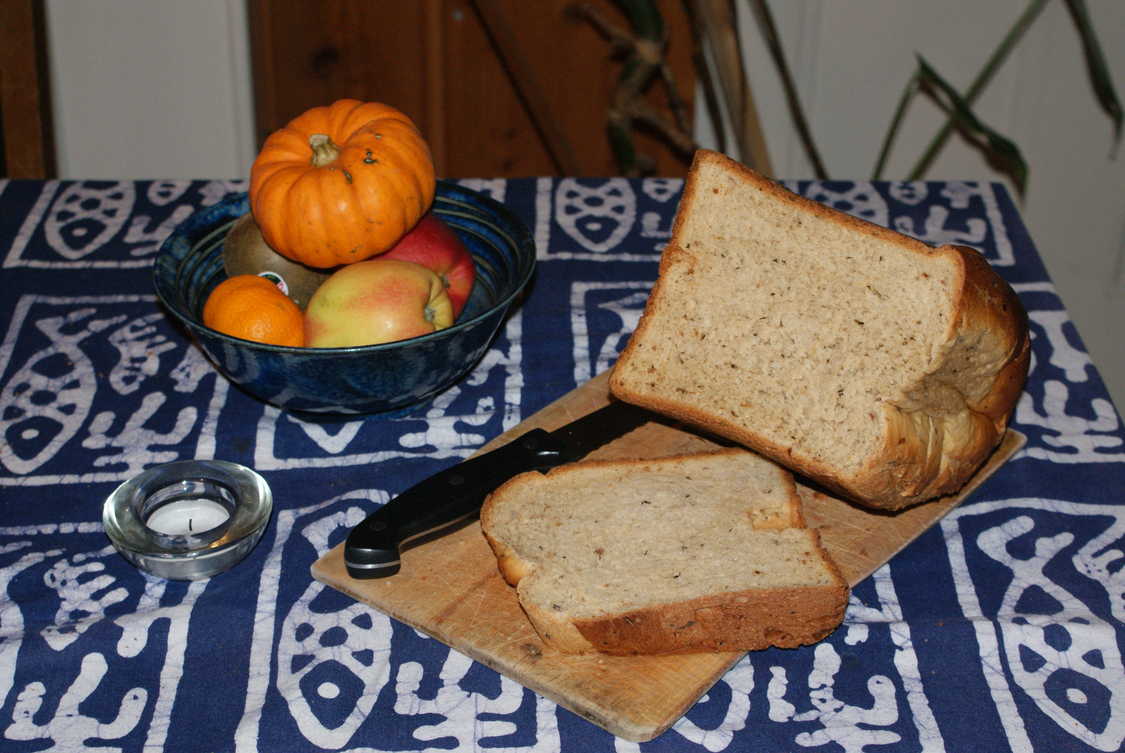
I made a loaf of bread machine red onion, thyme and rosemary bread, and a bowl of Earl Grey flavoured pumpkin seeds to prevent Flora from passing away before the meal arrived.
I baked some potatoes to make plain mash, braised a Savoy cabbage, and in keeping with the autumnal theme I decided to experiment with a pumpkin ice cream for dessert too. But as per usual all the supermarket pumpkins had turned into golden coaches or something at the stroke of Hallowe'en and driven off.
So I used butternut squash instead.
Which was probably better to be honest.
Despite being able to get the soup, baked potatoes, braised cabbage and dessert organised well in advance as planned, serving up the main course was still a bit hectic. It takes a some time to assemble each plate of goodies, and it doesn't help having lots of things which need frying just before serving. Typical shoddy planning on my part - though it is somewhat the nature of the dish. Fortunately the black pudding and the caramelised apple slices keep warm quite well, and with a bit of help from ex-Jenny Alex peeling the puddings unlike the real and original (Lancashire!) intestinal black pudding, Scottish versions are bizarrely shrink-wrapped in plastic and mashing the baked potatoes whilst work-and-play Alex documented the proceedings in 3D! we managed to get things out in a reasonable time frame. Maybe work-and-play Alex will post his videos for our entertainment at some point?
It probably helped that everyone was already stuffed with cheesy cream soup.
After throwing the croutons into the waiting soup and ladling it up, I had time to reheat the cabbage then stick it in the oven to stay warm, boil up a little milk to reheat the mashed spuds, and should have taken the opportunity to stick the scrumpy reduction and apple chutney in the oven too to keep them at the ideal temperature. As it was, the chutney was a bit too cold, and the reduction a bit too hot (and consequently runny).
After that it was just frying, frying, frying.


Update!
Work-and-play Alex has published some of his 3D party pictures!I reproduce a couple here - if you squint really hard at the pairs of pictures until the dots in the middle merge they will literally jump out of the page and smack you in the face.
Or at least, that's why I assume I now have this massive headache!

|

|
| • | • |

|

|
Braised Cabbage In Cider
side

Inspired by a Roux Brothers recipe
Serves 4
Ingredients
- 1 medium Savoy cabbage, about 1½lb (750g)
- drizzle of olive oil
- pinch or 3 of caraway seeds maybe juniper berries or cumin, onion or fennel seeds might work?
- 3½ oz (100g) thick smoked bacon slices, rind removed
- 7 oz (200g) shallots, peeled and left whole
- 1 granny smith, peeled, chopped
- 2 clove garlic, peeled and crushed
- 100ml (about ⅓ bottle) cider
- salt and freshly ground black pepper
Preparation
Pre-heat the oven to gas mark 6, 400°F (200°C).
Trim any coarse or damaged leaves from the cabbage, then cut it into quarters. Slice away the hard central stalk and shred the remaining cabbage into 1cm strips. Rinse in cold water and drain thoroughly in a colander.
Cut the bacon into 1cm strips.
Heat the olive oil in a heavy casserole and fry the caraway seeds until they release their aroma.
Add the sliced bacon and the shallots. Fry until the onions are starting to colour.
Meanwhile peel and core the apple and cut into 1cm cubes. Add to the pan with the crushed garlic.
When the apple has begun to caramelise, add the cabbage and stir around to coat with oil, then add the cider and bubble it off a little while you scrape the bottom of the pan.
Season with a little salt and some black pepper.
Serve hot.
Pre-heat the oven to gas mark 6, 400°F (200°C).
Trim any coarse or damaged leaves from the cabbage, then cut it into quarters. Slice away the hard central stalk and shred the remaining cabbage into 1cm strips. Rinse in cold water and drain thoroughly in a colander.
Cut the bacon into 1cm strips.
Heat the olive oil in a heavy casserole and fry the caraway seeds until they release their aroma.
Add the sliced bacon and the shallots. Fry until the onions are starting to colour.
Meanwhile peel and core the apple and cut into 1cm cubes. Add to the pan with the crushed garlic.
When the apple has begun to caramelise, add the cabbage and stir around to coat with oil, then add the cider and bubble it off a little while you scrape the bottom of the pan.
Season with a little salt and some black pepper.
You can pause at this stage if you don't need the cabbage just yet.
Just reheat it back up on the stove when you're ready to continue.
Put on the lid and transfer to the oven for about 30 minutes,
until the shallots and cabbage are tender.Serve hot.
Really good. Though the colour can be rather dull unless you pick nice dark cabbage.
Red Onion Bread with Thyme and Rosemary
bread veg
Thank God for bread machines!
I thinly sliced three red onions, threw in a tablespoon of chopped fresh rosemary, and gently caramelised them in a tablespoon or two of butter until golden and well reduced.
Then I mixed enough strong white flour to dry the mixture out so it wasn't too greasy looking, and added a tablespoon of roughly chopped thyme leaves.
Then I just followed my bread machine instructions for making Classic White Bread, and added my onion and herb mix when the machine angrily beeped at me demanding nuts, or raisins, or whatever you're supposed to add.
Despite mysteriously rising over-enthusiastically and sticking itself to the roof of the machine, spoiling the crust a bit, the bread was rather good.
Ingredients
- 3 red onions
- fresh herbs (rosemary, thyme)
- butter for frying
- extra flour for the onion mixture
For the bread:- scant 350ml milk
- 2 tbsp butter
- 1½ tsp salt
- 2 tbsp sugar
- 600g strong white flour
- 1 packet of dry yeast
Smoothie Party

It's my Birthday and I'd cry if I wanted to!
But instead I had a Smoothie Party with my cute landlady and a few of our friends. It seemed like a healthy alternative to drinking. Since I'm on the dry :(
Aline suggested it, and even bought me a smoothy cookbook for inspiration! I also sneaked a few ideas from the menu of a local bar at the recommendation of my fellow guests at Stasczi and Andrew's wedding over the weekend. Yep she's hooked another one. You go girl!
It might have been easier if I had a juicer (I'll add one to my gadget wish list), but the shopping was still unusually straightforward I have to say, mainly requiring the gathering of some attractive-looking fruit, random herbs, a few cartons of fruit juice, ice cream and some doughnuts.

The house had massive, oddly-shaped rooms packed with mysterious faux-egyptian furniture and furnished with huge onyx fireplaces. It featured servant's quarters, hidden staircases and hosted many atmospheric parties. It was at one such party that I (OK, maybe with a little help from my friends) invented the doughnut smoothie, which I decided would also be a feature of this smoothie party.
Hence the doughnuts.
As it turned out, the hardest things to buy were carrot juice you really need a wholefood shop, a reasonably ripe pineapple though most good supermarkets do carry an abundance of pineapples seemingly made from styrofoam. and a decent vanilla ice cream.
The massive ingredient lists on these commercial ice creams is truly dispiriting, I finally settled on Häagen-Dazs who rebelliously make their ice cream from... cream, milk, sugar and egg yolks.
Compare that with our own Scottish Mackie's who apparently believe that a Traditional Luxury Dairy Ice Cream is best pumped full of glycerine, fatty acid glycerides, sodium alginate and guar gum.
Oooh yum - that definitely says tradition to me.
Just in case the evening wasn't going to be liquid enough, and also because as usual for this time of year I have a couple of enormous pumpkin to use up, I made a big pot of good old-fashioned lactose-gluten-meat-fish-free pumpkin soup, and discovered crispy fried rice ball dumplings. Which I definitely plan on making again.


You would think, wouldn't you, that all that finely ground fruit would be fantastically good for you? And that you would would wake up the next day bursting with health and enthusiasm? Explain then, if you can, how I came to be so massively unwell next morning that I had to take the day off work and spend it sleeping. Finally waking up at 3 p.m. with a sore throat and a terrible pain in all the diodes down my left side.
What a waste of a holiday - I must have been ill!
Nothing for it but more liquid - and Aline kindly made me up a cup-full of her family's traditional flu remedy though she added extra cayenne as she felt I had probably built up more resistance to it than most.
I have to report that her remedy has quite a kick to it, and if you can manage to overcome your gag reflex and force it all down it feels like it might be doing some good. It certainly brought me out in a cold sweat.
As if not sweating enough had been my problem all along.
Aline's Traditional Flu Remedy
drink veg
As administered by Aline when I felt under the weather.
Be warned - it induces gagging.
Be warned - it induces gagging.
Serves 1 Invalid
Ingredients
- 1 clove garlic, crushed
- ¼ teaspoon cayenne pepper
- juice of 1 lemon
- honey to taste
- hot water
- a little ginger syrup optional
Roughly crush the garlic clove into a mug.
Add some ginger or ginger syrup if you like.
Add cayenne pepper to taste.
Pour over hot water.
Top with the juice of a lemon, honey to taste.
Administer.
Retreat to a safe distance.
Add cayenne pepper to taste.
Pour over hot water.
Top with the juice of a lemon, honey to taste.
Administer.
Retreat to a safe distance.
Yeuch!
Leftover Cheese Risotto

My Mum's visit left me with a fridge full of leftover cheese, some of it barely edible, that needed using up. So I invited Flora over for a cheesy dinner.
She brought her new footwear to show me.
Furry Boots?
On Flora's legs!
Apart from my staple Wyke Farm award-winning cheddar from Asda their most cheese-flavoured cheese, I couldn't resist some of Dobbies (not the house Elf - the one owned by fucking Tesco) 70% off specials on Old Amsterdam a fine mature Gouda Blacksticks Blue, Shropshire Blue and a rather nice Cave Aged Gruyère (I wonder if they have to take it to a special cave, or if cave is corporate Swiss for shed?)
Then Mum and I even added to the collection with a couple of smoked cheeses from our usual visit to Edinburgh's Farmers Market. You know, I keep buying stuff from the Farmers' Market - and I keep being enormously disappointed. This time was no exception. I bought some red onions that were half rotted, and some East Pier Smokehouse cheeses.
Well they might have been cheeses. They were cheese shaped anyway.
The Smokehouse advertises that it smokes the best Scottish produce and makes it better! which seems a terrible slur on Scottish produce. Our packages claim their contents to have once been Morangie Brie (from Ruraidh Stone at Highland Fine Cheeses) and a St. Andrews Anster.
Imagine if you took some smoke, and furiously pumped it into cheese-shaped moulds until it became solid. You'd have something like these cheeses. More or less inedible - they could just as well have been smoked foam rubber - but you can use them as flavouring if you like.
Smoke flavouring. If you don't happen to have any actual smoke.
Flora says it's time I checked out Stockbridge's new Farmers' market!
Edinburgh's Farmers Market notable exceptions, of course, are coffees from the Police Box Coffee Bars (which morphed suspiciously seamlessly from the now liquidated California Coffee Company ) and hog roast rolls from Oink.
It just goes to show that Farmers' Markets are all very well - but you can't beat the real thing: local shops regularly buying local products from local producers. You know, the kind of thing our high streets were full off before that fucking Tesco* arrived.
* [Insert favourite fucking supermarket here]
Leftover Cheese Risotto
main cheese

I made this using cheese I needed to get rid of, but you might actually plan it with a more suitable collection.
The smoked brie really worked very well, I'd have that again (and to be honest I wouldn't use it for much of anything else),
but the blue cheese was somewhat overwhelming.
I'd use less of it if I was making this again.
I served it with Culross Palace's finest leftover beetroots and horseradish cream. I also had some leftover spinach leaves which I stir-fried and served as a side-dish sprinkled with, yes, more leftover smoked cheese.
But I could have blanched them (or some spring greens) and stirred them through the risotto at the end.
These leaves were the diametric opposite of baby spinach leaves - and much more like kale. Quite an eye-opener actually. I've been shopping at fucking Tesco* for so long I've forgetting what real vegetables look like!
Serves 4
Ingredients
- 3-4 tablespoons butter
- 1 small onions or a few shallots, finely chopped
- 4 garlic cloves, finely chopped
- 1-2 cups dry white wine
- 1 litre chicken stock, hot
- leftover herbs Thyme and parsley would work. Mint not so much.
Leftover Cheese:- Shropshire blue
- Gruyère
- Smoked brie
- mature cheddar
Foam the butter and sweat the onion until it turns glassy, sweat the garlic briefly,
then add the risotto rice and fry until the grains are well coated
and begin to swell. Add the white wine. Reduce.
I had some thyme to add at this stage.
Now over a low heat add the hot stock a ladleful at a time and stir until it has been absorbed.
The rice will be ready when it has turned tender and creamy, around 20 - 30 minutes.
Turn off the heat and stir in the cheeses.
Serve sprinkled with parsley, parmesan or pine nuts (if you have any of them).
You know, it's simple, it got rid of some leftover cheese, and it doesn't taste half bad either.
Crispy fried beadcrumbs (use lots of butter) with garlic and herbs make a good topping too.
Baked Beetroots with Horseradish Cream
starter salad veg
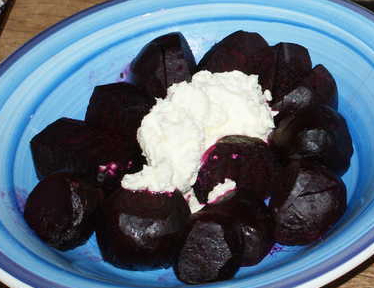
Serve warm or cold.
Serves 4
Ingredients
- 300g/6 small beetroots baby if you have them washed but unpeeled
- 2-3 knobs butter
- 1-2 tablespoons sherry or red wine vinegar
- sprigs of herbs (thyme, rosemary, bay leaves, etc)
For the horseradish sauce:- 75g horseradish root
- 250g double cream you may also use crème fraîche
- lemon juice or white wine vinegar optional
- salt
Horseradish Cream
Peel the horseradish and grate it into a bowl. Use the horrible rough side on your block grater - the one that always catches on things and has nasty strands hanging off it.
Moisten with some lemon juice, or white wine vinegar if you fancy (which also helps stop the root discolouring).
Mix with the cream.
Season - it will need some salt.
Leave overnight if you can to allow time for the flavour to infuse. But it won't kill your guests if you make it while the beets cook.
Beets
Pre-heat the oven to Gas mark 4.
On a sheet of tin foil, lay the washed beets, knobs of butter, vinegar and your selection of herbs.
Fold up the foil loosely into a nice pouch and bake for about an hour until the beets feel tender.
Remove from the oven, and when the beets are cool enough to handle, rub them out of their peel, halve any bigger ones and serve with the horseradish cream.
Peel the horseradish and grate it into a bowl. Use the horrible rough side on your block grater - the one that always catches on things and has nasty strands hanging off it.
Moisten with some lemon juice, or white wine vinegar if you fancy (which also helps stop the root discolouring).
Mix with the cream.
Season - it will need some salt.
Leave overnight if you can to allow time for the flavour to infuse. But it won't kill your guests if you make it while the beets cook.
This keeps in the fridge for a surprisingly long time - I've been eating a batch for a month now and it's still hasn't killed me.
Though I did make mine with a splash of lemon juice, which perhaps helps it to keep?
Beets
Pre-heat the oven to Gas mark 4.
On a sheet of tin foil, lay the washed beets, knobs of butter, vinegar and your selection of herbs.
Fold up the foil loosely into a nice pouch and bake for about an hour until the beets feel tender.
Remove from the oven, and when the beets are cool enough to handle, rub them out of their peel, halve any bigger ones and serve with the horseradish cream.
Lovely!
The horseradish goes rather nicely with the risotto too. Bonus!
The horseradish goes rather nicely with the risotto too. Bonus!
Breakfast With Mother
")
Mum came for a visit this weekend. Hurrah!
She took me to a show too - which I suppose is the kind of thing Mothers are supposed to do for their offspring.
In P. G. Wodehouse novels.

See it if you can, and take the kids. The younger the better. They'll be traumatised for life!
Mum's visits usually follow a simple formula: some mild exercise visiting local Scottish sites of interest, drinking (to excess), and eating (to excess).

The Palace is well worth a visit - both for its surprisingly authentic, dingy interior and the pleasant gardens to the rear; which offer both excellent views across the forth to the magnificence that is Grangemouth, and an extensive collection of very reasonably-priced garden vegetables that are for sale at the exit.
The hilltop Abbey is also well worth a visit, and we spent some time scratching our midge bites in its ancient graveyard where you will find gravestones sporting some very interesting tradesman's symbols from the 18th century, many of which we have been unable to interpret.
Such as this one, for example
(thanks Castaway Cottages!):
A third visit may be in order.But enough of this drivel - what, you ask, is Haggis Creggans?

Mum and I got a little more exercise on a Forth-side walk to Cramond, and I got rather more than I had bargained for having to lug car batteries around. The problems started when I came to start the car for the short drive down to the river, only to be greeted by a dismal churning noise, and no engine action. We got the car push-started by enlisting the help of a couple of game young ladies who happened to be passing - Thanks Girls! (Thank God too that the car was pointing downhill) I decided to immediately splash £80 on a new battery at Halfords (conveniently open on a Sunday) on the assumption that it was the most likely culprit given that I hadn't left any lights on overnight, the clock had reset itself to 1997 suggesting complete power loss, and the starter motor did appear to be turning. Just very slowly.
Good call as it happens - I had to use the battery and a pair of jump leads to get us back from Cramond, and just had time to swap in the new battery before (succesfully) driving to dinner.
When Mum comes I usually try and book a meal somewhere a bit posh (it's nice to have an excuse) and this trip we went for our second visit to Ondine.
Our first visit was so disappointing that I couldn't believe we hadn't just caught them on an off day, and all the raving reviews I read convinced me to give them a second chance.
Which just goes to show that other reviewers are complete idiots.

From muffins to... er... something indicating the end of a meal that starts with m? Massively stuffed? Munched out? But I digress...
A truly awesome meal - I have finally cracked the perfect Eggs Benedict. Cracked! And it only takes about 3 hours. Now let us forever go out for brunch and never make this again!
So that and a long-overdue return to the Kalpna covered the excessive eating (oh, me guts!).
Unfortunately, since I'm on the dry until Christmas the excessive drinking will just have to wait. For another 2 months, 2 days 7 hours and 37 minutes. To be precise. Sigh!
Yep, I'm having my annual abstinence in a desperate attempt to lose some gut before the onslaught of festivities.
So far so pointless.
Next up - dieting?


Holy Pork!

Another successful sailing trip on Erin to Holy Island (Lindisfarne) down there in foreign England. Successful in the sense that we actually made it to the island - there have been several earlier expeditions when we have been beaten back by the wind, the waves or the adverse tide of our own nausea.
It was a fairly windy weekend, all in all, but quite dry and even a bit sunny so the sailing was good.
We pretty much whipped around, and since we'd taken four days off we had plenty of time to cover the ground - berthing over in Eyemouth twice and hitting Pittenweem for a fish supper.
We like Pittenweem we do. We must do. We keep going back there.
Really, it is a nice little town, and the harbour is very comfortable even if, as it says in Reed's Almanac, it does not encourage yachts. Though to be fair, they've always been quite welcoming to us - it is a pretty busy working harbour and God knows there aren't that many of those left in Scotland.
Jude joined up with us in Eyemouth for a night of drinking relaxation, but otherwise it was just myself, John, Aidan, Ken and young Maggie. Young Maggie is still in training - she's getting on well with the drinking to embarrassing excess, and she has the vomiting nailed, but hasn't yet learned to take her sausages like a man.
Since Aidan did the drink shopping we ran out of Whisky and Gin (thank God for Cava eh?) and since John did the food shopping we were left with a herd of pork loins.
Which I gave a good home.
We also had a huge packet of stir-fry left over which joined the pork. But honestly - packets of stir-fry. What a gastronomic horror show! A motley collection of spare vegetable parts which quickly develop the smell of old mattress and all of which take different lengths of time to overcook.
Plus how many boats have you been on which possess a wok?
I rest my case.
I didn't actually produce any memorable meals this trip, but Ken was mightily impressed by my bacon sandwich.
And he was right to be - they are the best damn bacon sandwiches in the world.
So specially for you, Ken, here they are.
Enjoy.
Oh and on another topic - apparently there was a curry-eating contest at a restaurant here in Edinburgh last Saturday. Why wasn't I told?
Stir Fry Sesame Ginger Pork
oriental main meat nautical
Pork loin marinated in ginger, sesame oil and soy sauce. Stir fried.


An easy way to use up a boat-load of leftover pork loin.
You can freeze the cooked pork strips and thaw them out before re-frying to serve.
You can freeze the cooked pork strips and thaw them out before re-frying to serve.
Ingredients
- pork loin, sliced reasonably thinly
- ginger root, julienned
- sesame oil
- soy sauce
- garlic, sliced optional
- sesame seeds
- accompaniments (vegetables, noodles, etc...)
Spices optional:- five spice powder
- ginger powder
- ground black pepper
Thinly slice the pork and set to marinate with enough 50/50 sesame oil/soy sauce to generously coat,
thinly sliced ginger, garlic and spices if you like.
Leave for 5 minutes or for up to a day if you want a heavier flavour.
Heat a wok and fry the sesame seeds, remove and set aside.
Reheat the wok with a little oil and fry the pork in batches until nicely browned, adding more oil in between as necessary.
Now fry up whatever you will be having with your pork - sliced chinese cabbage, sliced okra whole okra stays too slimy mixed stir-fry vegetables, egg noodles, etc - add any remaining marinade, heat through, then serve with the pork and sesame seeds tossed over.
The Best Damn Bacon and Tomato Sandwich in the World
snack breakfast meat nautical
Yes, I'm sure I invented this. I remember it distinctly!
Ingredients
- bread
- bacon
- olive oil
- tomato
- mayonnaise
- tomato ketchup optional
Slice your bread. I don't care what kind of bread it is. Whatever kind you like.
Just because I'm actually writing down a recipe for a bacon sandwich doesn't absolve you of all responsibility.
Slice the tomatoes about the thickness of two pound coins (so fairly thin then), cut out the woody cores, and throw away the end bits. They're rubbish.
Fry your bacon on a high heat in a decent layer of olive oil so that the fat crisps up, but the meat stays moist. Personally I prefer thin slices of pancetta to bacon - it crisps up better, but whatever floats your boat.
Shuffle the bacon to one side or take it out, lower the heat slightly, replenish the oil, and add the tomato slices. Flip them once and cook them until they are on the verge of collapsing into a hopeless gooey mess. But not quite.
Job Done.
Slice the tomatoes about the thickness of two pound coins (so fairly thin then), cut out the woody cores, and throw away the end bits. They're rubbish.
Fry your bacon on a high heat in a decent layer of olive oil so that the fat crisps up, but the meat stays moist. Personally I prefer thin slices of pancetta to bacon - it crisps up better, but whatever floats your boat.
Shuffle the bacon to one side or take it out, lower the heat slightly, replenish the oil, and add the tomato slices. Flip them once and cook them until they are on the verge of collapsing into a hopeless gooey mess. But not quite.
Without wanting to mess with perfection, caramelising some thinly-sliced red onions alongside the bacon makes quite a nice addition too.
If you're cooking the bacon as part of a complete breakfast, or making sandwiches for an army, either roast it in a 200°C oven for 15-20 minutes or fry a pan-load at a time and keep it warm in a low oven until you're ready to serve.
Dip or fry! your slices of bread in the tomatoey bacon fat,
spread them with mayonnaise, layer one with bacon, then tomato.
If you have a sweet tooth you can dab on some tomato ketchup too.
Put the other slice on top.
If you're cooking the bacon as part of a complete breakfast, or making sandwiches for an army, either roast it in a 200°C oven for 15-20 minutes or fry a pan-load at a time and keep it warm in a low oven until you're ready to serve.
Job Done.
If there's not enough bacon fat to dip the slices feel free to give them a good buttering, but still fry one of the slices until it's crisped up.
It's worth it. A scattering of rocket leaves goes surprisingly well too, for the health-conscious.
If you are planning to take this sandwich up on deck in a howling gale then make sure to secure it with a cocktail stick.
Just saying!
Just saying!
The Best Damn Bacon and Mushroom Sandwich in the World
snack breakfast meat nautical
Did you know that HP Sauce is now only made in Holland?
Houses Of Parliament Sauce.
We had an empire once, now we can't even make our own national sauce.
Fucking tragic isn't it?
Houses Of Parliament Sauce.
We had an empire once, now we can't even make our own national sauce.
Fucking tragic isn't it?
Ingredients
- bread
- bacon
- olive oil
- mushrooms
- butter No - not margarine. Butter. No - not Lurpak Spreadable. That's not butter. Use butter.
- mayonnaise
- a few lettuce leaves optional
- HP Sauce not optional
Slice your bread. Don't use that industrial white pap though -
it won't take the strain and will collapse like a cheap hooker who got hit in the stomach by a fat guy with sores on his face.
Wipe your mushrooms clean of rat poo and slice vertically about the thickness of two pound coins.
Fry your bacon on a high heat in a decent layer of olive oil so that the fat crisps up, but the meat stays moist.
Towards the end of the bacon cooking time throw in the mushrooms and cook them until they glisten with eager sweat and have just started to wither.
Thickly butter (BUTTER) your bread, spread the top slice with mayonnaise, or first fry this buttered side of the top slice in the frying pan until crispy - which is quite nice too, and the bottom slice with the bacon so it melts the butter, squirt on the HP, cover with the mushrooms a few token lettuce leaves are also acceptable then place the other slice on top.
Eat.
Now you're HP.
The Best Damn Bacon and Egg Sandwich in the World
snack breakfast meat
For Flora.
Thank you for being so impressed!
Thank you for being so impressed!
Ingredients
- bread - probably soft white
- bacon
- olive oil
- eggs
- butter See above...
- sauce of choice optional
Slice your bread, and butter (BUTTER). Thickly.
Heat a layer of olive oil in a frying pan over high heat and fry the bacon until it crisps up at the edges. Lay it on one of the buttered slices of bread.
When the pan is good and hot again, carefully break in an egg. The whites should go all brown and crispy at the edge, but don't overcook the yolk. Flip the egg when it's cohered enough to do so.
Carefully remove the egg without breaking (this is when it usually happens) and place on top of the bacon.
Place the other slice of bread buttered-side-down in the pan. When the bread is nicely fried place it on top of the egg.
Sauce to taste.
Voilà
You can, of course, combine this with either of the sandwiches above.
O Tempura O Mores!

Finally - a long promised Sushi And Tempura evening with the Eldorardoes has arrived!
Sophie has been angling for another sushi evening (Angling. Sushi. Raw Fish. Geddit?) ever since our family lives went their separate ways.
Or theirs did. Mine's right here down the back of the couch where I left it.
Anyhoo, much as I love having the girlies over, like everything else it's been hard to find just the right time between my diary and theirs. But today is the day.
So the plan is that since Rachel is at work they'll get the bus over themselves and Rachel will come over later when she gets off.
Of course this rapidly descends into an organisational nightmare since the girlies can't remember from one day to the next where I live, or where they left the bit of paper with my address on it, how to phone people up to let them know they're on the way or how to get off the bus at my house before it sweeps them on to the glitzy wonders of Ocean Terminal's shopping centre.
They are soooo cute!
Fully cognisant (and frequently reminded) of Georgina's disliking for fish I also stocked up on pastrami, ham and nice blue cheese so that she would have some fishy-free alternatives to make sushi-type rolls from. (Despite her assurances that she would give the sushi a go she managed nothing more than a tiny lick at some pickled mackerel - perhaps not the best choice)
I stocked up good and early in the week on my vegetables, hams and cheeses and started trawling fishmongers and oriental supermarkets for the more exotic ingredients. Fresh fish, scallops, prawns not a problem: I have Clark Bros - a solid fishmonger near my office in Musselburgh, and Welch's just down the road in Newhaven.
Oh, and Georgina: that's pronounced clark brothers in the same way as Mario Bros is pronounced
mario brothers not mario bross.
Them's the rules - it's just the way it is.
You don't pronounce Mrs murrs or Mr murr do you?
See!
mario brothers.
MARIO BROTHERS.
We grownups just know these things - SO STOP ARGUING.
Them's the rules - it's just the way it is.
You don't pronounce Mrs murrs or Mr murr do you?
See!
mario brothers.
MARIO BROTHERS.
We grownups just know these things - SO STOP ARGUING.


I was disappointed not to find anywhere in Edinburgh that could provide me with any kind of fish eggs other than sturgeon caviar or cheap lumpfish imitation caviar. I wanted to get some Salmon eggs (fat jewelled orange Ikura for topping a gunboat sushi), flying-fish roe (tiny crunchy red Tobiko for decorating inside-out sushi) or Capelin (Smelt) roe (orange Masago for the dynamite) but was completely stymied.
I tried all the decent fishmongers - including Eddy's Seafood Market the reputable Bruntsfield upstart, all the fancy delicatessens (Valvona And Crolla, Marks and Spencers, Harvey Nicks) and all the Oriental supermarkets including the enormous Matthew's Foods.
But no joy.
Nor could I find any dried Shiitake mushrooms.
C'mon Edinburgh. Get your Japanese shit together!
I was, however, astonished and delighted to randomly find Sea Urchins (uni) at Clark Bros, and since they were only eighty pence each (EIGHTY PENCE EACH!) I bought four of them anticipating that one of them would be bad, and that I'd completely screw up opening one of them; this being my first time.
I just love sea urchins. To my mind their flavour is the very essence of the sea.
Though you do have to get over your natural squeamishness at the state of their insides to fully enjoy them when you prepare your own.
In the morning I took advantage of the peace and quiet in my flat to gut, clean and fillet the fishies (sea bass and mackerel) make up a vast (as I thought - though it soon ran out!) bowl of sushi rice, and to pickle the mackerel fillets.
Just time for a quick cleanup before the madness begins...
Welch have just expanded into a new retail shop-front which is very clean and attractively designed, plus they have a lobster tank. So as soon as the Eldorado girlies arrived (late) on the number 10 bus we headed on down to the fishmonger where the girls had great fun choosing a lobster of our own, settling on a youngster we named Larry. (The fishmonger told us that the lady lobsters have a sort of feathery net curtain effect around their back ends - something to do with catching their eggs. But I have yet to find any confirmation of that)
We also picked up a final few fresh fishy goodies that the girlies fancied - a slab of tuna (slightly dark and moist to be honest - which is a shame because they had some beautiful looking tuna earlier in the week) and a handful of enormous prawns.
 Georgina seemed to form a particularly strong relationship with Larry the Lobster introducing him to our checkout lady at Asda
and playing schoolyard games with him in the kitchen, so I was a little concerned how she would react to his slaughter.
Georgina seemed to form a particularly strong relationship with Larry the Lobster introducing him to our checkout lady at Asda
and playing schoolyard games with him in the kitchen, so I was a little concerned how she would react to his slaughter.We had a full and frank discussion about the best ways of dispatching Larry, in which I proposed putting him gently to sleep in the freezer for a couple of hours, but the girls all seemed happiest with the idea of just splitting his head open with a massive knife. Sadists.
They weren't so relaxed about it when it actually happened though - first there was the massive gush of clear liquid (I told them it was just seawater, but take it to have been lobster blood) which caused Sophie to run vomiting to the bathroom, and then there was all that embarrassing thrashing. Which went on. And on. And on. In fact the damn lobster just didn't seem to want to die, and continued twitching even after several minutes of swimming around in a giant pot of boiling water with his head split in two.
I since discovered from wikipedia that lobsters' brains operate from distributed ganglia, and that disabling only the frontal ganglia doesn't usually kill the lobster.
Now they tell me.
Unlike crabs, whose ganglia have more-or-less coalesced into two main units as their segments have fused together.
You can usually kill a crab by laying him on his back and driving a spike through the hole at the tip of the triangular apron below his eyes,
or by lifting the small flap at its bum and skewering him through the hole underneath.
Don't think about what that hole is.
So - the things I have learned about killing lobsters?
- Chill the lobster for a while in the freezer, or overnight in the fridge and then just chuck him into a big pot of boiling water and slap the lid on. Don't look! You could, of course, just freeze him completely - but then you've got a frozen lobster to defrost.
- If you do decide to cut his head in half, hold him firmly belly-side down in a thick towel and use a big knife to cut down through the cross-shaped markings on the back of his head in one firm thrust. Then hold on tight.
 Once everyone had gotten over the trauma of Larry's demise, and he was happily bubbling away in the pot for the necessary 5-6 minutes per pound,
The girlies got on with making their choice of the perfect dessert for an oriental dinner -
Astoundingly Good Chewy Chocolate Chip Cookies.
Once everyone had gotten over the trauma of Larry's demise, and he was happily bubbling away in the pot for the necessary 5-6 minutes per pound,
The girlies got on with making their choice of the perfect dessert for an oriental dinner -
Astoundingly Good Chewy Chocolate Chip Cookies.Fortunately I also had some (novelty) Green Tea Ice Cream that I'd made earlier!
The cookies didn't turn out quite as well as the last time we made them, but then Rachel's oven is of a more professional standard than my own. I figure the cooking temperature is a bit critical. And possibly the mixture was a bit runnier than the last time.
But the ice cream was a definite hit.
Finally on to preparing the dinner:
- cracking out Larry's flesh which Georgina undertook with evident relish
- slicing up the vegetables
- skinning, de-boning and cutting the fish
- making the tempura batter
- whipping up the tempura dipping sauce
- making up the dynamite sauce
- rolling up the sushis
I kept up the nagging though and we got quite a lot done, but some of the sushi ideas I'd had in mind ran out of steam: we didn't really get around to making the California Rolls, or organising the components for a do-it-yourself session.
Ah well, all the more leftovers for me!
So the meal plan:
- a clear light fish soup to start abandoned due to lack of energy
- pressed pickled mackerel log roll sushi check
- assorted rolled sushi check
- assorted gunboat sushi check
- inside-out California rolls featuring Larry The Lobster fail
- assorted tempura with dipping sauce check
- baked dynamite scallops check
- an exciting smorgasboard of do-it-yourself components from which guests will assemble their own sushies fail
- desserts double check!
OK, well mostly.
I added vodka to my batter number 7 and used Sapporo instead of soda water, filling up the soda syphon and refrigerating it about an hour before making the tempura.
To be honest I thought the result was a slight regression, and the batter came out a bit runny (you need to be able to pour the damn stuff into the syphon in the first place after all) and was probably not as crispy as it might have been after being made up for such a long time. But it did make a pretty good talking point, was a lot of fun when it ran out and farted batter everywhere, and was actually quite a handy way of dispensing the batter.
I look forward to trying it out for regular fish 'n' chip batter.

 Rachel, Chic and Nicky turned up in short order and the feeding commenced, with a round of sushi followed by an endless stream of tempura.
Except for Sophie, who after all my nagging felt too ill to eat with us and had to go for a little lie down in a darkened room. Poor old Sophie - the whole thing was her idea too. Fortunate indeed, then, that she was not too weak to pass the time watching YouTube videos and facebooking all her friends.
Nicky very kindly brought along a dessert of her own - knowing my fetish she baked me a ducky cake and a flock of fondant ducklings. So that's:
- desserts - triple check
 As is becoming something of a habit now, I had another dinner party for Aidan, Flora and Jenny featuring another endless stream of tempura
with the leftovers from this meal
- remembering to include the clear fish soup -
and still went on to make up a massive stockpot of leftover soup with the remains from that one.
As is becoming something of a habit now, I had another dinner party for Aidan, Flora and Jenny featuring another endless stream of tempura
with the leftovers from this meal
- remembering to include the clear fish soup -
and still went on to make up a massive stockpot of leftover soup with the remains from that one.As of two weeks later I'm still eating that soup, and I've got three more containers of it in the freezer!


Leftover Oriental Soup
soup veg


So, you've had your Sushi evening, tempura'd as many of the remains as you could stomach
and you're still left with a fridge of leftovers? What's a cook to do?
Simples - boil them all up in an oriental-style soup! Then by freezing the excess you can enjoy your sushi remains for weeks. Even months.
Yum.
Simples - boil them all up in an oriental-style soup! Then by freezing the excess you can enjoy your sushi remains for weeks. Even months.
Yum.
Makes Gallons. And Gallons.
Ingredients
- strong dashi
- kombu
- leftovers cut into bite-sized piecesbut not the okra
To Serve:- soy sauce
- some leftover spicy yoghurt sauce
Make up a potful of strong dashi (if you're using Honi-Dashi granules use about 1 tablespoon per 500ml water)
and put in a few sheets of kombu. Feel free to add soy sauce or mirin. Simmer until you're happy with the flavour.
Gently sweat your Alliums - thickly sliced rings of shallots, chunks of onion, lightly crushed garlic cloves in a little oil. Add any dried herbs you fancy.
Peel and cut your root vegetables (yam, sweet potato, carrot, potatoes though I chose not to use my potatoes - not oriental enough!) and add them to the pot.
Now add the flavoured dashi - just add as much as you need to produce a fairly watery soup.
Over a gentle heat add the rest of your leftovers - peeled and cut into bite-sized pieces as appropriate - in order of their required cooking time:
Serve with a dash of soy sauce or a blob of spicy yoghurt sauce, if you happen to have some.
I skipped my okra as I wasn't quite sure how that would work - I thought they might go all slimy. You could probably throw in any leftover fish you have lying around at the end too - as long as it isn't too oily.
Gently sweat your Alliums - thickly sliced rings of shallots, chunks of onion, lightly crushed garlic cloves in a little oil. Add any dried herbs you fancy.
Peel and cut your root vegetables (yam, sweet potato, carrot, potatoes though I chose not to use my potatoes - not oriental enough!) and add them to the pot.
Now add the flavoured dashi - just add as much as you need to produce a fairly watery soup.
Over a gentle heat add the rest of your leftovers - peeled and cut into bite-sized pieces as appropriate - in order of their required cooking time:
- thick coins of peeled fresh ginger
- sprouts if you must
- cauliflower stalks
- cauliflower florets
- broccoli stalks
- broccoli florets
- bell peppers
- mooli if you fancy them crunchy
- whole green chillies
- cabbage, sliced probably - I didn't have any
- mushrooms, quartered or sliced
- courgettes
- lettuce, sliced
- cubed tofu
- spring onions, sliced
- chopped fresh herbs coriander is nice
Serve with a dash of soy sauce or a blob of spicy yoghurt sauce, if you happen to have some.
I skipped my okra as I wasn't quite sure how that would work - I thought they might go all slimy. You could probably throw in any leftover fish you have lying around at the end too - as long as it isn't too oily.
Really quite delicious!
I added my mooli a bit later in the sequence which left them slightly crunchy. Otherwise you might add them with the other root vegetables, but hey - they're your leftovers!
I added my mooli a bit later in the sequence which left them slightly crunchy. Otherwise you might add them with the other root vegetables, but hey - they're your leftovers!
Pat the bird dry before carrying on with the roasting process.