Leftover Cheese Risotto

My Mum's visit left me with a fridge full of leftover cheese, some of it barely edible, that needed using up. So I invited Flora over for a cheesy dinner.
She brought her new footwear to show me.
Furry Boots?
On Flora's legs!
Apart from my staple Wyke Farm award-winning cheddar from Asda their most cheese-flavoured cheese, I couldn't resist some of Dobbies (not the house Elf - the one owned by fucking Tesco) 70% off specials on Old Amsterdam a fine mature Gouda Blacksticks Blue, Shropshire Blue and a rather nice Cave Aged Gruyère (I wonder if they have to take it to a special cave, or if cave is corporate Swiss for shed?)
Then Mum and I even added to the collection with a couple of smoked cheeses from our usual visit to Edinburgh's Farmers Market. You know, I keep buying stuff from the Farmers' Market - and I keep being enormously disappointed. This time was no exception. I bought some red onions that were half rotted, and some East Pier Smokehouse cheeses.
Well they might have been cheeses. They were cheese shaped anyway.
The Smokehouse advertises that it smokes the best Scottish produce and makes it better! which seems a terrible slur on Scottish produce. Our packages claim their contents to have once been Morangie Brie (from Ruraidh Stone at Highland Fine Cheeses) and a St. Andrews Anster.
Imagine if you took some smoke, and furiously pumped it into cheese-shaped moulds until it became solid. You'd have something like these cheeses. More or less inedible - they could just as well have been smoked foam rubber - but you can use them as flavouring if you like.
Smoke flavouring. If you don't happen to have any actual smoke.
Flora says it's time I checked out Stockbridge's new Farmers' market!
Edinburgh's Farmers Market notable exceptions, of course, are coffees from the Police Box Coffee Bars (which morphed suspiciously seamlessly from the now liquidated California Coffee Company ) and hog roast rolls from Oink.
It just goes to show that Farmers' Markets are all very well - but you can't beat the real thing: local shops regularly buying local products from local producers. You know, the kind of thing our high streets were full off before that fucking Tesco* arrived.
* [Insert favourite fucking supermarket here]
Leftover Cheese Risotto
main cheese

I made this using cheese I needed to get rid of, but you might actually plan it with a more suitable collection.
The smoked brie really worked very well, I'd have that again (and to be honest I wouldn't use it for much of anything else),
but the blue cheese was somewhat overwhelming.
I'd use less of it if I was making this again.
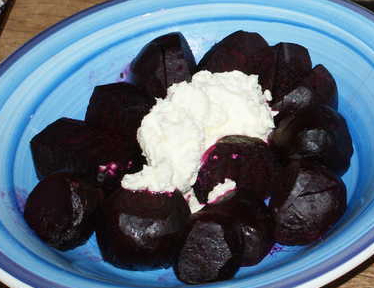
I served it with Culross Palace's finest leftover beetroots and horseradish cream. I also had some leftover spinach leaves which I stir-fried and served as a side-dish sprinkled with, yes, more leftover smoked cheese.
But I could have blanched them (or some spring greens) and stirred them through the risotto at the end.
These leaves were the diametric opposite of baby spinach leaves - and much more like kale. Quite an eye-opener actually. I've been shopping at fucking Tesco* for so long I've forgetting what real vegetables look like!
Serves 4
Ingredients
- 3-4 tablespoons butter
- 1 small onions or a few shallots, finely chopped
- 4 garlic cloves, finely chopped
- 1-2 cups dry white wine
- 1 litre chicken stock, hot
- leftover herbs Thyme and parsley would work. Mint not so much.
Leftover Cheese:- Shropshire blue
- Gruyère
- Smoked brie
- mature cheddar
Foam the butter and sweat the onion until it turns glassy, sweat the garlic briefly,
then add the risotto rice and fry until the grains are well coated
and begin to swell. Add the white wine. Reduce.
I had some thyme to add at this stage.
Now over a low heat add the hot stock a ladleful at a time and stir until it has been absorbed.
The rice will be ready when it has turned tender and creamy, around 20 - 30 minutes.
Turn off the heat and stir in the cheeses.
Serve sprinkled with parsley, parmesan or pine nuts (if you have any of them).
You know, it's simple, it got rid of some leftover cheese, and it doesn't taste half bad either.
Crispy fried beadcrumbs (use lots of butter) with garlic and herbs make a good topping too.
Baked Beetroots with Horseradish Cream
starter salad veg
Serve warm or cold.
Serves 4
Ingredients
- 300g/6 small beetroots baby if you have them washed but unpeeled
- 2-3 knobs butter
- 1-2 tablespoons sherry or red wine vinegar
- sprigs of herbs (thyme, rosemary, bay leaves, etc)
For the horseradish sauce:- 75g horseradish root
- 250g double cream you may also use crème fraîche
- lemon juice or white wine vinegar optional
- salt
Horseradish Cream
Peel the horseradish and grate it into a bowl. Use the horrible rough side on your block grater - the one that always catches on things and has nasty strands hanging off it.
Moisten with some lemon juice, or white wine vinegar if you fancy (which also helps stop the root discolouring).
Mix with the cream.
Season - it will need some salt.
Leave overnight if you can to allow time for the flavour to infuse. But it won't kill your guests if you make it while the beets cook.
Beets
Pre-heat the oven to Gas mark 4.
On a sheet of tin foil, lay the washed beets, knobs of butter, vinegar and your selection of herbs.
Fold up the foil loosely into a nice pouch and bake for about an hour until the beets feel tender.
Remove from the oven, and when the beets are cool enough to handle, rub them out of their peel, halve any bigger ones and serve with the horseradish cream.
Peel the horseradish and grate it into a bowl. Use the horrible rough side on your block grater - the one that always catches on things and has nasty strands hanging off it.
Moisten with some lemon juice, or white wine vinegar if you fancy (which also helps stop the root discolouring).
Mix with the cream.
Season - it will need some salt.
Leave overnight if you can to allow time for the flavour to infuse. But it won't kill your guests if you make it while the beets cook.
This keeps in the fridge for a surprisingly long time - I've been eating a batch for a month now and it's still hasn't killed me.
Though I did make mine with a splash of lemon juice, which perhaps helps it to keep?
Beets
Pre-heat the oven to Gas mark 4.
On a sheet of tin foil, lay the washed beets, knobs of butter, vinegar and your selection of herbs.
Fold up the foil loosely into a nice pouch and bake for about an hour until the beets feel tender.
Remove from the oven, and when the beets are cool enough to handle, rub them out of their peel, halve any bigger ones and serve with the horseradish cream.
Lovely!
The horseradish goes rather nicely with the risotto too. Bonus!
The horseradish goes rather nicely with the risotto too. Bonus!
Breakfast With Mother
")
Mum came for a visit this weekend. Hurrah!
She took me to a show too - which I suppose is the kind of thing Mothers are supposed to do for their offspring.
In P. G. Wodehouse novels.

See it if you can, and take the kids. The younger the better. They'll be traumatised for life!
Mum's visits usually follow a simple formula: some mild exercise visiting local Scottish sites of interest, drinking (to excess), and eating (to excess).

The Palace is well worth a visit - both for its surprisingly authentic, dingy interior and the pleasant gardens to the rear; which offer both excellent views across the forth to the magnificence that is Grangemouth, and an extensive collection of very reasonably-priced garden vegetables that are for sale at the exit.
The hilltop Abbey is also well worth a visit, and we spent some time scratching our midge bites in its ancient graveyard where you will find gravestones sporting some very interesting tradesman's symbols from the 18th century, many of which we have been unable to interpret.
Such as this one, for example
(thanks Castaway Cottages!):
A third visit may be in order.But enough of this drivel - what, you ask, is Haggis Creggans?

Mum and I got a little more exercise on a Forth-side walk to Cramond, and I got rather more than I had bargained for having to lug car batteries around. The problems started when I came to start the car for the short drive down to the river, only to be greeted by a dismal churning noise, and no engine action. We got the car push-started by enlisting the help of a couple of game young ladies who happened to be passing - Thanks Girls! (Thank God too that the car was pointing downhill) I decided to immediately splash £80 on a new battery at Halfords (conveniently open on a Sunday) on the assumption that it was the most likely culprit given that I hadn't left any lights on overnight, the clock had reset itself to 1997 suggesting complete power loss, and the starter motor did appear to be turning. Just very slowly.
Good call as it happens - I had to use the battery and a pair of jump leads to get us back from Cramond, and just had time to swap in the new battery before (succesfully) driving to dinner.
When Mum comes I usually try and book a meal somewhere a bit posh (it's nice to have an excuse) and this trip we went for our second visit to Ondine.
Our first visit was so disappointing that I couldn't believe we hadn't just caught them on an off day, and all the raving reviews I read convinced me to give them a second chance.
Which just goes to show that other reviewers are complete idiots.

From muffins to... er... something indicating the end of a meal that starts with m? Massively stuffed? Munched out? But I digress...
A truly awesome meal - I have finally cracked the perfect Eggs Benedict. Cracked! And it only takes about 3 hours. Now let us forever go out for brunch and never make this again!
So that and a long-overdue return to the Kalpna covered the excessive eating (oh, me guts!).
Unfortunately, since I'm on the dry until Christmas the excessive drinking will just have to wait. For another 2 months, 2 days 7 hours and 37 minutes. To be precise. Sigh!
Yep, I'm having my annual abstinence in a desperate attempt to lose some gut before the onslaught of festivities.
So far so pointless.
Next up - dieting?


Holy Pork!

Another successful sailing trip on Erin to Holy Island (Lindisfarne) down there in foreign England. Successful in the sense that we actually made it to the island - there have been several earlier expeditions when we have been beaten back by the wind, the waves or the adverse tide of our own nausea.
It was a fairly windy weekend, all in all, but quite dry and even a bit sunny so the sailing was good.
We pretty much whipped around, and since we'd taken four days off we had plenty of time to cover the ground - berthing over in Eyemouth twice and hitting Pittenweem for a fish supper.
We like Pittenweem we do. We must do. We keep going back there.
Really, it is a nice little town, and the harbour is very comfortable even if, as it says in Reed's Almanac, it does not encourage yachts. Though to be fair, they've always been quite welcoming to us - it is a pretty busy working harbour and God knows there aren't that many of those left in Scotland.
Jude joined up with us in Eyemouth for a night of drinking relaxation, but otherwise it was just myself, John, Aidan, Ken and young Maggie. Young Maggie is still in training - she's getting on well with the drinking to embarrassing excess, and she has the vomiting nailed, but hasn't yet learned to take her sausages like a man.
Since Aidan did the drink shopping we ran out of Whisky and Gin (thank God for Cava eh?) and since John did the food shopping we were left with a herd of pork loins.
Which I gave a good home.
We also had a huge packet of stir-fry left over which joined the pork. But honestly - packets of stir-fry. What a gastronomic horror show! A motley collection of spare vegetable parts which quickly develop the smell of old mattress and all of which take different lengths of time to overcook.
Plus how many boats have you been on which possess a wok?
I rest my case.
I didn't actually produce any memorable meals this trip, but Ken was mightily impressed by my bacon sandwich.
And he was right to be - they are the best damn bacon sandwiches in the world.
So specially for you, Ken, here they are.
Enjoy.
Oh and on another topic - apparently there was a curry-eating contest at a restaurant here in Edinburgh last Saturday. Why wasn't I told?
Stir Fry Sesame Ginger Pork
oriental main meat nautical
Pork loin marinated in ginger, sesame oil and soy sauce. Stir fried.


An easy way to use up a boat-load of leftover pork loin.
You can freeze the cooked pork strips and thaw them out before re-frying to serve.
You can freeze the cooked pork strips and thaw them out before re-frying to serve.
Ingredients
- pork loin, sliced reasonably thinly
- ginger root, julienned
- sesame oil
- soy sauce
- garlic, sliced optional
- sesame seeds
- accompaniments (vegetables, noodles, etc...)
Spices optional:- five spice powder
- ginger powder
- ground black pepper
Thinly slice the pork and set to marinate with enough 50/50 sesame oil/soy sauce to generously coat,
thinly sliced ginger, garlic and spices if you like.
Leave for 5 minutes or for up to a day if you want a heavier flavour.
Heat a wok and fry the sesame seeds, remove and set aside.
Reheat the wok with a little oil and fry the pork in batches until nicely browned, adding more oil in between as necessary.
Now fry up whatever you will be having with your pork - sliced chinese cabbage, sliced okra whole okra stays too slimy mixed stir-fry vegetables, egg noodles, etc - add any remaining marinade, heat through, then serve with the pork and sesame seeds tossed over.
The Best Damn Bacon and Tomato Sandwich in the World
snack breakfast meat nautical
Yes, I'm sure I invented this. I remember it distinctly!
Ingredients
- bread
- bacon
- olive oil
- tomato
- mayonnaise
- tomato ketchup optional
Slice your bread. I don't care what kind of bread it is. Whatever kind you like.
Just because I'm actually writing down a recipe for a bacon sandwich doesn't absolve you of all responsibility.
Slice the tomatoes about the thickness of two pound coins (so fairly thin then), cut out the woody cores, and throw away the end bits. They're rubbish.
Fry your bacon on a high heat in a decent layer of olive oil so that the fat crisps up, but the meat stays moist. Personally I prefer thin slices of pancetta to bacon - it crisps up better, but whatever floats your boat.
Shuffle the bacon to one side or take it out, lower the heat slightly, replenish the oil, and add the tomato slices. Flip them once and cook them until they are on the verge of collapsing into a hopeless gooey mess. But not quite.
Job Done.
Slice the tomatoes about the thickness of two pound coins (so fairly thin then), cut out the woody cores, and throw away the end bits. They're rubbish.
Fry your bacon on a high heat in a decent layer of olive oil so that the fat crisps up, but the meat stays moist. Personally I prefer thin slices of pancetta to bacon - it crisps up better, but whatever floats your boat.
Shuffle the bacon to one side or take it out, lower the heat slightly, replenish the oil, and add the tomato slices. Flip them once and cook them until they are on the verge of collapsing into a hopeless gooey mess. But not quite.
Without wanting to mess with perfection, caramelising some thinly-sliced red onions alongside the bacon makes quite a nice addition too.
If you're cooking the bacon as part of a complete breakfast, or making sandwiches for an army, either roast it in a 200°C oven for 15-20 minutes or fry a pan-load at a time and keep it warm in a low oven until you're ready to serve.
Dip or fry! your slices of bread in the tomatoey bacon fat,
spread them with mayonnaise, layer one with bacon, then tomato.
If you have a sweet tooth you can dab on some tomato ketchup too.
Put the other slice on top.
If you're cooking the bacon as part of a complete breakfast, or making sandwiches for an army, either roast it in a 200°C oven for 15-20 minutes or fry a pan-load at a time and keep it warm in a low oven until you're ready to serve.
Job Done.
If there's not enough bacon fat to dip the slices feel free to give them a good buttering, but still fry one of the slices until it's crisped up.
It's worth it. A scattering of rocket leaves goes surprisingly well too, for the health-conscious.
If you are planning to take this sandwich up on deck in a howling gale then make sure to secure it with a cocktail stick.
Just saying!
Just saying!
The Best Damn Bacon and Mushroom Sandwich in the World
snack breakfast meat nautical
Did you know that HP Sauce is now only made in Holland?
Houses Of Parliament Sauce.
We had an empire once, now we can't even make our own national sauce.
Fucking tragic isn't it?
Houses Of Parliament Sauce.
We had an empire once, now we can't even make our own national sauce.
Fucking tragic isn't it?
Ingredients
- bread
- bacon
- olive oil
- mushrooms
- butter No - not margarine. Butter. No - not Lurpak Spreadable. That's not butter. Use butter.
- mayonnaise
- a few lettuce leaves optional
- HP Sauce not optional
Slice your bread. Don't use that industrial white pap though -
it won't take the strain and will collapse like a cheap hooker who got hit in the stomach by a fat guy with sores on his face.
Wipe your mushrooms clean of rat poo and slice vertically about the thickness of two pound coins.
Fry your bacon on a high heat in a decent layer of olive oil so that the fat crisps up, but the meat stays moist.
Towards the end of the bacon cooking time throw in the mushrooms and cook them until they glisten with eager sweat and have just started to wither.
Thickly butter (BUTTER) your bread, spread the top slice with mayonnaise, or first fry this buttered side of the top slice in the frying pan until crispy - which is quite nice too, and the bottom slice with the bacon so it melts the butter, squirt on the HP, cover with the mushrooms a few token lettuce leaves are also acceptable then place the other slice on top.
Eat.
Now you're HP.
The Best Damn Bacon and Egg Sandwich in the World
snack breakfast meat
For Flora.
Thank you for being so impressed!
Thank you for being so impressed!
Ingredients
- bread - probably soft white
- bacon
- olive oil
- eggs
- butter See above...
- sauce of choice optional
Slice your bread, and butter (BUTTER). Thickly.
Heat a layer of olive oil in a frying pan over high heat and fry the bacon until it crisps up at the edges. Lay it on one of the buttered slices of bread.
When the pan is good and hot again, carefully break in an egg. The whites should go all brown and crispy at the edge, but don't overcook the yolk. Flip the egg when it's cohered enough to do so.
Carefully remove the egg without breaking (this is when it usually happens) and place on top of the bacon.
Place the other slice of bread buttered-side-down in the pan. When the bread is nicely fried place it on top of the egg.
Sauce to taste.
Voilà
You can, of course, combine this with either of the sandwiches above.
O Tempura O Mores!

Finally - a long promised Sushi And Tempura evening with the Eldorardoes has arrived!
Sophie has been angling for another sushi evening (Angling. Sushi. Raw Fish. Geddit?) ever since our family lives went their separate ways.
Or theirs did. Mine's right here down the back of the couch where I left it.
Anyhoo, much as I love having the girlies over, like everything else it's been hard to find just the right time between my diary and theirs. But today is the day.
So the plan is that since Rachel is at work they'll get the bus over themselves and Rachel will come over later when she gets off.
Of course this rapidly descends into an organisational nightmare since the girlies can't remember from one day to the next where I live, or where they left the bit of paper with my address on it, how to phone people up to let them know they're on the way or how to get off the bus at my house before it sweeps them on to the glitzy wonders of Ocean Terminal's shopping centre.
They are soooo cute!
Fully cognisant (and frequently reminded) of Georgina's disliking for fish I also stocked up on pastrami, ham and nice blue cheese so that she would have some fishy-free alternatives to make sushi-type rolls from. (Despite her assurances that she would give the sushi a go she managed nothing more than a tiny lick at some pickled mackerel - perhaps not the best choice)
I stocked up good and early in the week on my vegetables, hams and cheeses and started trawling fishmongers and oriental supermarkets for the more exotic ingredients. Fresh fish, scallops, prawns not a problem: I have Clark Bros - a solid fishmonger near my office in Musselburgh, and Welch's just down the road in Newhaven.
Oh, and Georgina: that's pronounced clark brothers in the same way as Mario Bros is pronounced
mario brothers not mario bross.
Them's the rules - it's just the way it is.
You don't pronounce Mrs murrs or Mr murr do you?
See!
mario brothers.
MARIO BROTHERS.
We grownups just know these things - SO STOP ARGUING.
Them's the rules - it's just the way it is.
You don't pronounce Mrs murrs or Mr murr do you?
See!
mario brothers.
MARIO BROTHERS.
We grownups just know these things - SO STOP ARGUING.


I was disappointed not to find anywhere in Edinburgh that could provide me with any kind of fish eggs other than sturgeon caviar or cheap lumpfish imitation caviar. I wanted to get some Salmon eggs (fat jewelled orange Ikura for topping a gunboat sushi), flying-fish roe (tiny crunchy red Tobiko for decorating inside-out sushi) or Capelin (Smelt) roe (orange Masago for the dynamite) but was completely stymied.
I tried all the decent fishmongers - including Eddy's Seafood Market the reputable Bruntsfield upstart, all the fancy delicatessens (Valvona And Crolla, Marks and Spencers, Harvey Nicks) and all the Oriental supermarkets including the enormous Matthew's Foods.
But no joy.
Nor could I find any dried Shiitake mushrooms.
C'mon Edinburgh. Get your Japanese shit together!
I was, however, astonished and delighted to randomly find Sea Urchins (uni) at Clark Bros, and since they were only eighty pence each (EIGHTY PENCE EACH!) I bought four of them anticipating that one of them would be bad, and that I'd completely screw up opening one of them; this being my first time.
I just love sea urchins. To my mind their flavour is the very essence of the sea.
Though you do have to get over your natural squeamishness at the state of their insides to fully enjoy them when you prepare your own.
In the morning I took advantage of the peace and quiet in my flat to gut, clean and fillet the fishies (sea bass and mackerel) make up a vast (as I thought - though it soon ran out!) bowl of sushi rice, and to pickle the mackerel fillets.
Just time for a quick cleanup before the madness begins...
Welch have just expanded into a new retail shop-front which is very clean and attractively designed, plus they have a lobster tank. So as soon as the Eldorado girlies arrived (late) on the number 10 bus we headed on down to the fishmonger where the girls had great fun choosing a lobster of our own, settling on a youngster we named Larry. (The fishmonger told us that the lady lobsters have a sort of feathery net curtain effect around their back ends - something to do with catching their eggs. But I have yet to find any confirmation of that)
We also picked up a final few fresh fishy goodies that the girlies fancied - a slab of tuna (slightly dark and moist to be honest - which is a shame because they had some beautiful looking tuna earlier in the week) and a handful of enormous prawns.
 Georgina seemed to form a particularly strong relationship with Larry the Lobster introducing him to our checkout lady at Asda
and playing schoolyard games with him in the kitchen, so I was a little concerned how she would react to his slaughter.
Georgina seemed to form a particularly strong relationship with Larry the Lobster introducing him to our checkout lady at Asda
and playing schoolyard games with him in the kitchen, so I was a little concerned how she would react to his slaughter.We had a full and frank discussion about the best ways of dispatching Larry, in which I proposed putting him gently to sleep in the freezer for a couple of hours, but the girls all seemed happiest with the idea of just splitting his head open with a massive knife. Sadists.
They weren't so relaxed about it when it actually happened though - first there was the massive gush of clear liquid (I told them it was just seawater, but take it to have been lobster blood) which caused Sophie to run vomiting to the bathroom, and then there was all that embarrassing thrashing. Which went on. And on. And on. In fact the damn lobster just didn't seem to want to die, and continued twitching even after several minutes of swimming around in a giant pot of boiling water with his head split in two.
I since discovered from wikipedia that lobsters' brains operate from distributed ganglia, and that disabling only the frontal ganglia doesn't usually kill the lobster.
Now they tell me.
Unlike crabs, whose ganglia have more-or-less coalesced into two main units as their segments have fused together.
You can usually kill a crab by laying him on his back and driving a spike through the hole at the tip of the triangular apron below his eyes,
or by lifting the small flap at its bum and skewering him through the hole underneath.
Don't think about what that hole is.
So - the things I have learned about killing lobsters?
- Chill the lobster for a while in the freezer, or overnight in the fridge and then just chuck him into a big pot of boiling water and slap the lid on. Don't look! You could, of course, just freeze him completely - but then you've got a frozen lobster to defrost.
- If you do decide to cut his head in half, hold him firmly belly-side down in a thick towel and use a big knife to cut down through the cross-shaped markings on the back of his head in one firm thrust. Then hold on tight.
 Once everyone had gotten over the trauma of Larry's demise, and he was happily bubbling away in the pot for the necessary 5-6 minutes per pound,
The girlies got on with making their choice of the perfect dessert for an oriental dinner -
Astoundingly Good Chewy Chocolate Chip Cookies.
Once everyone had gotten over the trauma of Larry's demise, and he was happily bubbling away in the pot for the necessary 5-6 minutes per pound,
The girlies got on with making their choice of the perfect dessert for an oriental dinner -
Astoundingly Good Chewy Chocolate Chip Cookies.Fortunately I also had some (novelty) Green Tea Ice Cream that I'd made earlier!
The cookies didn't turn out quite as well as the last time we made them, but then Rachel's oven is of a more professional standard than my own. I figure the cooking temperature is a bit critical. And possibly the mixture was a bit runnier than the last time.
But the ice cream was a definite hit.
Finally on to preparing the dinner:
- cracking out Larry's flesh which Georgina undertook with evident relish
- slicing up the vegetables
- skinning, de-boning and cutting the fish
- making the tempura batter
- whipping up the tempura dipping sauce
- making up the dynamite sauce
- rolling up the sushis
I kept up the nagging though and we got quite a lot done, but some of the sushi ideas I'd had in mind ran out of steam: we didn't really get around to making the California Rolls, or organising the components for a do-it-yourself session.
Ah well, all the more leftovers for me!
So the meal plan:
- a clear light fish soup to start abandoned due to lack of energy
- pressed pickled mackerel log roll sushi check
- assorted rolled sushi check
- assorted gunboat sushi check
- inside-out California rolls featuring Larry The Lobster fail
- assorted tempura with dipping sauce check
- baked dynamite scallops check
- an exciting smorgasboard of do-it-yourself components from which guests will assemble their own sushies fail
- desserts double check!
OK, well mostly.
I added vodka to my batter number 7 and used Sapporo instead of soda water, filling up the soda syphon and refrigerating it about an hour before making the tempura.
To be honest I thought the result was a slight regression, and the batter came out a bit runny (you need to be able to pour the damn stuff into the syphon in the first place after all) and was probably not as crispy as it might have been after being made up for such a long time. But it did make a pretty good talking point, was a lot of fun when it ran out and farted batter everywhere, and was actually quite a handy way of dispensing the batter.
I look forward to trying it out for regular fish 'n' chip batter.

 Rachel, Chic and Nicky turned up in short order and the feeding commenced, with a round of sushi followed by an endless stream of tempura.
Except for Sophie, who after all my nagging felt too ill to eat with us and had to go for a little lie down in a darkened room. Poor old Sophie - the whole thing was her idea too. Fortunate indeed, then, that she was not too weak to pass the time watching YouTube videos and facebooking all her friends.
Nicky very kindly brought along a dessert of her own - knowing my fetish she baked me a ducky cake and a flock of fondant ducklings. So that's:
- desserts - triple check
 As is becoming something of a habit now, I had another dinner party for Aidan, Flora and Jenny featuring another endless stream of tempura
with the leftovers from this meal
- remembering to include the clear fish soup -
and still went on to make up a massive stockpot of leftover soup with the remains from that one.
As is becoming something of a habit now, I had another dinner party for Aidan, Flora and Jenny featuring another endless stream of tempura
with the leftovers from this meal
- remembering to include the clear fish soup -
and still went on to make up a massive stockpot of leftover soup with the remains from that one.As of two weeks later I'm still eating that soup, and I've got three more containers of it in the freezer!


Leftover Oriental Soup
soup veg


So, you've had your Sushi evening, tempura'd as many of the remains as you could stomach
and you're still left with a fridge of leftovers? What's a cook to do?
Simples - boil them all up in an oriental-style soup! Then by freezing the excess you can enjoy your sushi remains for weeks. Even months.
Yum.
Simples - boil them all up in an oriental-style soup! Then by freezing the excess you can enjoy your sushi remains for weeks. Even months.
Yum.
Makes Gallons. And Gallons.
Ingredients
- strong dashi
- kombu
- leftovers cut into bite-sized piecesbut not the okra
To Serve:- soy sauce
- some leftover spicy yoghurt sauce
Make up a potful of strong dashi (if you're using Honi-Dashi granules use about 1 tablespoon per 500ml water)
and put in a few sheets of kombu. Feel free to add soy sauce or mirin. Simmer until you're happy with the flavour.
Gently sweat your Alliums - thickly sliced rings of shallots, chunks of onion, lightly crushed garlic cloves in a little oil. Add any dried herbs you fancy.
Peel and cut your root vegetables (yam, sweet potato, carrot, potatoes though I chose not to use my potatoes - not oriental enough!) and add them to the pot.
Now add the flavoured dashi - just add as much as you need to produce a fairly watery soup.
Over a gentle heat add the rest of your leftovers - peeled and cut into bite-sized pieces as appropriate - in order of their required cooking time:
Serve with a dash of soy sauce or a blob of spicy yoghurt sauce, if you happen to have some.
I skipped my okra as I wasn't quite sure how that would work - I thought they might go all slimy. You could probably throw in any leftover fish you have lying around at the end too - as long as it isn't too oily.
Gently sweat your Alliums - thickly sliced rings of shallots, chunks of onion, lightly crushed garlic cloves in a little oil. Add any dried herbs you fancy.
Peel and cut your root vegetables (yam, sweet potato, carrot, potatoes though I chose not to use my potatoes - not oriental enough!) and add them to the pot.
Now add the flavoured dashi - just add as much as you need to produce a fairly watery soup.
Over a gentle heat add the rest of your leftovers - peeled and cut into bite-sized pieces as appropriate - in order of their required cooking time:
- thick coins of peeled fresh ginger
- sprouts if you must
- cauliflower stalks
- cauliflower florets
- broccoli stalks
- broccoli florets
- bell peppers
- mooli if you fancy them crunchy
- whole green chillies
- cabbage, sliced probably - I didn't have any
- mushrooms, quartered or sliced
- courgettes
- lettuce, sliced
- cubed tofu
- spring onions, sliced
- chopped fresh herbs coriander is nice
Serve with a dash of soy sauce or a blob of spicy yoghurt sauce, if you happen to have some.
I skipped my okra as I wasn't quite sure how that would work - I thought they might go all slimy. You could probably throw in any leftover fish you have lying around at the end too - as long as it isn't too oily.
Really quite delicious!
I added my mooli a bit later in the sequence which left them slightly crunchy. Otherwise you might add them with the other root vegetables, but hey - they're your leftovers!
I added my mooli a bit later in the sequence which left them slightly crunchy. Otherwise you might add them with the other root vegetables, but hey - they're your leftovers!
Quick Thai Curry and Muffins

Tonight Flora felt the need for muffins. The need.
She's a girl and you know how they get these uncontrollable urges. Not like boys. Boys can easily contain their urges. We just choose not to.
Anyway, Flora came round to make muffins, and left the decision of what to have for dinner open-ended, so we spent an extraordinary amount of time examining my local Chinese takeaway menu for dishes which might satisfy Flora's further need for mushrooms and bamboo shoots, and planning our trip to Asda to take in ordering the dishes on the way out and collecting them on the way back. The trip to Asda being necessary due to the quite astonishing fact that I appear not to possess a bun tin!
Unfortunately, despite all our meticulous planning, we were disappointed to find that the takeaway is shut on Tuesdays and now, Mondays.
Today is Monday and it is shut.
So we decided to fall back on our own resources and make a chow mein stir-fry with some tinned bamboo shoots and mushrooms from Asda, only to be hugely disappointed to find that Asda did not have a tin of bamboo shoots. How is that possible? I thought it was some kind of law that every supermarket was required to have a tin of bamboo shoots hidden amongst the bottles of Kikkoman soy sauce in their ersatz ethnic food section?
But then, just after we had abandoned our stir-fry plans, and Flora had started hinting about how much she liked coconut rice, we came across a cellophane pack of stir-fry ingredients that, lo and behold, contained some bamboo shoots. So I was just about ready to throw away all my cooking principles and buy a pre-prepared pack of stir-fry garbage, when I was saved by the fact that Asda had completely sold out of fresh egg noodles. Hurrah!
So we returned to the theme of coconut rice and I persuaded Flora that I could turn out a simple Thai-style stew in a reasonable amount of time (whilst going easy on the chillies). Which simple recipe I reproduce below.
Whilst looking for the bamboo shoots Flora was distracted by a tin of lychees, so we took that along too - I used some of the juice in both my coconut rice and and the Thai curry - then threw the rest of it away.
OK, not really. They aren't half bad with a dollop of yoghurt as dessert.
And the muffins weren't half bad either. Though Flora might have gone slightly mental on the flavourings, electing for both chocolate chips and blueberries.
Lots of blueberries.
And not much stirring.
Which meant that occasionally you would get a mouthful of blueberries so intense that it was like biting into a lemon, and some of the muffins seemed to be entirely muff.
But we like to live dangerously!
Quick Thai Curry
oriental curry main fowl thai

Shouldn't take more than half an hour. Honest!
Serves 4
Ingredients
- 1 can coconut milk
- lychee juice
- couple tablespoons fish sauce
- 2" ginger, sliced into discs
- 2 chicken breasts, cut into bite-sized pieces
- 150g baby button mushrooms
- half dozen (50g) baby corns, sliced
- 4 spring onions, sliced on a diagonal
- 1 sweet red pepper, sliced
- half-dozen chillies, whole
- 1 courgette, sliced on a diagonal
- a half dozen tiny cherry tomatoes, whole optional
- a small can of bamboo shoots if you can find any - which I couldn't
- 50g mange tout, sliced prettily
- handful basil leaves, torn
- juice of 1 lime
Start your rice. It will steam nicely while you make up the Quick Thai Curry.
Empty the coconut milk into a pot with a couple of tablespoons of fish sauce, about one quarter of the juice from a can of lychees and set to warm gently.
Peel a couple of inches of ginger, slice it into rounds and add to the pot.
Slice the chicken breasts into halves or thirds lengthways, then diagonally into bite-sized pieces and add to the pot.
Wipe the baby button mushrooms and add them whole to the pot.
Halve the baby corn lengthways, slice them diagonally if they are too large and add them to the pot.
Slice 4 spring onions diagonally and add to the pot.
Remove the core and seeds from the red pepper, slice into bite-sized pieces or rounds and add to the pot.
Throw half a dozen whole chillies (or to taste) into the pot.
Slice the courgette into diagonal rounds and add to the pot (and those cherry tomatoes if you want).
Cut the mange tout into pretty pieces and add to the pot.
Simmer until the vegetables are tender, but don't overdo it (as I did). They'll probably be ready straight away, so then throw in a handful of torn basil leaves, remove from the heat, stir through the juice of a lime and serve over your perfectly cooked rice.
It ain't exactly authentic, but it tastes pretty good for all that.
Coconut Rice
oriental staple side veg vegan
This is a slightly different approach than a coconut rice I've tried before.
I think it works slightly better - you could probably use tinned coconut milk or water with 2-3 teaspoons of coconut powder in it per cup instead of the coconut cream block though.
I think it works slightly better - you could probably use tinned coconut milk or water with 2-3 teaspoons of coconut powder in it per cup instead of the coconut cream block though.
Serves 2
Ingredients
- 1 or 2 oz creamed coconut block
- 8 fl oz jasmine rice
- lychee juice
- grated peel of 1 lime or lemon
- 1 teaspoon salt
Grate the creamed coconut piece and make up to 16 fl oz of liquid (or perhaps a little more)
with some (about 4 fl oz or to taste) juice from a can of lychees if you have one,
lemon or lime juice if you feel like it and the rest of boiling water.
Grate in the peel of a lemon or lime, and add a teaspoon of salt.
Gently bring to the boil in a small pot, seal with a tightly-fitting lid and put over the lowest possible heat Careful! Coconut cream will burn. or into a low oven for 20 minutes or so.
Grate in the peel of a lemon or lime, and add a teaspoon of salt.
Gently bring to the boil in a small pot, seal with a tightly-fitting lid and put over the lowest possible heat Careful! Coconut cream will burn. or into a low oven for 20 minutes or so.
From Flora's Friend.
Probably called Persephone.
From what I was able to extract from her Word document.
Privacy and security being alien concepts at Microsoft!
Probably called Persephone.
From what I was able to extract from her Word document.
Privacy and security being alien concepts at Microsoft!
Muffins
sweet veg

Flora got this recipe from a friend of hers, and it seems a little confused to be honest.
It's not really clear whether you should include the weight of the eggs in your 200g of wet ingredients
or not (we didn't). Anyhoo, here is her recipe verbatim...
Makes about 18
Ingredients
- 100g butter
- 275g self raising flour
- 75g sugar
- 2 large eggs
- you need 200g of wet ingredients, this can be any combination of:
- eggs really?
- craime fraiche
- yoghurt we used yoghurt
- cream
- etc.
- vanilla essence
- flavourings
Choose a muffin flavour - could be blueberries chocolate chips or anything like that. If you want to make banana ones, you can use one mashed and add raisins if you like them.
Preheat a fan-assisted oven to 180°C I used gas mark 6
Prepare a muffin tray, easier if you put cases in before the mixture is ready.
Melt butter in pan (don't fry it)
Mix flour and sugar in bowl
Put wet ingredients (not the two large eggs) in a bowl and mix them
Whisk the two eggs together
Put all ingredients together, including flavourings and melted butter, and quickly mix and spoon into the cases
Put in the oven for 20 minutes
Not too bad - I've had better muffins, but they worked perfectly well.
Try not to go too mental with the flavourings :)
Try not to go too mental with the flavourings :)
Yacht Master Chef
Today I passed my Yachtmaster exam. Yay for me!
I'm especially glad about it because I would not want to do that again. It was extremely gruelling since there were three of us taking the exam, and the examiner insisted on making sure each of us performed every single possible exercise. Sometimes several times.
The whole thing took from 11 o'clock Thursday morning to 2 o'clock Friday afternoon, with a generous 3 hours of sleep between 5 and 8 a.m.
The weather was mostly pretty mild, which was a bonus, but there was still enough wind to allow one of us, who shall remain nameless, to ram the boat at speed into the end of a pontoon whilst undertaking an extremely tricky manoeuvre to come alongside under sail and in the dark, putting an enormous gouge into the hull.
We decided to simplify our evening meal during the exam by making up a huge pot of stew beforehand ready to reheat. I made my apple-supplemented stovies, and invented an interesting variation on the theme of glazed carrots. (There was no honey on board, see, but plenty of marmalade.) They seemed to go down well, though there were complaints that no one could taste the apple in the stovies. Which, I explained, was the general idea. A subtle enhancement, I explained. Also, being Scottish, they complained that they weren't authentic Stovies since they had corned beef in.
Everyone's a critic.
Marmalade Glazed Carrots
side veg nautical
A bit like Michael Smith's
Glazed Carrot Sticks with Ginger and Orange
but with a secret ingredient.
The quantities I used were a bit random, but I wouldn't overdo the marmalade. I had about 1 tablespoon for a half dozen carrots.
The quantities I used were a bit random, but I wouldn't overdo the marmalade. I had about 1 tablespoon for a half dozen carrots.
Serves 6
Ingredients
- 6-8 carrots, julienned
- tablespoon butter
- glass orange juice
- ½ chicken stock cube optional
- 1 tablespoon marmalade
- salt
Peel and julienne your carrots into thick matchsticks.
Put them in a pot with a good knob of butter, a pinch of salt, a crumbled stock cube if you fancy it, the marmalade and a splash or so of orange juice. Don't overdo the orange juice - you just need about half an inch in the bottom of the pot.
Bring to the boil and simmer the pot, half-covered until the carrots are tender and most of the liquid has evaporated.
Give them an occasional shake to make sure they aren't sticking.
Interesting. I wonder if you could completely do away with the orange juice. After all, that's all marmalade is right - sugar and orange juice?
I should think ground ginger, cinnamon or nutmeg would be good additions, and you could always add some brown sugar if the carrots aren't sweet enough.
I should think ground ginger, cinnamon or nutmeg would be good additions, and you could always add some brown sugar if the carrots aren't sweet enough.
Cooking With Mouth Sores

Poor old Flora - here she comes for dinner with a mouth full of ulcers.
Stress apparently. Definitely nothing to do with trouble, you know, down there. Definitely not.
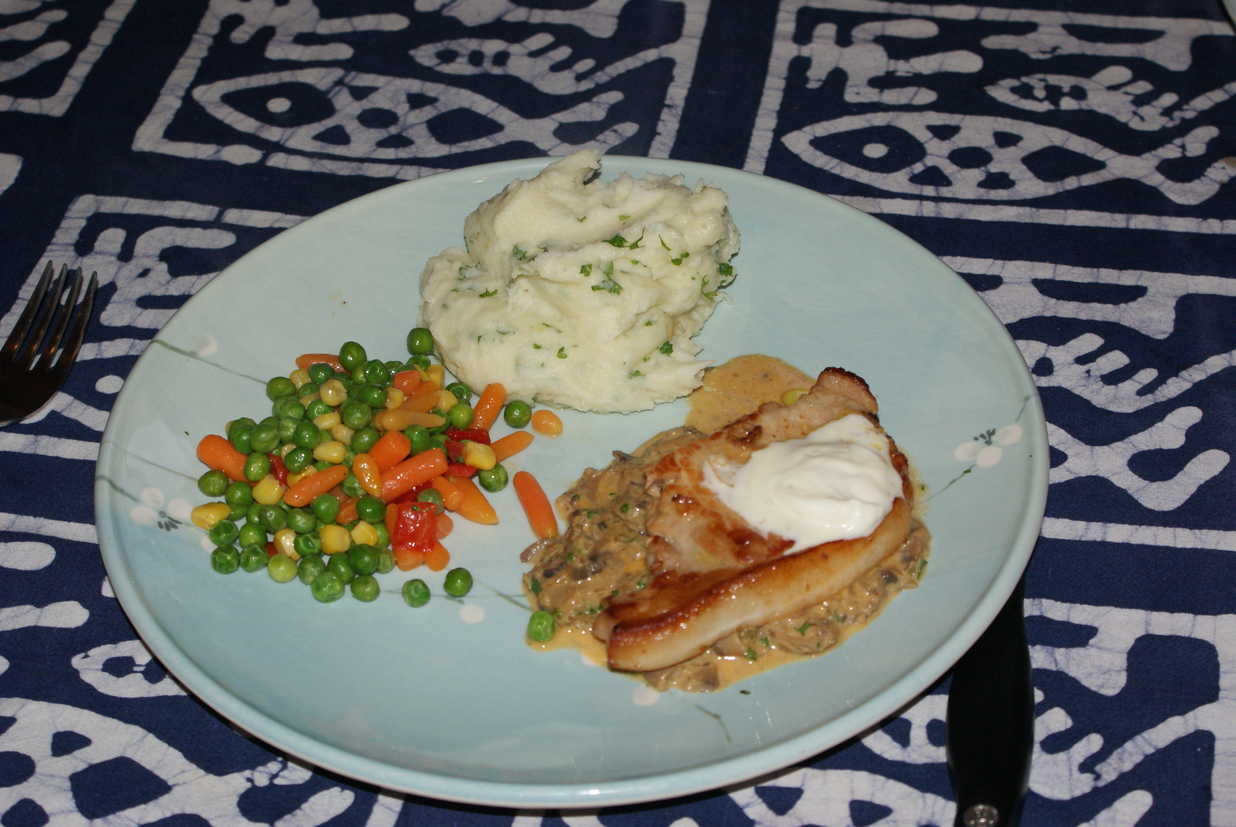
So I concocted a soft and gentle meal, nothing too spiky, nothing too spicy, nothing too acid, all creams and purée: A nice (if unauthentic) pork stroganoff, puréed potatoes, mixed veg and to follow; a soothing homemade vanilla ice cream.
Mostly wasted effort, though, as the ungrateful guest started her visit by helping herself to some distinctly ulcer-unfriendly pickled gherkin slices, and then spent the evening complaining that what she really fancied was take-away food like what they're always eating in The Big Bang Theory.
Pah.
Not a bad meal on the whole, though I think it could have done with some kind of crispy, crunchy greens (cabbage or kale?) on the side.
I'm ashamed to say that the the mixed veg were just out of a frozen packet that I heated in a small pot with a generous knob of butter. But the pork stroganoff is real enough.
Pork Stroganoff
main meat
Pork chops in a mushroom and sour cream sauce
Ingredients
- 4 pork chops
- olive oil
- 1 clove garlic, thinly sliced optional
- 1 onion, peeled, finely chopped
- 500g button mushrooms
- 2 tbsps butter
- 150ml white wine
- 1 tsp paprika
- 125ml sour cream
- 1 scant tsp Dijon mustard
- salt
- 2 tablespoons chopped parsley or chives
To make the sauce, halve the onion and chop finely.
Clean the mushrooms, separate the stalks and mince them up. Finely slice the heads.
Melt the butter in a large frying pan and gently sweat the onions for 10 minutes until they soften, add the paprika and stir through, then add the mushrooms (in batches if necessary) and sweat them gently for a further 10 minutes until they have leaked much of their water and reduced. Set the mixture aside in a pot.
Now add a little more butter to the frying pan and fry up the mushroom stalks until they dry out, then deglaze with the wine and simmer to reduce by half. Use a stick blender to purée this reduction to a smooth paste, adding a little of the onion mixture and more wine if required. Add this to the onion mushroom mixture in the pot. This whole purée thing is optional - just deglaze the onion mixture with the white wine if you can't be bothered with it but it will produce a thicker, smoother sauce.
Now cook the chops - you can just fry them over a moderate heat for 10 minutes, season, turn them for another 5 minutes, then rest.
Or you can do as I did, and brown the seasoned chops quickly in olive oil over high heat, then throw in a finely sliced garlic clove, scrape out the pan and wrap the whole lot tightly in tin foil and stick it in the oven to cook slowly until you're ready for it, say half an hour at Gas Mark 4.
When you're ready to serve, reheat the mushroom mixture in the pot for 5 minutes until well mixed, then add the sour cream and the mustard (both to taste), season, and cook stirring for a further 5 minutes. Add any juices from the chops when they are cooked.
Serve the chops with mushroom sauce spooned over, an extra dollop of sour cream, and scattered with herbs.
Melt the butter in a large frying pan and gently sweat the onions for 10 minutes until they soften, add the paprika and stir through, then add the mushrooms (in batches if necessary) and sweat them gently for a further 10 minutes until they have leaked much of their water and reduced. Set the mixture aside in a pot.
Now add a little more butter to the frying pan and fry up the mushroom stalks until they dry out, then deglaze with the wine and simmer to reduce by half. Use a stick blender to purée this reduction to a smooth paste, adding a little of the onion mixture and more wine if required. Add this to the onion mushroom mixture in the pot. This whole purée thing is optional - just deglaze the onion mixture with the white wine if you can't be bothered with it but it will produce a thicker, smoother sauce.
Now cook the chops - you can just fry them over a moderate heat for 10 minutes, season, turn them for another 5 minutes, then rest.
Or you can do as I did, and brown the seasoned chops quickly in olive oil over high heat, then throw in a finely sliced garlic clove, scrape out the pan and wrap the whole lot tightly in tin foil and stick it in the oven to cook slowly until you're ready for it, say half an hour at Gas Mark 4.
Interestingly, I decided to compare the two cooking methods - pan-frying a chop
and cooking a chop in the oven for half an hour at Gas Mark 4 (both defrosted frozen chops - if that makes any difference).
The oven-cooked chop was noticeably drier and tougher,
so although it can make the preparation a bit easier particularly if you don't have much hob space,
I'd have to recommend against it.
When you're ready to serve, reheat the mushroom mixture in the pot for 5 minutes until well mixed, then add the sour cream and the mustard (both to taste), season, and cook stirring for a further 5 minutes. Add any juices from the chops when they are cooked.
Serve the chops with mushroom sauce spooned over, an extra dollop of sour cream, and scattered with herbs.
The chops were ever-so-slightly tough, so maybe I left them too long in the oven or it was too hot and dried them out.
Or maybe you could skip the frying step and put the chops straight in the oven with the garlic - after all they'll be covered in sauce when you serve them so no one will know if they appear to have come from an albino pig.
Or maybe you could skip the frying step and put the chops straight in the oven with the garlic - after all they'll be covered in sauce when you serve them so no one will know if they appear to have come from an albino pig.
Or maybe, as I mention above, it's just a bit of a rubbish way to cook them?
The sauce is good. You can also add a squirt of lemon juice to it at the end if you like, and you aren't cooking for someone with an acid sensitivity.
Easy Puréed Potatoes
side staple veg
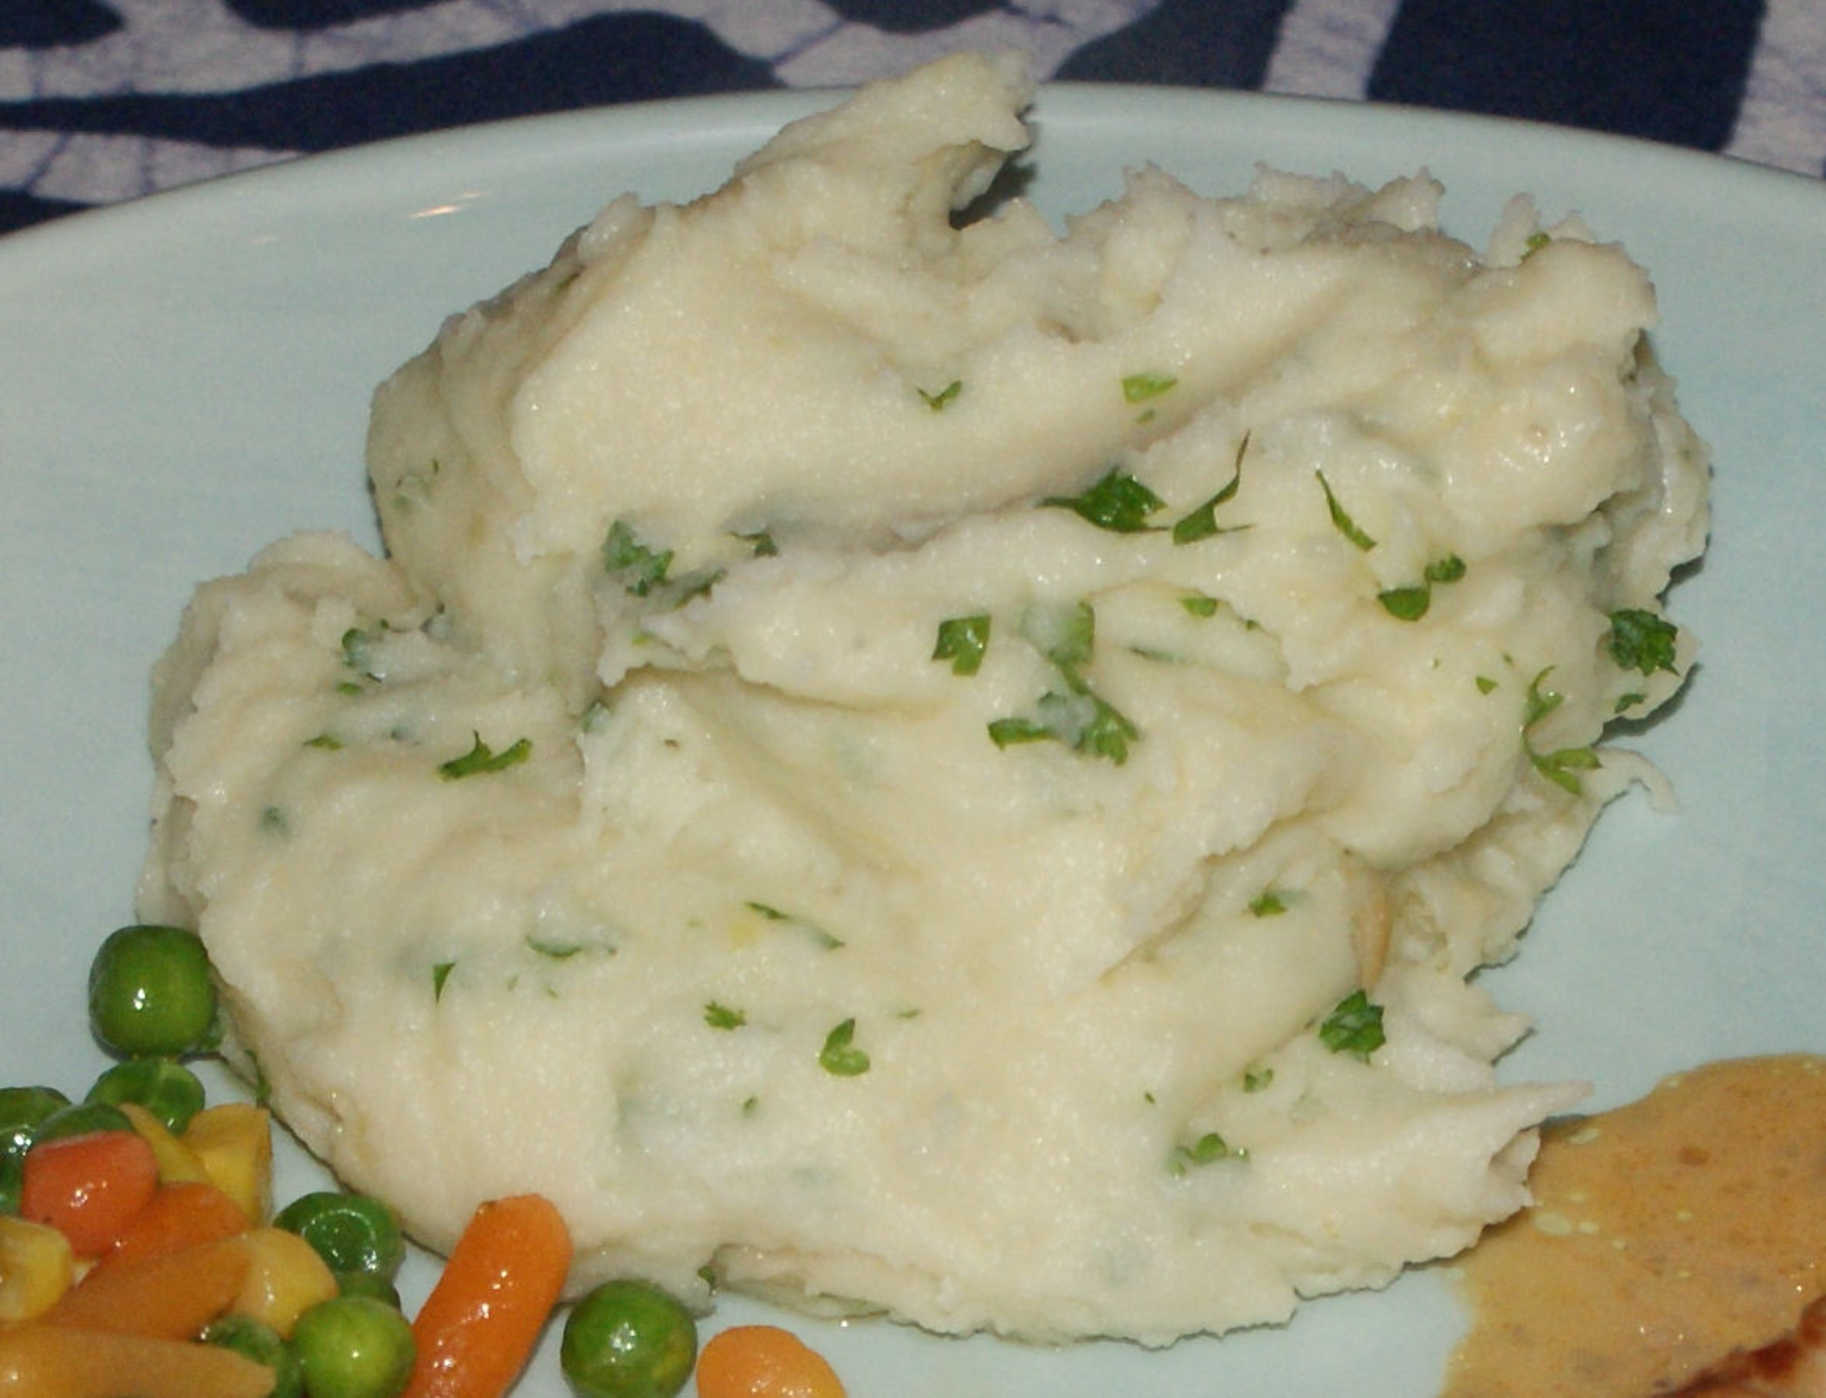
I normally prefer to bake the potatoes for mash, but I had a bag of smallish King Edwards that needed using up,
and couldn't be arsed to bake them all.
Serves 4
Ingredients
- 2 lb smallish potatoes in their skins
- butter. Lots of butter.
- 150ml single cream
- 1 head garlic
- salt. Lots of salt.
- 2 tablespoons chopped parsley
Bake your head of garlic at Gas Mark 4-6 for 30 minutes until soft and oozing, cut the top off the head and squeeze out the cloves
using the back of a heavy knife (or your fingers).
Meanwhile simmer the potatoes in their skins for about half an hour until they are extremely soft and their skins have started breaking open. Drain them and leave to cool a little until you can handle them.
Carefully scrape off the peel with a sharp knife, and run the potatoes through a potato ricer back into the pot over a low heat to dry out, then vigorously beat in your garlic and your butter - a generous amount of butter. As much butter as you think you could possibly stand. Then a bit more. Now you can cover this mixture with buttered paper until you need it.
To serve, heat the cream, put the potato in a pot over low heat and whisk in the hot cream in a steady stream until the mash is nice and smooth, season generously, stir in the parsley and serve.
You can simplify this by heating the cream in the pot and then mashing the potato into it, though you won't incorporate quite as much air that way.
You can also add the butter at this stage too, rather than beating it in earlier.
You might prefer the coarser result, more like mash than purée.
You can also add the butter at this stage too, rather than beating it in earlier.
You might prefer the coarser result, more like mash than purée.
Vanilla Ice Cream
dessert veg

If, like me, you have a pathetic freezer, make sure to put your ice cream machine sleeve in to freeze several days ahead of schedule.
Also make sure that the custard mix is really well chilled before churning it in the machine.
Also make sure that the custard mix is really well chilled before churning it in the machine.
Serves 4
Ingredients
- 1 vanilla pod
- 4 egg yolks
- 450ml single cream
- 150ml double cream
- 110g/4 oz caster sugar
Remember to put the ice cream machine sleeve in your freezer a day or so ahead of time.
Slit the vanilla pod down its length. Put in a pot with the single cream, bring slowly to a gentle simmer and leave to infuse.
Beat the eggs with the sugar until pale and fluffy.
Pour the strained cream into the egg yolks, stirring constantly, then set the bowl over simmering water (or if you're feeling brave in a pot directly over a very low heat) and whisk vigorously as the custard heats to 80°C, and thickens enough to coat the back of a spoon.
Don't let it curdle or turn to scrambled eggs. You might be able to rescue it by dumping the pot into cold water and whisking like a lunatic if this does happen. Or you might not.
Put in the fridge, then the freezer to cool and thoroughly chill.
Whisk up the double cream until it is thick (though not stiff), then stir it into the custard and finally pour it into your ice cream machine.
Put into the freezer until required, but take it out and set it in the fridge 15 minutes or so before serving so it's not too hard.
Rather nice, but unlikely as it seems, just a bit too creamy.
It's actually better made following the ingredients listed in the
Carved Angel Cookery Book:
- 3 egg yolks
- 300ml milk
- 150ml double cream
Cooking With Mother
Mum's up for a weekend visit.
Mostly visiting me, though she did spend a day with Rachel's Mum. Hey, just 'cos we split up doesn't mean our Mums have to!
We started off the weekend with a shopping trip to the Farmers' Market, where I feasted on Oink's Hog Roast rolls, and a California Coffee Company coffee. You know - the people that operate out of those ex-police boxes.
They make the best coffee. Except for Kilimanjaro Coffee on Nicolson Street. They make the best coffee.
But I still like the California Coffee Company's Java roast. In fact I've got a bag of their beans right here. Well. In the kitchen. I don't sit and hug it or anything. Not with the lights on, at least.
Anyway, we finished the day off with a very satisfying return visit to David Bann's most excellent vegetarian restaurant on St Mary's Street. The savoury courses were just great, and their Chilli Margaritas as good as I remembered. The desserts were a bit disappointing, but maybe that was only in comparison. They didn't seem to show quite the same sure-handed inventiveness in the matching of flavours.
I was particularly impressed by their beautifully aromatic tarragon-butter spinach, and a delightful banana chutney which perfectly complemented their Thai-style tofu fritters, which Mum ordered for a starter.
According to the waitress, who seemed well-informed so I trust her, they leave the bananas to almost-ferment, before mixing with turmeric, cumin, fennel and fenugreek.
Suitably inspired I decided to recreate Bann's tarragon spinach when I cooked Mum's leaving dinner tonight.
At the Farmers' Market we picked up some of Stichill Jersey's Eildon Blue Cheese which needs eating, that I thought that might go well with broccoli, and we also bought some rather nice looking whitecurrants (since all the gooseberries on offer looked sad and mouldy), that I decided need a crumble to bring out their best side.
The rest, as they say, is history...
Mostly visiting me, though she did spend a day with Rachel's Mum. Hey, just 'cos we split up doesn't mean our Mums have to!
We started off the weekend with a shopping trip to the Farmers' Market, where I feasted on Oink's Hog Roast rolls, and a California Coffee Company coffee. You know - the people that operate out of those ex-police boxes.
They make the best coffee. Except for Kilimanjaro Coffee on Nicolson Street. They make the best coffee.
But I still like the California Coffee Company's Java roast. In fact I've got a bag of their beans right here. Well. In the kitchen. I don't sit and hug it or anything. Not with the lights on, at least.
Anyway, we finished the day off with a very satisfying return visit to David Bann's most excellent vegetarian restaurant on St Mary's Street. The savoury courses were just great, and their Chilli Margaritas as good as I remembered. The desserts were a bit disappointing, but maybe that was only in comparison. They didn't seem to show quite the same sure-handed inventiveness in the matching of flavours.
I was particularly impressed by their beautifully aromatic tarragon-butter spinach, and a delightful banana chutney which perfectly complemented their Thai-style tofu fritters, which Mum ordered for a starter.
According to the waitress, who seemed well-informed so I trust her, they leave the bananas to almost-ferment, before mixing with turmeric, cumin, fennel and fenugreek.
Update:
I emailed that nice Mr Bann to ask him how to make his chutney so I could have a go for a curry party
(Oooh mister that burns!) and here's what he told me:
Mum's main course were chilli crepes served with a chocolate sauce. Not only did the sauce complement the crepes,
but it was also delicious with our side order of rosemary and thyme sprinkled chunky chips.
I think there may a meal with chips and chocolate sauce in the offing!Suitably inspired I decided to recreate Bann's tarragon spinach when I cooked Mum's leaving dinner tonight.
At the Farmers' Market we picked up some of Stichill Jersey's Eildon Blue Cheese which needs eating, that I thought that might go well with broccoli, and we also bought some rather nice looking whitecurrants (since all the gooseberries on offer looked sad and mouldy), that I decided need a crumble to bring out their best side.
The rest, as they say, is history...
Broccoli and Blue Cheese Soufflé
main veg cheese


The soufflés are quite small - Mum and I ate 2 and a half each quite happily,
but we didn't have much else with them. And then we were stuffed.
I'm not exactly sure about the milk quantity - I just used enough to lubricate the broccoli and start the white sauce.
I'm not exactly sure about the milk quantity - I just used enough to lubricate the broccoli and start the white sauce.
Makes 6
Ingredients
- 150g blue cheese
- 500g broccoli, before trimming
- 40g butter
- 40g plain flour
- 200ml milk or cream
- 4 eggs, separated
- grated nutmeg
For the red pepper sauce:- 2 red peppers
- a little cream
- pinch paprika or cayenne pepper
Put a baking tray in the oven and preheat to 200°C/Gas Mark 6.
Separate the eggs and whisk the egg whites until stiff.
Crumble the blue cheese.
Rub 6 x 200ml ramekins or one large dish with melted butter and, if you want, dust with grated parmesan cheese or fine white breadcrumbs.
Steam or blanch the broccoli until quite tender, remove most of their stems, and purée in a blender with a little milk.
Cook the butter and flour gently in a pan for 2-3 minutes, then gradually add a little milk, whisking until you have a thick paste. Cook a little, then add the broccoli, the cheese, a grating of nutmeg and a little salt and heat through. You should have a thick sauce at this stage. Add more milk if it is more like cement.
Off the heat whisk in the egg yolks, then whisk in a spoonful of the egg whites before carefully folding in the rest.
Pour into the ramekins almost to the rim then cook on the pre-heated baking tray for 8-10 minutes or 25-30 minutes if making one large soufflé.
Serve with the red pepper sauce.
The Red Pepper Sauce
Cut 2 red peppers in half and deseed them.
Place the pepper halves under a grill until the skin chars, and the flesh softens, then put them in a plastic bag to cool.
Peel the skin away from the peppers, then blend them together with a little cream and paprika or cayenne pepper.
Heat gently in a small pan.
Very tasty I thought.
Though they are difficult to turn out. It might be best to serve them in their ramekins, with the sauce on the side.
If you must turn them out, run a knife around the edge, turn them upside down on a small plate, then flip them back up again using a fish slice underneath them, and slide them onto the plates.
Tarragon Butter Spinach
side veg

Ingredients
- 150g/5 oz spinach
- 1-2 tablespoons butter
- a handful of tarragon probably about 6g, leaves stripped and finely chopped
Chop the tarragon leaves quite finely, and heat gently with the butter in a small pot.
Leave to infuse.
Wash the spinach, put in a large pot, cover and shake it around over the heat until it wilts.
Squeeze dry (if there is any extra water). Feel free to use the juice in your broccoli soufflé mixture. Set aside.
When you're ready to serve re-heat the spinach in the tarragon-flavoured butter and serve.
Wash the spinach, put in a large pot, cover and shake it around over the heat until it wilts.
Squeeze dry (if there is any extra water). Feel free to use the juice in your broccoli soufflé mixture. Set aside.
I finely chopped up my spinach at this stage, but the result was a bit too much like creamed spinach.
It's better only roughly chopped.
When you're ready to serve re-heat the spinach in the tarragon-flavoured butter and serve.
Lovely aromatic spinach - the flavours complement each other well.
I'm not sure if you particularly need to infuse the butter first, since spinach cooks so quickly anyway you might try just throwing the spinach and the chopped tarragon into a pan and wilting them together in butter.
I'm not sure if you particularly need to infuse the butter first, since spinach cooks so quickly anyway you might try just throwing the spinach and the chopped tarragon into a pan and wilting them together in butter.
Whitecurrant Crumble
dessert veg

Ingredients
- 450g whitecurrants
- 6 oz plain flour
- 3 oz butter
- 4 tablespoons demerara sugar
- caster sugar
Preheat the oven to 200°C/Gas Mark 6.
Clean the currants and put them in an ovenproof dish with a pinch of salt and a scattering of caster sugar - about a tablespoon.
Mix the flour and butter with your fingers until you have rough breadcrumbs then mix in the demerara with a knife.
Scatter over the fruit.
Bake for 30-40 minutes or until turning nicely golden on top.
Serve with custard.
Not bad. The currants are tart enough to work in a crumble, and the pips aren't too annoying.
Real Egg Custard
sauce dessert veg
The quantities here aren't critical, you want enough cream for the number of people you have to feed,
enough sugar to make it sweet enough for the dish you are serving it with
(you can add more sugar once you're heating the custard),
and as many egg yolks as you need to thicken it to your taste.
You can get it surprisingly thick if you add loads of yolks.
The quantities below are a good starter, though I would probably use 4 eggs and a little less sugar - I like my custard thin.
You can get it surprisingly thick if you add loads of yolks.
The quantities below are a good starter, though I would probably use 4 eggs and a little less sugar - I like my custard thin.
Serves 4
Ingredients
- 1 pint/600ml single cream though you can use milk if you're poor
- 6 egg yolks
- 125g/4 oz caster sugar
- vanilla pod, or Sauternes wine
If you happen to have some vanilla-ed caster sugar already made up, so much the better,
otherwise slit or cut the vanilla pod and put it into a saucepan
with the cream, bring to the boil and leave to infuse.
Whisk the egg yolks with the caster sugar, strain the vanilla-flavoured milk into the yolks then return to the saucepan.
Gently heat the custard whilst whisking vigorously until you it thickens. Don't let it curdle or turn into scrambled eggs. You can do this in a double-boiler if you like.
Apparently you can also use Sauternes (or other dessert wine) as the flavouring for special occasions.
Heat the wine and whisk it into the egg yolks before the cream.
Whisk the egg yolks with the caster sugar, strain the vanilla-flavoured milk into the yolks then return to the saucepan.
Gently heat the custard whilst whisking vigorously until you it thickens. Don't let it curdle or turn into scrambled eggs. You can do this in a double-boiler if you like.
You might be able to rescue curdled custard by plunging the pan into cold water and whisking like mad.
You could also try adding a teaspoonful of cold water to the mixture.
If you are afraid of scrambling your custard then a teaspoon of cornflour added to the cream will help to stabilise the mixture.
If you are afraid of scrambling your custard then a teaspoon of cornflour added to the cream will help to stabilise the mixture.
Apparently you can also use Sauternes (or other dessert wine) as the flavouring for special occasions.
Heat the wine and whisk it into the egg yolks before the cream.
Crab Ice Cream

I've been thinking about a seafood ice cream for a while now, as you do.
Partly for my long-maturing stuffed-squid meal, and partly for the hell of it.
I ultimately want to do something with wasabi crackers (like those chinese prawn crackers, but wasabi flavoured)
and maybe oyster ice cream as a starter,
but I decided to have my first stab at making one for a dessert and I went for crab,
though I also thought prawns might work.
I invited Aidan and Jude around for a first attempt at making our planned Erin's Signature West Coast dish. Over here on the East Coast - since we didn't get the chance when we were on the West Coast. That's to be a black pudding and scallop stack with a lime-butter sauce for your information.
I didn't tell them what the pudding was going to be!
menu
Starter
Goat's Cheese Parcels
Main Course
Scallops and Black Pudding Stack
Pak Choy in Soy Sauce
Lime Butter Sauce
Dill Mashed Potatoes
Dessert
Crab Ice Cream
That's right, ice cream. But with crab.
Goat's Cheese Parcels
Main Course
Scallops and Black Pudding Stack
Pak Choy in Soy Sauce
Lime Butter Sauce
Dill Mashed Potatoes
Dessert
Crab Ice Cream
That's right, ice cream. But with crab.
I started on the dessert the night before, making up the broth before going to bed.
I also remembered to get the ice cream machine sleeve into the freezer compartment days early
(hoping to to do better than the last time I tried to
use the damn thing).
Then I had time to make up the custard early in the morning and leave it chilling for several hours first in the fridge
then in the freezer to get it absolutely as cold as possible without freezing it, knowing how poor my freezer is.
This seemed to do the trick, because the ice cream machine successfully churned the mixture to ice cream in about 20 minutes. (Well, to be honest it wasn't quite frozen even then, but it was very thick and the machine couldn't churn it any more. Maybe I was a bit heavy on the egg yolks?). Then I stuck the sleeve in the freezer until dinner time, turning the contents around with a wooden spoon every so often when I remembered.
The ice cream was quite a lot of effort really, it's a pity the result was a bit underwhelming.
I made the guests try and guess the flavour, which they eventually got with a bit of prompting (and some incredulous muttering) and they were mightily impressed with the concept. But not the delivery.
I don't think the world is quite ready for seafood ice cream as a dessert. It's too much of a psychological dissociation when your mind is expecting pudding and your mouth is feeding you crab.
I still think it has potential as a starter, but I'm pretty much alone here. Aidan did suggest wasabi ice cream instead of my wasabi crackers. I guess there's gonna to have to be a lot of ice cream making going on. Maybe when Aline comes back and we get a new freezer?
Aidan kindly brought the starters, which were rather tasty hope I've got the recipe down Aidan?
I started the mash off nice and early by baking King Edwards well ahead of time for 90 minutes at Gas Mark 6 before running them through a potato ricer and then leaving them to one side in a small bowl, liberally smeared with butter and covered with cling film. When ready to reheat the potato I boiled up some milk and double cream in a large pan, then added the potato and some roughly chopped dill fronds and mashed the potato around until it had warmed through, adjusting the seasoning at the end.
I made up the lime butter sauce half an hour ahead and kept it in a warmed thermos flask.
I fried the black pudding and apple rings just before the guests arrived and put them in a low oven to keep warm.
Preparing everything in advance this way meant that I needed only to stir-fry the pak choy, reheat the riced potato and fry the scallops to serve up the dinner.
The sauce is pretty nice, and quite popular with the other guests, but it's very limey. I found it a little bit too tart for the meal, I think I'd try a Mornay sauce next time.
I decided to try out a couple of different ways of frying up the scallops, just for comparison:
However, it's a lot easier to control the slow cooking in butter, it may take a bit longer (and cost a fortune in butter), but you can better manage the cooking speed, and they don't really need that much attention. When you're frying them over high heat it's quite easy to overcook the scallops and turn them into little rubber bullets.
So especially if you've got a lot of other stuff going on I think the deep-butter technique is going to work best.
Thanks Og!
As per usual, I managed to completely forget about taking photos of the end product. So I had to make the meal all over again the next day using some leftover black pudding. But it did give me the chance to try the black pudding stacks with a Mornay sauce instead and I also added a layer of crispy pancetta to the stack, which I managed to forget the first time around! I also served it with celeriac purée instead of mashed potato this time. Just 'cos I didn't want to throw half a celeriac away. It was perfectly good that way too.
I rather liked the Mornay sauce (though don't make it too thick), but then I missed the limeyness of the first meal. Maybe I could try a Mornay sauce with a hint of lime! Ugh no! Or a lime-butter sauce with a bit less lime?
Meh. Life's too short.
This seemed to do the trick, because the ice cream machine successfully churned the mixture to ice cream in about 20 minutes. (Well, to be honest it wasn't quite frozen even then, but it was very thick and the machine couldn't churn it any more. Maybe I was a bit heavy on the egg yolks?). Then I stuck the sleeve in the freezer until dinner time, turning the contents around with a wooden spoon every so often when I remembered.
The ice cream was quite a lot of effort really, it's a pity the result was a bit underwhelming.
I made the guests try and guess the flavour, which they eventually got with a bit of prompting (and some incredulous muttering) and they were mightily impressed with the concept. But not the delivery.
I don't think the world is quite ready for seafood ice cream as a dessert. It's too much of a psychological dissociation when your mind is expecting pudding and your mouth is feeding you crab.
I still think it has potential as a starter, but I'm pretty much alone here. Aidan did suggest wasabi ice cream instead of my wasabi crackers. I guess there's gonna to have to be a lot of ice cream making going on. Maybe when Aline comes back and we get a new freezer?
Aidan kindly brought the starters, which were rather tasty hope I've got the recipe down Aidan?
I started the mash off nice and early by baking King Edwards well ahead of time for 90 minutes at Gas Mark 6 before running them through a potato ricer and then leaving them to one side in a small bowl, liberally smeared with butter and covered with cling film. When ready to reheat the potato I boiled up some milk and double cream in a large pan, then added the potato and some roughly chopped dill fronds and mashed the potato around until it had warmed through, adjusting the seasoning at the end.
I also boiled up some celeriac with the intention of mashing that in to my potato, but I didn't cook it nearly enough
(even though it was simmering for a good 20 minutes).
I should have known better -
after all you need to take a very different approach to making celeriac purée.
I made up the lime butter sauce half an hour ahead and kept it in a warmed thermos flask.
I fried the black pudding and apple rings just before the guests arrived and put them in a low oven to keep warm.
Preparing everything in advance this way meant that I needed only to stir-fry the pak choy, reheat the riced potato and fry the scallops to serve up the dinner.
The sauce is pretty nice, and quite popular with the other guests, but it's very limey. I found it a little bit too tart for the meal, I think I'd try a Mornay sauce next time.
I decided to try out a couple of different ways of frying up the scallops, just for comparison:
- My usual method of quick-frying in (or brushed with) a little clarified butter (or pancetta fat) over high heat in a griddle.
- A method suggested by John Ogden who used to own the Seafood Temple in Oban — Gently fry the the scallops in an inch or two of butter turning occasionally, until they turn opaque.
However, it's a lot easier to control the slow cooking in butter, it may take a bit longer (and cost a fortune in butter), but you can better manage the cooking speed, and they don't really need that much attention. When you're frying them over high heat it's quite easy to overcook the scallops and turn them into little rubber bullets.
So especially if you've got a lot of other stuff going on I think the deep-butter technique is going to work best.
Thanks Og!
As per usual, I managed to completely forget about taking photos of the end product. So I had to make the meal all over again the next day using some leftover black pudding. But it did give me the chance to try the black pudding stacks with a Mornay sauce instead and I also added a layer of crispy pancetta to the stack, which I managed to forget the first time around! I also served it with celeriac purée instead of mashed potato this time. Just 'cos I didn't want to throw half a celeriac away. It was perfectly good that way too.
I rather liked the Mornay sauce (though don't make it too thick), but then I missed the limeyness of the first meal. Maybe I could try a Mornay sauce with a hint of lime! Ugh no! Or a lime-butter sauce with a bit less lime?
Meh. Life's too short.
First attempt at Erin's West Coast signature dish
Scallops and Black Pudding
main fish meat
Scallops, apple rings, pancetta and black pudding stacks

Although this never quite got made on board Erin, we always planned to try it out during our West Coast holiday.
It would have worked pretty well on board to be honest. There's nothing here you couldn't do in a cramped galley on a storm-tossed sea.
Except eat it of course.
Except eat it of course.
Serves 6. Or 4 with a couple of spares
Ingredients
- 6" Stornaway black pudding
- 1 apple
- 8 scallops
- 6 slices pancetta
- lime butter sauce or thin Mornay sauce
- nutmeg
Heat the oven to 180°C/350°F/Gas 4.
Place the pancetta slices on a baking tray, and if you want them to be extra flat put another baking tray on top of them to hold them down (feel free to put greaseproof paper on either side), then bake them in the oven until they are browned and crisp - about 7 minutes.
Remove from the tray and set them on kitchen paper until required. You can keep the fat from the baking tray to brush over the scallops if you want.
Turn the oven down low.
Slice the black pudding into rounds roughly ¾" thick - one per person.
Peel the apple, slice it into rounds, about ⅓" thick, set them aside in a bowl covered with lemon juice and water to stop them browning.
Fry the black pudding slices until they crisp up, then put them in the oven.
Fry the apple rings (you can use the same fat, but you might want to pour off the excess) until they caramelise, then lay a slice of pancetta and an apple ring atop each of the black pudding rounds and return them to the oven.
Fry up the scallops and put one or two on top of the black pudding stack.
You can either fry the scallops on a very hot frying pan (but clean the one you've just used) or griddle using a little clarified butter or the pancetta fat,
or you can cook them more slowly in a good depth of butter in a small saucepan.
Pool a little of the sauce in the middle of each plate, place a black pudding stack on each puddle, grate over a little nutmeg and serve.
Pretty good - although the pancetta is optional, it definitely helps to bring some texture to the dish.
Personally I think I prefer Mornay sauce, but the lime-butter was popular. It might be worth trying to add a little lemon/lime into the Mornay for the best of both worlds.
Nope. Don't do that it just tastes weird!
Personally I think I prefer Mornay sauce, but the lime-butter was popular. It might be worth trying to add a little lemon/lime into the Mornay for the best of both worlds.
Nope. Don't do that it just tastes weird!
Crab Ice Cream
dessert fish


Not exactly a success - it was fun trying out, and I think there's some potential there
(though not everyone agrees with me), but I wouldn't try this at home kids!
Serves 6
Ingredients
- 1 crab - around 700g
- 4 shallots, chopped
- 1 leek, carefully washed and chopped
- 4 celery stalks, chopped
- 4 tomatoes, chopped
- ½ head garlic, cloves peeled
- 4 carrots, chopped
- cognac
- vermouth
- white wine
- zest of ¼ orange
- ½ star anise
- handful dill
For the custard:- 5 smallish egg yolks
- 100g caster sugar though I added more on tasting - probably 20g
- 300ml double cream
To Serve:- parmesan crisps
- passion fruit
Kill your crab, then boil it in salted water for 2 minutes.
Some rather horrible stuff squidges out of the crab during this process. Probably it's normal. Probably.
Pull off the gills dead man's fingers and any intestines and discard them. Wash out any nasty fluids from the shell.
Cut the body in half and crack open the claws and legs and prise out any tasty white meat with a skewer or tweezers and reserve it. Try not to get any bits of shell mixed up in it.
When you've collected enough meat, chop up any of the bigger pieces of crab, then start frying.
Heat some olive oil or butter in a large stock pan and fry all the crab pieces and shell for a few minutes until they are dried out and starting to crackle.
Now add the shallots, then the leek, then the garlic, then deglaze with a shot of cognac, a glass of vermouth and a glass of wine.
Carry on frying until the pan dries out again, then add the tomatoes, the carrots, some fennel would be good, the zest, anise, dill and cover with water.
Cover, set to a gentle simmer for 2 hours, giving it an occasional skim, then strain the broth.
Reduce the broth to 300ml, add 300ml double cream and a scant teaspoon of saffron though I think that might have been a touch too much and bring back almost to the boil then take off the heat to cool a little.
Mix a little of the hot broth into the eggs, then pour the eggs into the broth pan and reheat, stirring constantly, until the custard reaches 80°C and begins to thicken to coat the back of a spoon. At this stage you can add more sugar (as I did) if the custard does not taste sweet enough.
Cover with cling film and leave to cool, then chill it right down for a few hours.
Now you can pour it into your ice cream machine and churn it up. I also added most of the shredded crab meat I had reserved earlier.
Keep it in the fridge until required, but preferably for not too many hours.
To serve, you can make some parmesan crisps to stick in the ice cream scoops, and dress them with a little passion fruit.
You are supposed to be able to kill a crab by laying it on its back and driving a knife through it just behind the eyes,
but I didn't have any luck with that. Maybe you have to drive harder to get through the shell.
Anyway I found it was more effective to drive a skewer or a chopstick through the hole at the pointy tip of the triangular apron
below the crab's eyes on its belly.
Break off the crab's legs, pull off the apron then prise the crab's body out of its back shell.Pull off the gills dead man's fingers and any intestines and discard them. Wash out any nasty fluids from the shell.
Cut the body in half and crack open the claws and legs and prise out any tasty white meat with a skewer or tweezers and reserve it. Try not to get any bits of shell mixed up in it.
When you've collected enough meat, chop up any of the bigger pieces of crab, then start frying.
Heat some olive oil or butter in a large stock pan and fry all the crab pieces and shell for a few minutes until they are dried out and starting to crackle.
Now add the shallots, then the leek, then the garlic, then deglaze with a shot of cognac, a glass of vermouth and a glass of wine.
Carry on frying until the pan dries out again, then add the tomatoes, the carrots, some fennel would be good, the zest, anise, dill and cover with water.
Cover, set to a gentle simmer for 2 hours, giving it an occasional skim, then strain the broth.
I did this by first straining through a colander to get rid of the bigger bits,
then through four layers of muslin, then repeat through the muslin until the stock is clear enough.
I ended up with 1½ pints of broth.
I ended up with 1½ pints of broth.
Reduce the broth to 300ml, add 300ml double cream and a scant teaspoon of saffron though I think that might have been a touch too much and bring back almost to the boil then take off the heat to cool a little.
I did a little test first with just a couple of tablespoons of each to find out if the mixture would curdle when it boiled up -
but it seems to be pretty stable.
Meanwhile beat or whisk together the egg yolks and the sugar for 10 minutes until it is thick and creamy.Mix a little of the hot broth into the eggs, then pour the eggs into the broth pan and reheat, stirring constantly, until the custard reaches 80°C and begins to thicken to coat the back of a spoon. At this stage you can add more sugar (as I did) if the custard does not taste sweet enough.
Cover with cling film and leave to cool, then chill it right down for a few hours.
Now you can pour it into your ice cream machine and churn it up. I also added most of the shredded crab meat I had reserved earlier.
Keep it in the fridge until required, but preferably for not too many hours.
To serve, you can make some parmesan crisps to stick in the ice cream scoops, and dress them with a little passion fruit.
OK, this wasn't exactly a success. Interesting, and entertaining yes, but not particularly nice.
Not as a dessert anyway. The combination of salty and sweet flavours is a bit too weird when your brain is expecting pudding!
I think it might work as a starter, maybe with salad, but the truth is the ice cream was just much too crabby, Especially with the bits of crab meat. I think I'd leave them out if I try this again, and maybe use about half the size of crab.
I see that Heston Blumenthal has a crab ice cream recipe in which he uses skimmed milk powder instead of cream (and about a dozen egg yolks). Maybe that would help?
The passion fruit goes pretty nicely though, and I thought the parmesan crisps were a nice touch.
Pak Choy with Soy Sauce
side veg vegan
Pak Choy fried with soy sauce and garlic
This is quite a good simple way of serving pak choy.
You need about 1 bulb of pak choy, 1 garlic clove and 1 tablespoon of soy sauce per person. Ish. 3 bulbs seemed enough for 4 people really. Make sure to keep the leaves reasonably small or they won't wilt.
The original idea is from Gordon Ramsay, which was to fry the pak choy tossed in soy sauce and garlic from the start. I didn't find that worked very well - the soy sauce burned before the pak choy was cooked.
My method is better.
Serves 4
Ingredients
- 3 bulbs pak choy
- 3 cloves garlic
- 3 tablespoons soy sauce
- 2 tablespoons olive oil plus for frying
Grind the garlic cloves with a generous twist of black (or mixed) peppercorns to a paste in a pestle and mortar.
Separate the pak choy leaves and wash them well. Cut the larger ones in half or smaller. Which means most of them. Stir-fry the pak choy in a little olive oil in a frying pan or wok until they char a little, and begin to wilt. Add the soy sauce mixture, allow it to reduce and thicken then turn off the heat.
Serve.
If you're in a hurry you can just press the garlic, but a smooth paste is nicer.
Mix with the soy sauce and olive oil.Separate the pak choy leaves and wash them well. Cut the larger ones in half or smaller. Which means most of them. Stir-fry the pak choy in a little olive oil in a frying pan or wok until they char a little, and begin to wilt. Add the soy sauce mixture, allow it to reduce and thicken then turn off the heat.
Serve.
Rather nice.
Lime Butter Sauce
sauce veg
A good sauce to add to the inventory, but be careful not to over-lime it.
Serves 6
Ingredients
- 1 shallot, chopped
- 100ml white wine
- 250ml double cream
- 50g butter, chilled, cut into cubes
- 40ml lime juice (1½ limes) or 60ml lemon juice to taste
- 1 scant teaspoon cornflour dissolved in a little water
Chop the shallot, and simmer in a small pot with the wine until it has reduce to about one half. Strain.
Feel free to add a little stock or spare bits of scallops to the wine.
Mix with the cream, add a little of the dissolved cornflour to help prevent curdling though it did seem reasonably stable without and bring it to a reasonable thickness (bearing in mind that the lime juice will thin the sauce further).
Whisk in the butter, a small piece at a time.
Remove from the heat and stir in the lime juice.
Season to taste.
A good flavour, but quite tart sauce. Adjust the lime juice as necessary.
You can keep the sauce warm in a bain marie or a thermos for up to an hour before serving.
If the sauce curdles you can try and rescue it by vigorously whisking in a teaspoon or two of water.
You can keep the sauce warm in a bain marie or a thermos for up to an hour before serving.
If the sauce curdles you can try and rescue it by vigorously whisking in a teaspoon or two of water.
Celeriac Purée
side veg
It takes quite a lot of cooking to get celeriac soft enough to mash,
so this is a good approach that avoids leeching all the flavour away in boiling water.
Serves 6
Ingredients
- 1 celeriac, peeled and chopped into 1" pieces
- 3-4 tablespoons butter
- ½ pint or so milk
- sprig rosemary
- salt & pepper
- nutmeg
Cut up the celeriac, and place in a pan with a generous amount of butter and sweat gently for 5 minutes, without colouring.
Add milk almost to cover, the sprig of rosemary and leave to simmer gently for 20-30 minutes until celeriac is soft and the liquid absorbed.
Discard the rosemary, mash or purée the celeriac, season to taste and serve with a grating of nutmeg.
Add milk almost to cover, the sprig of rosemary and leave to simmer gently for 20-30 minutes until celeriac is soft and the liquid absorbed.
Discard the rosemary, mash or purée the celeriac, season to taste and serve with a grating of nutmeg.
Really rather nice.
Goat's Cheese Parcels
starter veg cheese
Goat's cheese with garlic and herbs in filo pastry parcels

Ingredients
- 4 sheets filo pastry
- olive oil
- 1 teaspoon fresh thyme
- 1 teaspoon fresh marjoram
- 1 clove garlic, pressed
- 85g/3 oz firm goat's cheese, cut into 1cm cubes
- jam to serve
Preheat the oven to 200°C/400°F/Gas 6.
Press the garlic clove, and mix with the cheese, herbs and a little oil in a bowl.
Lay the filo sheets on a damp surface to prevent them drying out and cut into 4 squares.
Put a little mixture into the middle of each rectangle and fold up into wonton-shaped parcels, twisting the top to seal them up.
Brush with oil and bake for 4 minutes until the pastry crisps up.
Serve warm with a little dollop of jam.
They're pretty nice - it's best if the insides are still hot and slightly melty.
You could use more than one layer of filo to wrap them if you like, but a singleton works best. Make sure the oven is hot enough or the parcels will go soggy before the pastry crisps. And be sure to cube the cheese, not mash it or they'll go soggy then too. Won't they Mum?
You could use more than one layer of filo to wrap them if you like, but a singleton works best. Make sure the oven is hot enough or the parcels will go soggy before the pastry crisps. And be sure to cube the cheese, not mash it or they'll go soggy then too. Won't they Mum?
Gourmet Cooking On Boats
Away again on Erin, we are doing a couple of feeder races to take the boat down to Blyth for
East Coast Sailing Week,
and there's only the four of us this time with a guaranteed overnight stop in the safety and comfort of Eyemouth harbour
so I've carefully planned a gourmet meal within the strict constraints of
Erin's onboard cooking rules.
I was going to include a Lime Thyme Risotto, but decided that was a bit too much trouble and risked violating rule 1, so went with the safer mashed potato option.
In the end no one had room for a baked dessert and only managed to squeeze in tiny petits filous instead.
I shall leave you to guess where I hid the bacon.

menu
Main Course
Duck Breasts in a Cherry Sauce
Buttered Leeks
Lime Thyme Mashed Potato
Side Salad
Dessert
Baked Bananas with Rum and Lime
For a lightweight finish :)
Duck Breasts in a Cherry Sauce
Buttered Leeks
Lime Thyme Mashed Potato
Side Salad
A rocket salad dressed with a balsamic vinaigrette
Dessert
Baked Bananas with Rum and Lime
For a lightweight finish :)
Duck Breasts in Cherry Sauce
main fowl nautical
Pan-fried duck breasts in a cherry and port sauce

It seems that every chef has a different preferred way of cooking duck breasts,
from roasting them skin-side down all the way in the oven,
through frying them skin-side down only and finishing them off in the oven,
to flipping them frantically from skin to flesh side à la Heston Blumenthal.
Some slap into a hot pan, some cook slowly from cold. Some don't seem to think a bout in the oven is necessary at all.
I guess you pays your money, you takes your choice.
Personally I find it hard to get duck breasts' done-ness just right.
They usually seem to be too thick to cook through properly in the frying pan without drying them out too much, so finishing off will probably be required.
You can either do this in the oven as I do, or you can simmer the breasts in the sauce you are about to make.
The best bet for getting your ducks perfectly cooked for all concerned is to use a meat thermometer. For wild breasts (not those intensive salmonella-farmed ducks) and bearing in mind that the temperature will carry on rising a little after you remove the meat from the heat:
Whichever method you choose, be sure to leave the breasts for a few minutes rest and relaxation between cooking and serving.
Some slap into a hot pan, some cook slowly from cold. Some don't seem to think a bout in the oven is necessary at all.
I guess you pays your money, you takes your choice.
Personally I find it hard to get duck breasts' done-ness just right.
They usually seem to be too thick to cook through properly in the frying pan without drying them out too much, so finishing off will probably be required.
You can either do this in the oven as I do, or you can simmer the breasts in the sauce you are about to make.
The best bet for getting your ducks perfectly cooked for all concerned is to use a meat thermometer. For wild breasts (not those intensive salmonella-farmed ducks) and bearing in mind that the temperature will carry on rising a little after you remove the meat from the heat:
- 120-130°F/49-54°C for rare
- remove at 122°F/50°C for Karl, letting the final internal temperature rise to 125°F/52°C
- 135-145°F/57-63°C for medium
- more than 155°F/68°C for well done
Whichever method you choose, be sure to leave the breasts for a few minutes rest and relaxation between cooking and serving.
Serves 4
Ingredients
- 4 duck breasts
- 200g cherries, stoned, halved or 50g dried cherries
- 400ml chicken stock
- 1 cup/300ml port
- 1 glass berry-flavoured Genever
- pinch thyme
- 20g cold butter, cut into cubes
- minced onion/shallot/garlic optional
Preheat the oven to 200°C/400°F/Gas 6.
Cut the cherries in half, discarding their stones or put your dried cherries to soak in port or red wine if you fancy that.
Put the chicken stock in a small saucepan and reduce it to about a third so that it starts to thicken up slightly.
Throw in a few strands of stripped thyme leaves, and the cherry halves and set to one side.
Score diamond-pattern slashes into the skin of the duck breasts with a sharp knife, without cutting down to the flesh.
Rub the breasts all over with salt and pepper.
Place the breasts skin-side down in a cold heavy frying pan or skillet over a medium heat.
Drain off some of the oil and save for roasting potatoes, then turn the breasts and cook for a further 4-5 minutes until lightly browned and the flesh feels springy.
Meanwhile finish the sauce -
Lightly fry the shallots if you are using them in the duck pan until colouring, then deglaze the pan with the Genever and the port, simmer 5 minutes until the alcohol is reduced and beginning to thicken, then add the stock and cherries and simmer for another 5 minutes until nicely thickened. Add back any juices that have drained out of the duck while it was roasting and resting. Whisk in a few lumps of cold butter to make the sauce glossy.
Slice the duck diagonally (if you can be bothered) and serve over a drool of the sauce.
Cut the cherries in half, discarding their stones or put your dried cherries to soak in port or red wine if you fancy that.
Put the chicken stock in a small saucepan and reduce it to about a third so that it starts to thicken up slightly.
Throw in a few strands of stripped thyme leaves, and the cherry halves and set to one side.
Score diamond-pattern slashes into the skin of the duck breasts with a sharp knife, without cutting down to the flesh.
Rub the breasts all over with salt and pepper.
Place the breasts skin-side down in a cold heavy frying pan or skillet over a medium heat.
Starting the (room-temperature) breasts in a cold pan is a chef's tip for rendering out more fat from the skin.
I've also seen it suggested that you do this on a very low heat for 20-30 minutes, occasionally draining off excess fat, before turning the heat up high to crisp the skin, then flipping the breasts to cook the other side.
It's possible this method will cook the breasts well enough all the way through that they won't need more cooking in the oven before resting and serving.
But you'd have to check.
Allow the breasts to fry in the pan for 10 minutes or until most of the fat has rendered out and the skin has crisped and turned golden-brown.I've also seen it suggested that you do this on a very low heat for 20-30 minutes, occasionally draining off excess fat, before turning the heat up high to crisp the skin, then flipping the breasts to cook the other side.
It's possible this method will cook the breasts well enough all the way through that they won't need more cooking in the oven before resting and serving.
But you'd have to check.
Drain off some of the oil and save for roasting potatoes, then turn the breasts and cook for a further 4-5 minutes until lightly browned and the flesh feels springy.
At this point the duck is probably still rather too rare for most tastes, (especially the skipper's if you're cooking this on a boat).
So you will have to continue cooking until all signs of pinkness have gone sigh.
Put the breasts skin-side up uncovered in the oven for 5-8 minutes or until they are cooked to your satisfaction,
then set aside covered in foil to rest for 2-4 minutes before serving them.Meanwhile finish the sauce -
Lightly fry the shallots if you are using them in the duck pan until colouring, then deglaze the pan with the Genever and the port, simmer 5 minutes until the alcohol is reduced and beginning to thicken, then add the stock and cherries and simmer for another 5 minutes until nicely thickened. Add back any juices that have drained out of the duck while it was roasting and resting. Whisk in a few lumps of cold butter to make the sauce glossy.
Slice the duck diagonally (if you can be bothered) and serve over a drool of the sauce.
This was absolutely delicious, though my sauce was slightly too thin
(it didn't seem to want to go any thicker - possibly because I was using ready-made stock),
and the duck was overcooked for my taste (though probably not the skippers!).
I think you might consider adding a little cherry jam or conserve to get the sauce that bit thicker, or try reducing the stock harder before adding the cherries (you don't want the cherries actually disintegrating).
I think you might consider adding a little cherry jam or conserve to get the sauce that bit thicker, or try reducing the stock harder before adding the cherries (you don't want the cherries actually disintegrating).
Buttered Leeks
side veg nautical
Simple but delicious leeks.

A simple, traditional, and delightful way to cook leeks. You could also use it for cabbage with a little extra stock.
Serves 4
Ingredients
- 2 leeks
- a 30g/1oz wedge of butter
- thyme optional
- salt and white pepper
- cream optional
Cut away the root, dried-up outer leaves and anything too green from the leeks.
Slice into fat rounds about 1" or so wide.
Wash the leeks thoroughly, drain, and put in a pan with a healthy knob of butter, a generous sprinkling of thyme leaves and season enthusiastically with salt and white pepper.
Stir the butter through and cook, covered, over a low heat for 10-15 minutes until meltingly soft.
You can cook them uncovered towards the end if they're looking a bit soggy, and you can stir through a little cream before serving for an extra rich version.
So easy. So tasty!
Baked Bananas with Rum and Lime
dessert veg nautical
Bananas baked with sugar, rum and lime.

Ingredients
- 6 firm bananas
- zest of 1 lime
- juice of 2 limes
- 3 tablespoons dark-brown muscovado sugar
- 50ml/2 fl oz rum
To Serve:- juice of ½ lime
- 2 tablespoons rum
- ice cream or whipped cream
Peel the bananas and halve lengthways.
Sprinkle the lime zest, half the juice and half the sugar into a shallow baking-dish.
Lay the bananas on top in a single layer.
Pour on the rest of the lime juice and all of the rum, and add the remaining sugar.
Put in an oven preheated to 220°C/425°F/gas mark 7 and bake for 15 to 20 minutes or until the bananas are soft.
Stick the dish under a hot grill until bubbling — about three minutes.
Drizzle on more lime juice and rum and serve immediately with ice cream or whipped cream.
I didn't actually try this, since everyone was too stuffed with duck breasts and cherry sauce,
but it looks like a convenient alternative to Erin's more usual
Flaming Rum Bananas.