
Leftover Leftover Liquorice Day
Now I have leftovers from the meal I made yesterday
to use up the leftovers from my
Liquorice Dinner.
So I thought I'd use a spare lemon with the spare squid ink pasta
to try Jamie Oliver's very simple
lemon linguine.
Naturally, being a pretentious arse Jamie insists you should use Sicilian lemons, which reputedly being less acidic, might explain some taste differences, but I thought the recipe was pretty much rubbish. The balance of flavours are all wrong - far too much lemon and not nearly enough olive oil, however a bit of adjustment gives you something that's not too unpalatable. I'm just not entirely sure it's significantly better than simply leaving out the lemon completely.
You could try adding some dried red chillies.
I'm slightly dubious about garlic but you could try that too.
Lemon Linguine
main pasta
You don't have to use squid ink pasta with this. In fact. Probably you shouldn't.
Serves 4
Ingredients
- 1 lb/500g/16 nests linguine
- grated peel ½-1 lemon
- juice 1 lemon
- 6 tablespoons olive oil
- 2 oz/60g grated parmesan
- handful torn basil leaves
- handful rocket
- salt and pepper
Whilst the pasta is cooking, beat the lemon juice and rind with the olive oil
around twice oil to juice and add the parmesan.
Season.
Strain the pasta and add it back to the hot pan together with the sauce and give it a good stir.
The heat will melt the cheese and give the pasta a smooth coating, after which you can allow it to cool slightly before mixing in the torn basil leaves and the rocket.
Strain the pasta and add it back to the hot pan together with the sauce and give it a good stir.
The heat will melt the cheese and give the pasta a smooth coating, after which you can allow it to cool slightly before mixing in the torn basil leaves and the rocket.
Some possible extras:
- a grating of nutmeg
- dried red chilli flakes
- minced fresh green chilli (quite good!)
- minced garlic (dubious?)
- chopped black olives
- mint/chives or any other herbs you fancy
- no lemons!
Actually I'm starting to like it now.
My proportions above are pretty good!
Leftover Liquorice Day
Ah, the joy of living off dinner party leftovers.
Today I used up some of the Liquorice and Blackberry sauce and the Braised Cabbage from my last meal. I happened to pop into Clark Bros - my Musselburgh fishmongers - for a lunchtime kipper today, and was surprised to discover that they'd (finally) managed to find an enormous stock of squid ink, so I had another go at my previously disappointing Pasta Al Nero.
I'd also been thinking of trying out the Liquorice sauce with something other than pheasant - duck or venison maybe, and the lo the gods were obviously smiling on me this week: after almost giving up on Asda's pitiful meat cabinets (and not having found the time to get to a real butcher what with my cylinder heads filling up with water and all) I found a single plastic pack of edible-looking duck breasts last night, so I grabbed them quick.
This time, when I freshened up the sauce with some extra blackberries I didn't bother with any red wine - just a good dose of Creme de Cassis, and a glug of port to simmer up another half dozen blackberries or so. Finished off with a couple of teaspoons of liquorice essence.
Pan-Fried Duck Breasts with Blackberry Liquorice Sauce
main fowl

Served on a bed of Tagliatelli Al Nero Di Seppia, with a side saddle of Braised Red Cabbage.
Yes - you're right, they don't really work together - delicious though the cabbage undoubtedly is, it doesn't go with the black pasta, and the squid inky flavour is too subtle and delicate for the robust sauce. It might work better with a stronger flavour (more squid ink perhaps?) but I'm not convinced that's physically possible. Something to try next time.
I think something like a nutty couscous, butternut squash purée or nutty parsnip purée might work, and you could substitute spinach, or swiss chard for the red cabbage. Even the samphire from my original dinner.
Serves ME!
Ingredients
- duck breasts
- Blackberry Liquorice Sauce

Preheat the oven to 400°F/200°C/Gas Mark 6.
Put in a heavy baking tray if you don't have a skillet that will go straight into the oven from the hob.
Bubble up some blackberries in port and Creme de Cassis (and maybe a basil leaf or two) for the sauce in a small pot whilst you get on with the duck.
First cut away any sinews from the fleshy side of the breasts - these will tighten up on cooking and deform the fillets.
Deeply score the duck skin and fat in a nice diagonal criss-cross pattern without cutting into the flesh.
Sprinkle salt (and pepper if you like) into the skin and the flesh.
Get a heavy frying pan or cast iron skillet nice and hot, and slap the duck breasts into it, skin side down. You can lubricate the pan with a little bacon fat or olive oil if you like, but it's not necessary. Let the breasts sizzle away, and cook them over a medium heat until the fat has rendered nicely away, the skin is crispy mahogany, and the flesh has coloured about half the way through the breast. This should take around 5 minutes. Spots of blood and juice will be oozing out of the upper side.

 Now pour away the fat from the skillet and stick it straight into the oven without turning the breasts.
Cook in the oven for about 10 more minutes until the breasts are just cooked all the way through.
Now pour away the fat from the skillet and stick it straight into the oven without turning the breasts.
Cook in the oven for about 10 more minutes until the breasts are just cooked all the way through.
Put in a heavy baking tray if you don't have a skillet that will go straight into the oven from the hob.
Bubble up some blackberries in port and Creme de Cassis (and maybe a basil leaf or two) for the sauce in a small pot whilst you get on with the duck.
First cut away any sinews from the fleshy side of the breasts - these will tighten up on cooking and deform the fillets.
Deeply score the duck skin and fat in a nice diagonal criss-cross pattern without cutting into the flesh.
Sprinkle salt (and pepper if you like) into the skin and the flesh.
Get a heavy frying pan or cast iron skillet nice and hot, and slap the duck breasts into it, skin side down. You can lubricate the pan with a little bacon fat or olive oil if you like, but it's not necessary. Let the breasts sizzle away, and cook them over a medium heat until the fat has rendered nicely away, the skin is crispy mahogany, and the flesh has coloured about half the way through the breast. This should take around 5 minutes. Spots of blood and juice will be oozing out of the upper side.


If you want to brown the duck breasts all over just flip them over in the frying pan and briefly fry the other side.
If you don't have a skillet that will go in the oven, just transfer the breasts, skin-side down, to a heated oven tray instead.
If you like totally rare duck, and you are happy living a little dangerously, then skip the oven completely and just flip the breasts for a couple of minutes, then set aside to rest.
If you like totally rare duck, and you are happy living a little dangerously, then skip the oven completely and just flip the breasts for a couple of minutes, then set aside to rest.


They will look puffed up and sealed on the top side, which will just have turned from pink to grey. It's best to use a meat thermometer to check this if you have one - make sure the centre of the breasts have reached 125°F.
Set the breasts aside to rest for 5 minutes while you finish off the sauce - push it through a fine sieve, and dose with liquorice essence. Season with salt and add more Creme de Cassis if necessary.
Slice the breasts at an angle into nice ½" pieces (it's easier with the skin down), and serve them arranged nicely on a puddle of sauce, or with the sauce drizzled over.
Scatter a few drops of the pure liquorice essence over the top to finish.
I have to say, the breasts and sauce were luvverly.
Better than the pheasant from my previous effort. Though I think that was the pheasant's fault rather than the overall concept.
Better than the pheasant from my previous effort. Though I think that was the pheasant's fault rather than the overall concept.
The Last Supper
Well, it's official. My three-year relationship with the Eldoradoes has come to an end.
Not with a bang but a whimper.
And an ironically nice dinner at the ever-reliable Wedgewood. (If you are looking to break up with your girlfriend I highly recommend their updated version of couscous-encrusted lamb, which is now rolled in crushed fennel and what might be mustard seeds. Very tasty.)
The plan was to spend a pleasant evening in the company of Doctor Jenny and boy, taking in a couple of shows at the Fringe and rounding off with good food courtesy of what is fast becoming a favourite standby.
Well, the food was as delightful as ever, but the comedy wasn't funny, my girlfriend unusually surly, and the tension between us only grew over the course of the evening, developing into full-grown discomfort by the time we were wandering aimlessly around town looking for a late-night cabaret.
When you can barely hold a civilised conversation with your girlfriend, I guess it's just time to call it a day.
Those poor Eldorado girls, we always seem to break up just before one or other of their birthdays, so this time I took pity on Georgina and followed through with her Lego™ CrocoSharkAsaur kit.
Which she seems to love.

Gonna miss you guys.

And an ironically nice dinner at the ever-reliable Wedgewood. (If you are looking to break up with your girlfriend I highly recommend their updated version of couscous-encrusted lamb, which is now rolled in crushed fennel and what might be mustard seeds. Very tasty.)
The plan was to spend a pleasant evening in the company of Doctor Jenny and boy, taking in a couple of shows at the Fringe and rounding off with good food courtesy of what is fast becoming a favourite standby.
Well, the food was as delightful as ever, but the comedy wasn't funny, my girlfriend unusually surly, and the tension between us only grew over the course of the evening, developing into full-grown discomfort by the time we were wandering aimlessly around town looking for a late-night cabaret.
When you can barely hold a civilised conversation with your girlfriend, I guess it's just time to call it a day.
Those poor Eldorado girls, we always seem to break up just before one or other of their birthdays, so this time I took pity on Georgina and followed through with her Lego™ CrocoSharkAsaur kit.
Which she seems to love.
Gonna miss you guys.
Worcestershire Sauce Day
Rachel told me of her unsatisfactory attempts to create a Worcestershire sauce-based chicken dish
something along the lines of an ersatz gumbo I believe.
Apparently it turned out little different from a Dolmio pasta sauce, so I thought I'd have a go myself.
 I decided that rather than try a stew type approach I'd take my cue from Michael Smith's recipe for
Nell Gwynn's Breasts and stuff chicken fillets with something Worcestershire saucy,
then have a cheesy, but Worcestershire, dressing to go with them.
I decided that rather than try a stew type approach I'd take my cue from Michael Smith's recipe for
Nell Gwynn's Breasts and stuff chicken fillets with something Worcestershire saucy,
then have a cheesy, but Worcestershire, dressing to go with them.
And a nice bean salad with a Worcestershire dressing.
Everything Worcestershire! (Well, OK, I didn't have a Worcestershire pudding. I think that might just have made everyone sick!)
 I went for a mushroom Duxelles stuffing
flavoured with the Worcestershire, which was delicious even by itself.
It gave the breasts a fine dark centre like the skin of a dusky maiden, say
Nell Carter
(OK, my first choice would have been Halle Berry too, but I've got a theme going on here dammit), and tasted pretty fine too.
I went for a mushroom Duxelles stuffing
flavoured with the Worcestershire, which was delicious even by itself.
It gave the breasts a fine dark centre like the skin of a dusky maiden, say
Nell Carter
(OK, my first choice would have been Halle Berry too, but I've got a theme going on here dammit), and tasted pretty fine too.
In keeping with my plans to marry monkfish with all the blue cheeses of the world I took the opportunity to fry up some monkfish along with my dusky breasts for moral support. Gorgeous pink-capped mounds of firm alabaster flesh, I wanted to call them Rachel's Breasts, but she wouldn't let me. So Eskimo Nell's they are.
The juices from the chicken roasting dish have a nice Worcestershire flavour, which makes a good dressing for the otherwise slightly dry crispy fried noodles, and a pickled cherry salad works hard at cutting through some of the salty richness of the rest of the meal.
Just a word of warning - though today may be Worcestershire, tomorrow will be Garlic.
This meal even got a full five star rating from Georgina, thumbs up and everything - though that might have something to do with the fact that she had special chicken, with a special sauce, and a special salad. And carrots. So not this meal at all then.


menu
Apparently it turned out little different from a Dolmio pasta sauce, so I thought I'd have a go myself.

And a nice bean salad with a Worcestershire dressing.
Everything Worcestershire! (Well, OK, I didn't have a Worcestershire pudding. I think that might just have made everyone sick!)
In keeping with my plans to marry monkfish with all the blue cheeses of the world I took the opportunity to fry up some monkfish along with my dusky breasts for moral support. Gorgeous pink-capped mounds of firm alabaster flesh, I wanted to call them Rachel's Breasts, but she wouldn't let me. So Eskimo Nell's they are.
The juices from the chicken roasting dish have a nice Worcestershire flavour, which makes a good dressing for the otherwise slightly dry crispy fried noodles, and a pickled cherry salad works hard at cutting through some of the salty richness of the rest of the meal.
Just a word of warning - though today may be Worcestershire, tomorrow will be Garlic.
This meal even got a full five star rating from Georgina, thumbs up and everything - though that might have something to do with the fact that she had special chicken, with a special sauce, and a special salad. And carrots. So not this meal at all then.


menu
Nell Carter's Breasts
Eskimo Nell's Breasts
Little Nell's Breasts
Crispy Fried Noodles
Pickled Cherry Salad
Green Bean Salad
Breasts with a rich, dark centre.
Eskimo Nell's Breasts
Plump white morsels.
Little Nell's Breasts
Virgin flesh.
Crispy Fried Noodles
A little something to soak up the juices.
Pickled Cherry Salad
A tangy salad to relieve the richness of all that breast meat.
Green Bean Salad
For something a little different.
Green Bean Salad
salad

I suppose the idea here came from St John Restaurant's lovely
Green Beans, Shallots, Garlic and Anchovies
Serves 4
Ingredients
- 200g fine beans, trimmed
- peas, podded, about the same amount
- 4 cloves garlic, finely sliced
- spring onions and broad beans might be nice
- olive oil
- a few drops white wine vinegar
Dressing:- 1 50g tin anchovies, crushed
- 3 cloves garlic, crushed
- juice of 1 lime
- 2 teaspoons capers, crushed
- 1 teaspoon Worcestershire sauce
- ground mixed peppercorns
- olive oil
Trim the beans and slice them into 1" pieces. Pod the peas.
Blanch the vegetables: Bring a pot of water to the boil, and throw in the beans, when it boils up again, add the peas, reboil and simmer for about 20 seconds, drain and rinse the vegetables quickly in cold water.
Drain and dry thoroughly, then add the garlic slices, coat in olive oil and drizzle with white wine vinegar.
Set aside to marinate in the fridge for an hour before serving.
Make the dressing:
Grind the anchovies, then garlic cloves and then capers together in a mortar. Since you won't want to add any extra salt, use peppercorns to provide a little grit for the grinding process. Add enough liquid to get a good paste, then the rest of the lime juice and Worcestershire sauce. Shake up with about the same quantity of olive oil in a jam jar.
This is a really tasty salad, especially with the anchovy dressing, though you can leave that off if you like,
but go pretty easy with it, a thin coating is more than enough
and you might want to cut back on the garlic slices too if you're having both dressings. It can get pretty garlicky. Especially the day after.
The blanching takes any slightly bitter edge off the vegetables, though maybe your peas won't need it.
Some (spring) onions or podded, blanched broad beans might be nice also, Yes they're fine - blanch the broad beans before adding the green ones. and I'm sure you could throw in any herbs you fancied - rosemary/thyme/oregano maybe coriander.
You can add feta cheese and other vegetables, like red pepper, grated carrots, torn lettuce leaves and the rest, and it's still nice with the dressing and all.
Pickled Cherry Salad
salad raw veg vegan

Serves 4
Ingredients
- dozen cherries, halved, stoned
- half dozen button mushrooms, quartered
- 1 small red onion, halved, thinly sliced
- rocket, lamb's lettuce and watercress salad leaves
Dressing:- white wine vinegar
- balsamic vinegar
- walnut oil
- salt and ground mixed peppercorns
Halve the cherries, remove the stones and leave to marinate overnight in a covering of white wine vinegar and a drizzle of balsamic.
Next day, quarter the button mushrooms (or so - depending on their size) and mix them up with the cherries and a generous dollop of walnut oil.
Season, add a finely sliced red onion and set aside to mature for an hour or so.
When you're ready to serve, combine the cherry mixture with your salad leaves in a large bowl.
When you're ready to serve, combine the cherry mixture with your salad leaves in a large bowl.
Ok, the cherries don't take on all that much pickling, but I still thought it was quite a refreshing salad, good with strong or rich flavours.
Which is exactly what we had.
You could probably pickle the cherries for longer, or simmer them up with the vinegar, but then they'd probably go mushy unless you started with pretty hard or sour ones.
You could probably pickle the cherries for longer, or simmer them up with the vinegar, but then they'd probably go mushy unless you started with pretty hard or sour ones.
Somehow I imagined Nell Carter's breasts would be bigger...
Nell Carter's Breasts with Blue Cheese Sauce
main fowl cheese


Serves 4
Ingredients
- 4 skinless chicken breast fillets
- 300g smoked bacon slices
- 200g shallots, minced
- 200g mini portabella mushrooms, minced
- generous knob butter
- glass white wine
- 3 Tablespoons Worcestershire sauce (or so)
Sauce:- 200g Roquefort (or other tasty blue cheese)
- 4 Tablespoons crème fraîche or sour cream
- 1 Tablespoon Dijon mustard
- 1 Tablespoon Worcestershire sauce
- 1 Tablspoon tomato purée
- ½ teaspoon tsp paprika
- good pinch of ground cayenne unless you're cooking for the hyper spiceogenic
- Freshly ground pepper
Sweat the finely minced shallots in the butter until softened,
then add the finely minced mushrooms and sweat until they lose their moisture and begin to hold together with the oil separating off.
Add the glass of wine, reduce the mixture back down, then add the Worcestershire sauce and reduce again. Add sauce to your taste - the vinegary edge softens as the mixture cooks.
Lay each chicken fillet on a chopping board, cover with a sheet of cling film and use a rolling pin to hammer them thin and flat.
Coat each flattened fillet with the duxelles mixture, then roll up and then wrap bacon slices around the breasts in a spiral. If you pull on the slices a little as you go they should stick to the chicken well enough without resorting to cocktail sticks or string. Though you can if you need to. It helps if the bacon slices are nice and wide, not cut too thickly and are reasonably stretchy.
Chilling the chicken rolls before you cook them will help them to stay together, but once the bacon crisps up it should stay put alright.
Quickly brown the wrapped chicken breasts in a generous knob of butter in a heavy frying pan, carefully turning to cover all sides. Then bake in a 180°C oven for 20 minutes or so until cooked through (200°C really is too hot for a fan-assisted oven), but keep an eye on them in case they start to burn.
Meanwhile, make the blue cheese sauce by heating all the ingredients gently in a pan whilst stirring them with a wooden spoon.
Pretty tasty stuff, the sauce is strong though. Maybe a touch less cheese.
Eskimo Nell's Breasts
main fish

They're deliciously pink-skinned firm white pillows - I call them Eskimo Nell's Breasts.
I was going to call them Rachel's Breasts, but she wouldn't let me.
I was going to call them Rachel's Breasts, but she wouldn't let me.
Serves 2
Ingredients
- A nice monkfish fillet
- 200g smoked bacon slices
Filling:- anchovies
- garlic cloves
- lime juice
- Worcestershire sauce
Make the filling by grinding up the anchovies with a couple of garlic cloves in a pestle and mortar.
Moisten the mixture with Worcestershire sauce and a squeeze of lime.
Cut the monkfish fillets into reasonably sized chunks. The plan is to get some filling into them before wrapping them up in bacon as for Halle Berry's Breasts, and the best way to do that is to cut the monkfish into quarter fillets then join them back together with paste in between. You could try lightly flattening them so they'll roll up, but that will probably just make them fall apart.
Once you've got them wrapped in the bacon, fry them in the pan after the chicken and put them uncovered lower down the same oven.
Serve with the same blue cheese sauce.
Mainly I fancied trying out the blue cheese sauce with these monfish fillets.
It's a pretty good combo, especially with the bacon, though the sauce is a bit overpowering.
Maybe it could be made a bit less, well, blue? Less cheese or a bit of yoghurt or cream?
Also, it's all a bit salty - might work better with unsmoked bacon.
Could probably have done without the filling too, to be honest.
Could probably have done without the filling too, to be honest.
Untouched by mushrooms. Or blue cheese.
Little Nell's Breasts
main fowl cheese

For those not up to the challenge of the full-strength mounds above.
Serves 1 sensitive philistine
Ingredients
- 1 skinless chicken breast fillet
- 3 unsmoked bacon slices
- double gloucester, sliced
Sauce:- 1 tablespoon flour
- 1 tablespoon butter
- 1 level tablespoon tomato purée
- 1 scant cup milk
- double gloucester, grated
- 1 tablespoon Worcestershire sauce, or to taste
Flatten the chicken breast, cover with thin slices of the double gloucester, roll it up and wrap it in bacon.
Fry and bake with the other magnificent breasts above.
Make a regular cheese sauce - fry the flour in butter until it starts to colour. You can use any spare butter left over from frying the chicken breasts here too. Add the tomato purée fry briefly then gradually whisk in a little milk at a time until you've got a nice sauce consistency add your grated orange cheese and Worcestershire sauce so it tastes nice. But not too scary.
Serve Little Nell's breasts with the cheesy custard and bask in the approbation.
A fine alternative to anything with mushrooms or blue cheese in it.
Georgina was very appreciative, and favourably compared the cheese sauce to her Mum's macaroni cheese.
Apparently she is also prepared to tolerate orange cheese sauce with mustard.
Crispy Fried Noodles
side staple veg
Serves 4
Ingredients
- pack fresh egg noodles
- 4 spring onions, sliced diagonally
- groundnut oil
- sesame oil, to finish
Mix up the noodles with spring onions diagonally sliced about ⅛" thick.
Get a wok nice and hot, add a layer of peanut oil, then add the noodles, shake them to warm through, then turn the heat down low and leave the noodles to cook until they crisp nicely on the lower side.
Turn the noodle cake by sliding it off onto a plate, inverting the wok over the plate then turning the wok around again. Brown the other side until crispy.
Finish off the noodles with a ladleful of stock if they're looking a bit dry and a drizzle of sesame oil.
You can tip them into a warmed serving dish to keep warm until needed.
You get quite a nice noodle cake out of this, crispy on the outside and moist in the middle,
but it sort of sticks together a bit too much and it definitely needs a bit of juice to get it going.
Fortunately all those luscious breasts leak quite a bit.
Fortunately all those luscious breasts leak quite a bit.
IKEA Weekend
On my regular visit to my local fishmonger to inquire after sachets of squid ink I ended up settling for a brace of sea bass instead.
These formed the basis for a couple of tasty meals over a weekend of IKEA cupboard-building.
It was observed, quite fairly I thought, that the first dinner - Pan-Fried Sea Bass with Beetroot Rösti, Pak Choy and Lemon Grass Sauce took an absurd length of time to prepare. Ten hours does seem excessive. In my defence - this included several hours of sauce reduction, some messy fish cleaning and a great deal of rösti experimentation. I'm sure you could knock this out in a mere 6 hours or so!
Fortunately for the sanity of my audience, the second Sea Bassy meal with Apple-Mustard sauce and stuffed courgettes took only minutes.
About a hundred or so.
Pan-Fried Sea Bass with Beetroot Rösti, Pak Choy and Lemon Grass Sauce
main side fish
Dishes
Thoroughly de-scale each sea bass with a sharp knife, then fillet them by slicing down each side along the rib bones from the spine.
This gives two wide pieces with a line of bones down the middle.
It's easiest if you split these pieces in half down this line, cutting out the bones to get two narrow fillets.
You can then tidy these up, cutting away the thin white flaps along the bottom , then slice them diagonally into nice lozenge shapes.
Rub their skin side with Maldon sea salt just before frying.
Prepare the lemon grass sauce, the stir-fry ingredients and the beetroot rösti mixture.
Best if you first fry the salted Sea Bass Lozenges over a high heat in clarified butter though regular will do at a pinch. Cook them skin-side down until the skin is crispy and the flesh has whitened almost all the way through then flip them briefly to finish off the fleshy side.
Keep them warm in the oven while you fry the rösti and the stir fry.
Spoon a puddle of sauce onto each plate, stack a row of sea bass lozenges in the sauce, add a pile of rösti and a heap of stir-fry and serve.
Prepare the lemon grass sauce, the stir-fry ingredients and the beetroot rösti mixture.
I also made a batch of tomato vanilla sauce and toasted coconut, but it didn't really go.
Unfortunately there's a lot of frying here, and you want to serve everything as quickly as possible,
but especially the rösti which really don't keep well.
So you'll just have to work fast.Best if you first fry the salted Sea Bass Lozenges over a high heat in clarified butter though regular will do at a pinch. Cook them skin-side down until the skin is crispy and the flesh has whitened almost all the way through then flip them briefly to finish off the fleshy side.
Keep them warm in the oven while you fry the rösti and the stir fry.
Spoon a puddle of sauce onto each plate, stack a row of sea bass lozenges in the sauce, add a pile of rösti and a heap of stir-fry and serve.
If you want to try it you can place a cookie cutter (it doesn't have to be heart shaped) on the plate,
fill it with the tomato vanilla sauce, lift off the cutter and then top with toasted coconut.
But I didn't think much of it.
But I didn't think much of it.
Pan-Fried Sea Bass with Stuffed Courgettes, Mango Salad and Apple-Mustard Sauce
main side fish

- sea bass
- Apple-Mustard Sauce
- Stuffed Courgettes
- Mango salad
Prepare the stuffed courgettes and then get them under the grill or in the oven.
Prepare the sea bass as above.
Prepare the Apple-Mustard sauce.
Make a simple mango salad - chop some mango, spring onions, cherry tomatoes, lettuce and mix together with a light dressing.
Fry the sea bass as above, spoon a puddle of the thick sauce on the plate, stack the sea bass lozenges nicely in it, then add a stuffed courgette and a pile of salad sprinkled with toasted coconut.
Job Done.
Prepare the sea bass as above.
Prepare the Apple-Mustard sauce.
Make a simple mango salad - chop some mango, spring onions, cherry tomatoes, lettuce and mix together with a light dressing.
I also dressed the salad with a sprinkling of newly-retoasted toasted coconut. Which looked pretty,
even if it added little in the way of flavour.
Fry the sea bass as above, spoon a puddle of the thick sauce on the plate, stack the sea bass lozenges nicely in it, then add a stuffed courgette and a pile of salad sprinkled with toasted coconut.
Job Done.
Tomato And Vanilla Sauce
sauce veg

Your tomatoes will reduce waaaaay down.
Serves 2
Ingredients
- half red onion, minced I would probably have used shallots if I'd had any
- 4 cloves garlic, minced
- knob butter
- 5 largish peeled, seeded tomatoes
- 1 vanilla pod, split down its length
- peeled, halved carrots optional
- 1 red sweet pointed pepper, grilled, peeled, seeded, finely chopped
Soften the minced onion and garlic in a little butter.
Split the vanilla pod lengthwise and add it to the pot.
Simmer gently to reduce the tomatoes to a mushy pulp, then blend to a paste (using water sieved through the leftover tomato bits), and continue to simmer.
The sauce will thicken and should turn a deep red colour when its ready.
Remove the vanilla pod.
Pile the purée on the plates (use a cookie cutter - if the sauce has thickened enough) and decorate with toasted coconut.
If I'd been going for a more Italian-style sauce I would have used olive oil, herbs and probably fried some tomato purée too.
I've read an interesting suggestion for adding some halved, peeled carrots to the frying mixture for sweetness, then discarding them before using the sauce. Probably no need to combine this with the sweet pepper though.
Blanch the tomatoes in boiling water then peel and deseed them.
Add to the pan.I've read an interesting suggestion for adding some halved, peeled carrots to the frying mixture for sweetness, then discarding them before using the sauce. Probably no need to combine this with the sweet pepper though.
Split the vanilla pod lengthwise and add it to the pot.
To be honest - releasing all the little vanilla seeds results in an unpleasantly gritty feel to the purée.
I think it would probably be better not to slit the pod, as long as you can still get enough flavour to leach out.
Grill the pepper to char the skin, let it cool in a small plastic bag, then peel and deseed it.
Chop the flesh. Add it to the potSimmer gently to reduce the tomatoes to a mushy pulp, then blend to a paste (using water sieved through the leftover tomato bits), and continue to simmer.
The sauce will thicken and should turn a deep red colour when its ready.
Remove the vanilla pod.
Pile the purée on the plates (use a cookie cutter - if the sauce has thickened enough) and decorate with toasted coconut.
I was really looking for a tart sauce to complement some pan-fried sea bass.
But this wasn't it. It has a nice enough flavour, if a bit on the sweet side, (I did consider adding balsamic vinegar)
and it's a lot of effort for only a little sauce.
I'm not really sure about the toasted coconut either,
you definitely can't leave the coconut sitting around for long if you want it to stay crispy.
If you wanted to use this as the base for a pizza or pasta sauce, you probably wouldn't bother blending the fried mixture.
If you wanted to use this as the base for a pizza or pasta sauce, you probably wouldn't bother blending the fried mixture.
Lemon Grass Sauce
oriental sauce veg

Ingredients
- 3 sticks lemon grass
- 1" ginger
- ½ head garlic
- ½ red onion I would probably have used shallots if I'd had any
- groundnut oil
- coconut cream from ½ coconut
- handful basil leaves, sliced obviously Thai basil would go best
Make your coconut cream.
Peel and grate your coconut flesh,
pour in a cup or two of lukewarm water and then massage the coconut until you've extracted as much cream as possible,
adding the coconut's water too if you like.
Strain it through muslin.
Or buy it :)
Blend the other ingredients together, moistening with groundnut oil as necessary.
Fry the resulting paste in a smear of groundnut oil, until it colours, and the oil separates.
Stir through sliced basil leaves just before serving.
Or buy it :)
Blend the other ingredients together, moistening with groundnut oil as necessary.
Fry the resulting paste in a smear of groundnut oil, until it colours, and the oil separates.
If the coconut cream has enough fat in it (e.g. came from a tin) you could probably use that to fry the paste.
I wasn't sure if the frying was necessary, however I noticed that until the paste had been thoroughly fried through the sauce retained a somewhat bitter flavour.
Then add the rest of the coconut cream (in smallish batches), reducing to a nice thick sauce.I wasn't sure if the frying was necessary, however I noticed that until the paste had been thoroughly fried through the sauce retained a somewhat bitter flavour.
Stir through sliced basil leaves just before serving.
The result is delicious, but very grainy.
I'd probably prefer just to boil the ingredients in coconut cream and then strain them out again. Question is - would we end up with the bitterness I noted above?
Perhaps I'd still need to fry up the (chopped) ingredients first, then strain them out again?
I'd probably prefer just to boil the ingredients in coconut cream and then strain them out again. Question is - would we end up with the bitterness I noted above?
Perhaps I'd still need to fry up the (chopped) ingredients first, then strain them out again?
Toasted Coconut
ingredient veg vegan

Makes an acceptable topping for sauces or salads.
If a little bland.
Ingredients
- A coconut
Hammer a screwdriver into the coconut eyes and turn the nut upside down on a glass to drain out the coconut water.
Put the coconut in a very hot oven for 5 minutes, then hold it in a towel and crack it sharply with a hammer - the shell should split nicely.
Peel the brown skin from the white coconut and finely grate the flesh.
Gently dry pan-fry the shredded coconut until it colours nicely and starts to crisp up. You'll need to watch it like a hawk and keep it moving to stop it burning though.
This has a reasonably pleasant, sweet nutty flavour,
but is disappointingly mild and doesn't stay crispy long, so use it quick.
Maybe there's something it could be fried up with to make it a bit more entertaining?
Maybe there's something it could be fried up with to make it a bit more entertaining?
Apple-Mustard Sauce
sauce veg

This is a really tasty if intriguing mixture of flavours,
and goes terrifically well with, say, pan-fried Sea Bass.
I was rather under the impression that I had invented it, but to my chagrin, it turns out that other people have got there before me.
Bastards.
Just goes to show there's nothing new under the grill.
I was rather under the impression that I had invented it, but to my chagrin, it turns out that other people have got there before me.
Bastards.
Just goes to show there's nothing new under the grill.
Serves 2
Ingredients
- 1 apple, cored, peeled, chopped
- 2-3 heaping teaspoons prepared English mustard.
- 1 oz butter, or to taste
- handful chopped basil
Peel, core and chop the apple.
Fry the pieces in a little butter until well coated and starting to soften (unless you've been shopping in a supermarket and ended up with an apple which is made of polystyrene).
Add a little brown sugar if the apple is very tart.
Season and serve.
Fry the pieces in a little butter until well coated and starting to soften (unless you've been shopping in a supermarket and ended up with an apple which is made of polystyrene).
Add a little brown sugar if the apple is very tart.
I imagine you could also soften some chopped onion or garlic with the apple -
you'd either end up with a lumpier sauce or have to blend it though.
Cover the apple with water or you could try using lemon juice
and simmer until the apple is completely mushy, crush, mash or blend, then stir in the mustard and gently reduce.
Since I bought my apple at a supermarket I had to resort to the potato masher.
When the sauce is thick and gloopy, whisk in a few knobs of butter until the sauce gets all glossy,
then stir through the basil.Season and serve.
You could also try finishing the sauce with cream, using sage instead of basil, and adding a little white wine or a dash of cognac.
Beetroot Rösti
side veg vegan experimental


Ingredients
- 1 large (baking) potato
- 1 large beetroot
- grated fresh coconut optional
- flour possibly
- salt
Boil the potato and beetroot whole in their skins for about 10 minutes, until they just began to soften,
but are still firm. Drain and allow to cool slightly before peeling and grating them into separate bowls.
Salt the roots generously.
Grate the coconut into another bowl.
I tried a few different ways of making up the röstis. I was hoping for nicely shaped patties, crispy on the outside, well cooked and tender on the inside.
Salt the roots generously.
Grate the coconut into another bowl.
I tried a few different ways of making up the röstis. I was hoping for nicely shaped patties, crispy on the outside, well cooked and tender on the inside.
-
Mix roughly half beetroot with half potato, press into patties and fry in a generous amount of butter until cooked.
Works well, quite tasty, and you can crisp some of the sticky-out bits quite effectively, which do hold their crunch quite well, but it doesn't seem possible to get a whole crispy shell.
-
Mix pure grated beetroot with enough plain flour to coat,
press into patties and fry in a generous amount of butter until cooked through.
These fellows crisped up pretty well in the pan, and they taste nice enough, especially when mixed with the coconut, but just didn't seem to stay crispy for very long at all.
Oh, and they definitely don't keep warm well in the oven. -
Press grated beetroot into patties and fry in butter until cooked.
No, no, no! Beetroot does not hold together on its own. Not enough starch I suppose.
Good taste to these röstis, also mixed with the coconut, but I wasn't really happy with any of their crunchiness.
They were very nice served up for breakfast the next day with a fried egg on top,
but their overnight stint in the fridge definitely didn't help the crisping up at all.
Opinions on making crunchy potato röstis vary, some use pre-cooked roots, and some raw.
The raw suggestions all seem very keen to remove excess liquid from the grated potato,
ranging from grating into a sieve, scattering with salt and pressing out with a spoon,
to grating, scattering with salt and wringing out a couple of times in a tea towel.
Cookipedia suggests brushing the röstis all over with melted butter and baking them at the top of an oven preheated to 220°C/Gas 7/425°F. Bake for 15 minutes, flip, and bake the other side for another 10 minutes.
Cookipedia suggests brushing the röstis all over with melted butter and baking them at the top of an oven preheated to 220°C/Gas 7/425°F. Bake for 15 minutes, flip, and bake the other side for another 10 minutes.
-
So, I tried the oven baking method:
I par-boiled a potato and a beetroot (10 minutes for the potato, 20 for the beetroot) peeled and grated them together seasoned the mixture, pressed into 1"x3" patties, brushed both sides with an olive oil/melted butter mixture, then baked at Gas 8 (Gas 7 seemed to low) for 15 minutes, then flip and 10 minutes longer.Good taste, and a crunchy texture to the extremities, though still not exactly crisp over the entire outside.
I did forget to sprinkle with flour as recommended - perhaps that would have helped.
Oh, and they reheat in the oven pretty well too.
Still more work to do, but I'm liking the baking method.
Stuffed Courgettes
side main veg cheese

I remember making these fellows ages ago, but now I can't seem to find my original recipe for them.
Which is weird. I'm usually reasonably retentive of these things. I wonder if anyone has noticed?
Ah, here it is!
Serves 1 or 2 per courgette
Ingredients
- courgettes
- butter
- onion, diced or shallots, if you have 'em
- garlic, minced
- mustard I liked Dijon
- cheese, grated Edam was good - nice and stringy
Par-cook the courgettes whole in a steamer, or a small amount of water. Don't overdo it.
When they've cooled slightly, slice them in half lengthways and scoop out the seedy centre with a teaspoon. Chop the flesh.
Gently fry the onions and garlic in butter until soft, then add the courgette flesh and reduce it. Add mustard to taste. Grate about half the cheese into the mixture and a splash of wine if you fancy.
Lay the courgettes in a baking dish, fill them with the stuffing mixture, and grate over the remaining cheese.
Grill (or bake at 200°C) until the cheese melts nicely.
These are delicious - by the way.
I'm not really sure if the courgettes need par-cooking at all, but they do taste good when they're all squishy.
Perhaps you could achieve the same result by cooking the stuffed, cheese-covered courgettes entirely in the oven with a layer of water?
I liked the Dijon-Edam combination, though I'm sure you could go with strong cheddar.
Stir Fried Pak Choy
oriental side veg vegan
Ingredients- pak choy
- ginger
- spring onion
Leftover Tempura Dip:- soy sauce
- tangerine juice
- water
- mirin (rice wine)
- dash sesame oil
Mince the ginger
Fry the ginger, followed by the spring onions then the pak choy.
Throw in the tempura dip to finish off, let it boil off and remove to a warmed serving dish.
I grated mine, but it tends to clump up when you fry it, and you end up with unexpected mouthfuls of the stuff.
slice the spring onions on a diagonal, wash the pak choy.Fry the ginger, followed by the spring onions then the pak choy.
Throw in the tempura dip to finish off, let it boil off and remove to a warmed serving dish.
Yeah, it's fine. Nothing to write home about.
P In The Park
Last Friday afternoon Rachel and I spent 2 hours packing up our
tent, sleeping bags, sleeping mats, camping stove, mountain bikes, pots, pans, plates, cuddly toys, small hyperexcited child,
disposable barbecue, considerable food supplies, emergency bottles of wine
and set off for the Gallowhill campsite near Loch Leven,
which until recently played host to
T In The Park
(and indeed was still hosting quite a lot of its atmosphere).


 Once there we spent 2 more hours unpacking, putting up the tent, blowing up the sleeping mats,
laying out the sleeping bags and the cuddly toys (a fraught task),
stashing the pots, pans and plates,
unshipping the mountain bikes then wearily tracking down a local chippy to feed a small ravenous child.
Once there we spent 2 more hours unpacking, putting up the tent, blowing up the sleeping mats,
laying out the sleeping bags and the cuddly toys (a fraught task),
stashing the pots, pans and plates,
unshipping the mountain bikes then wearily tracking down a local chippy to feed a small ravenous child.
Finally on Saturday we received the payoff for all our preparations with a whole 6 mile cycle along the, admittedly scenic, Heritage Trail around the north shore of Loch Leven.
 On Sunday morning we then spent 2 hours packing the soggy tents
(yes, there are many treasures to be found in the fields of filth left behind by
T In The Park - if you can stomach the smell),
sleeping bags, sleeping mats, camping stove, mountain bikes, pots, pans, plates, cuddly toys, small grizzly child
and no wine back into the car so that we could drive home and spend 2 hours unpacking it all again.
On Sunday morning we then spent 2 hours packing the soggy tents
(yes, there are many treasures to be found in the fields of filth left behind by
T In The Park - if you can stomach the smell),
sleeping bags, sleeping mats, camping stove, mountain bikes, pots, pans, plates, cuddly toys, small grizzly child
and no wine back into the car so that we could drive home and spend 2 hours unpacking it all again.
Ah the many joys of family camping!
 On our short tour of the shores of Loch Leven, we had lunch at Loch Leven's Larder
and our friends' young boy Toby had an interesting-looking Potato and Curly Kale soup.
On our short tour of the shores of Loch Leven, we had lunch at Loch Leven's Larder
and our friends' young boy Toby had an interesting-looking Potato and Curly Kale soup.
An odd choice I thought. For a young boy.
I did wonder if he knew what curly kale was before he ordered it.
Imagine the bitter disappointment if he had been expecting some gloriously coiled fantasy sea creature. With Potato.
And then got kale.
I decided to have a go at the soup myself, especially as I already had most of the ingredients knocking around, including some disturbingly old Christmas goose stock that desperately needed using up.
Their's looked more appealing than mine - thinner, lighter and less virulently green. Also less lumpy.
But mine tasted better.


Finally on Saturday we received the payoff for all our preparations with a whole 6 mile cycle along the, admittedly scenic, Heritage Trail around the north shore of Loch Leven.

Ah the many joys of family camping!
An odd choice I thought. For a young boy.
I did wonder if he knew what curly kale was before he ordered it.
Imagine the bitter disappointment if he had been expecting some gloriously coiled fantasy sea creature. With Potato.
And then got kale.
I decided to have a go at the soup myself, especially as I already had most of the ingredients knocking around, including some disturbingly old Christmas goose stock that desperately needed using up.
Their's looked more appealing than mine - thinner, lighter and less virulently green. Also less lumpy.
But mine tasted better.
Back In The Fold
Of course, we made up again shortly afterwards.
Just our bi-annual wobble I guess.
Still, I've been starting to feel antsy about not having anyone to cook for during our break (including myself due to my (failing) attempts to lose weight by eating just salads),
so when Rachel texted me to say that she'd not had a decent meal for ages, was sick of living on sausages and fancied a nice bit of fish, and Sunday sailing at the East Coast Sailing Week Regatta was cancelled due to the arrival of Armaggedon (I believe that's a 13 on the Beaufort scale), it seemed a God-given opportunity to shop like a maniac and pop around to satisfy poor Rachel's desires.
Obviously the choice (and quality) of fish was somewhat limited due to it being a Sunday, and there being nowhere to shop but supermarkets (sigh), but I did my best.
I have to say, though, you can't beat leftover old supermarket fishes for price!
Prawn And Scallop Tempura
starter fish

Serves 2
Ingredients
8 fresh peeled King Prawns
6 scallops
tempura batter no. 6
flour for coating
groundnut oil for deep-frying
cup mayonnaise
lemon juice
large handful mint leaves
2-3 Tablespoons creme fraiche
Method
6 scallops
tempura batter no. 6
flour for coating
groundnut oil for deep-frying
cup mayonnaise
lemon juice
large handful mint leaves
2-3 Tablespoons creme fraiche
Whizz up the mint leaves with the mayonnaise using a hand blender or a small food processor.
Moisten with a little lemon or lime juice to get things going if you like.
You need quite a lot of mint leaves to get a good flavour.
Stir in the creme fraiche to give a little sharpness to taste.
Dollop the dip into individual ramekins and set aside in the fridge to chill.
Heat the heavy pot of groundnut oil. When it is hot enough a drop of batter will fizz enthusiastically and rise to the surface. Roll each ingredient in the flour to coat, then dip in the batter and drop into the oil. You can add half a dozen pieces at a time, but don't overload the pan, and keep the oil up to temperature. When the pieces are done they will rise to the top and take on a little colour. Scoop them out with a slotted spoon and set aside to drain on paper towels.
When all the pieces are cooked, put a ramekin of dip in the middle of a plate, surround with the tempura, and serve.
Yum!
Pan-Fried Rainbow Trout with Rhubarb Relish
main side fish


Serves 2
Ingredients
2 nice fat Rainbow Trout
knob of butter
seasoned flour
1 portion of Rhubarb and Mustard Relish (with strawberries)
1lb new potatoes
grated peel of 1 lime
few mint stalks
1lb curly kale, shredded
6 spring onions, diagonally sliced
1 teaspoon yellow mustard seeds
1 teaspoon black onion seeds
Method
knob of butter
seasoned flour
1 portion of Rhubarb and Mustard Relish (with strawberries)
1lb new potatoes
grated peel of 1 lime
few mint stalks
1lb curly kale, shredded
6 spring onions, diagonally sliced
1 teaspoon yellow mustard seeds
1 teaspoon black onion seeds
Start your Rhubarb Relish
Add some of your strawberries for an extra summery zing.
Clean the trout, removing their gills and their head (unless you like them staring at you with their soulless milky eyes) and pat dry on kitchen paper.
Season some plain flour with salt, mixed ground peppercorns and a dash of paprika on a large plate.
Bring a large pot of salted water to boil and throw in the mint stalks and new potatoes.
Heat a large frying pan and a wok.
Roll the fish around in the plate of flour to get a good coating. Add enough butter to coat the bottom of the frying pan and add the fish. You want the pan hot enough to quickly fire off any water from the fish so they keep frying and to brown the butter giving a nice nutty flavour, but not so hot that you burn the butter and turn it bitter.
Cook the fish for about 5 minutes on each side so that the flesh in the centre turns opaque and firms up, but don't dry it out.
It takes a reasonably long time to do this, ideally you will end up with a lovely crunchy, tasty bit of well-browned skin, and moist succulent flesh that forks beautifully off the bone. If the flesh looks pale or translucent and tastes gelatinous it is undercooked, and if it seems dry and claggy then it is overdone.
Meanwhile pour a coating of olive or peanut oil into the wok, when it reaches smoking point throw in the onion and the mustard seeds. Have a lid ready to just cover the wok to keep the seeds in and wait until they start to pop.
Then throw in the spring onions, shake the wok once or twice then throw in the kale, maybe in two or three batches to keep the wok going.
Scoop into a serving dish when the kale is cooked through, or beginning to crisp at the edges. Feel free to moisten with a little lime juice if you fancy.
Drain the potatoes and dress with a knob of butter, the grated lime peel and some shredded mint leaves if you like.
The Rhubarb relish goes beautifully with the fish!
Serve the relish in a pot on the side - I think that would look better than trying to artistically dollop it on the plate.
The curly kale was nice enough - but didn't quite go with the fish. Also I slightly overcooked the onions by letting them fry through before adding the kale - so only give them a brief shake in the pan.
I found a recipe for broadbean mash that might have been a better choice, except that I already had the mushy rhubarb relish. Perhaps some kind of whole broadbean dish would have been better?
Chilled Strawberry And Melon Soup
soup

Makes 4 delicate portions
Ingredients
1 lb /400g strawberries
½ Galia melon
juice of 1 lime
handful mint leaves
ground mixed peppercorns
pinch salt
Method
½ Galia melon
juice of 1 lime
handful mint leaves
ground mixed peppercorns
pinch salt
Core the strawberries and whizz them up in a food processor.
You can add a little water or cranberry juice to get things going if necessary.
Add a little sugar if the strawberries are not sweet enough, though I didn't need to. My strawberries were absolutely gorgeous :) Push through a sieve into a jug, add a pinch of salt and a grinding of mixed red/green/black peppercorns then cover and put in the fridge to chill.
Serve by pouring equal quantites of the purées into opposite sides of a bowl and swirling with a knife to make pretty patterns.
Add a little sugar if the strawberries are not sweet enough, though I didn't need to. My strawberries were absolutely gorgeous :) Push through a sieve into a jug, add a pinch of salt and a grinding of mixed red/green/black peppercorns then cover and put in the fridge to chill.
I did try to get rid of the (tiny) strawberry seeds completely by straining through muslin,
but the strawberry mush was just too thick to pass through even a single layer.
Cut the half melon into slices, deseed and peel them,
chop them into pieces and whizz them up in a food processor with the lime juice and the mint leaves.
Pour this out into another jug, cover and chill in the fridge.
Again, if the melon is not quite sweet enough you could add a little sugar, but I didn't need to.
You are aiming to produce the same quantities of strawberry and melon purées
You are aiming to produce the same quantities of strawberry and melon purées
Serve by pouring equal quantites of the purées into opposite sides of a bowl and swirling with a knife to make pretty patterns.
Delicious soup, which we had as a dessert.
Rachel commented that the purées would make lovely sorbets too.
Rachel commented that the purées would make lovely sorbets too.
The End Of The Line?


Ah those Campbell soup cans.
The inspiration of artists, the darling of gourmandes and the kindler of fond childhood memories.
Requiescat in pace
As a boy, I spent many weekends, and long summer weeks with a small band of close friends (who I no longer talk to) hiking off into that vast wilderness - The Yorkshire Dales. Armed only with tins of Campbell's Condensed Oxtail Soup, feet-long paper packets of dried spaghetti, fresh mince, onions, garlic, mushrooms, various small plastic film containers (remember those?) filled with dried oregano, Worcestershire and Tabasco sauce, and of course the fresh eggs and bacon for breakfast, we would muscle our enormous rucksacks over hills and dales to comfy camping spots by rivers and streams. And pubs.
Once settled in with our tents up and sleeping bags decompressing we would pump up the solid brass paraffin stoves, break out the giant pasta pan and start boiling the water for our time-honoured Spaghetti Bolognese di Campeggio
I don't know where our traditional family recipe for oxtail-soup-based Spaghetti Bolognese originally came from, I'm not even sure it was from my family (though there is a history of condensed-soup-based cookery), but I can't smell the rich meaty aroma of hot, bubbling condensed oxtail soup without being instantly transported back to those childhood trips.
Imagine my horror, then, at the double body blows of first being denied oxtail soup due to our Gubbermint's hysterical overreaction to the fear of Mad Cow Disease (I don't know if you tried the oxtail-effect soup produced by Campbell during this period but suffice to say - you really can't make a convincing oxtail out of carrots), and then to the sale of Campbell's Soup (UK) label to Batchelors.
Sold.
A Goddamn cultural icon!
Naturally as soon as I heard the news in 2006 and fearing that I might never get to taste that glorious meaty phlegm again, I stocked up with soup tins as for a nuclear war. Fortunately for my sanity, though, it seems that Batchelor's are still making the same recipe and their new cans are quite acceptable. If not as photogenic.
Fast forward to 2010, and down to my last can of Campbell's original, possibly the last can in the country, I decide to share this priceless hoarded treasure together with its golden childhood memories with my girlfriend on a well-earned camping holiday. This time out in the vast wilderness of the Cairngorms.
Unfortunately for our relationship I happened to notice that the expiration date on the can was 2008, and had to open my big mouth, at which Rachel immediately refused to have anything more to do with it, demanding that a tin of tomatoes be substituted instead.
Sacrilege!
This despite being perfectly happy to munch her way through a fridge-full of tragically mouldering produce at home, smugly proclaiming how it helps to keep up her immunities.
So I immediately dumped her.
Pretty fair I thought.
I print the recipe here for anyone else who fancies recreating this special experience.
The food that is. Not breaking up with your girlfriend.
You don't need my help with that!
Feeds an army
Spaghetti Bolognese di Campeggio
main meat pasta
Ingredients- 2 fist-fulls spaghetti
- 2lb beef mince
- 6 cloves garlic, minced
- 2 onions, finely chopped
- 2 cans Campbell's Condensed Oxtail Soup (or to taste)
- dried oregano
- dozen button mushrooms, quartered
- Worcestershire Sauce
- Tabasco Sauce
Optional:- bacon, chopped
- chorizo, chopped
- yoghurt
First hike out into the Yorkshire Dales carrying ten times the amount of clothing and food that you could possibly require.
Set up camp in a lonely spot near to running water, but within pitch-dark walking distance of a Theakston Pub.
Cover the bottom of a large pan with olive oil and fry the mince until it starts to brown (chopped bacon or chorizo works as a delicious addition also), toss in the minced garlic and crisp it a little, then add the onion.
At this point throw on the dried oregano and fry until the onions turn glassy.
Add quartered mushrooms.
Meanwhile boil a large pot of water for the spaghetti. Dump the spaghetti in the boiling water and cook until just al dente, then strain.
While the spaghetti cooks pour the cans of condensed oxtail soup over the fried mince. and let the sauce gently simmer.
Flavour to taste with Tabasco and Worcestershire sauce.
Serve the spaghetti with the sauce poured over.
Wash the dishes*.
Go to the pub.
Set up camp in a lonely spot near to running water, but within pitch-dark walking distance of a Theakston Pub.
Cover the bottom of a large pan with olive oil and fry the mince until it starts to brown (chopped bacon or chorizo works as a delicious addition also), toss in the minced garlic and crisp it a little, then add the onion.
At this point throw on the dried oregano and fry until the onions turn glassy.
Add quartered mushrooms.
Meanwhile boil a large pot of water for the spaghetti. Dump the spaghetti in the boiling water and cook until just al dente, then strain.
While the spaghetti cooks pour the cans of condensed oxtail soup over the fried mince. and let the sauce gently simmer.
I found a single tin of soup will do for 2lb mince if your stocks are running low.
If you want to be a bit more philistine traditional you could also add tinned tomatoes
It's ready when a layer of luminous orange oil floats greasily over the surface.If you want to be a bit more philistine traditional you could also add tinned tomatoes
Flavour to taste with Tabasco and Worcestershire sauce.
Serve the spaghetti with the sauce poured over.
You won't need grated cheese, but yoghurt is a nice topping.
Eat.Wash the dishes*.
Go to the pub.
*There's little to recommend standing in a freezing cold stream desperately scraping at the thick residue of heavy orange fat
coating your pans and plates when you've forgotten to bring the washing up liquid, but you would be well-advised to do so.
As delightful as the enticing aroma of hot condensed oxtails can be the evening before, it is a nauseatingly cloying stench to first greet your hangover next morning.
As delightful as the enticing aroma of hot condensed oxtails can be the evening before, it is a nauseatingly cloying stench to first greet your hangover next morning.
The Long Spinach Friday
Because I'm trying to incorporate spinach and samphire into
my ideas for a lemon risotto-stuffed squid dinner,
this turned into a very spinach-oriented weekend! Starting with samphire and spinach, followed by samphire and spinach puree,
then on to spinach soufflés, spinach crisps, then finally spinach oil.
We rounded off with a pretty enjoyable Spinach Lasagne from Delia Smith for light relief.
We rounded off with a pretty enjoyable Spinach Lasagne from Delia Smith for light relief.
Spinach and Ricotta Lasagne with Pine Nuts
main pasta veg cheese


Serves 6
Ingredients
For the sauce:
1½ pints (850 ml) milk, or less
2 oz (50 g) butter
2 oz (50 g) plain flour
1 bay leaf
2½ oz (60 g) Parmesan (Parmigiano Reggiano)
salt and freshly milled black pepper
For the lasagne:
1 lb 5 oz (600 g) young leaf spinach
8 oz (225 g) ricotta
12 fresh lasagne sheets (weighing about 9 oz/250 g)
2 oz (50 g) pine nuts
knob of butter
¼ whole nutmeg, grated
7 oz (200 g) Gorgonzola, Shropshire Blue or Cashel Blue cheese, crumbled
7 oz (200 g) Mozzarella, coarsely grated
salt and freshly milled black pepper


Pre-heat the oven to gas mark 4, 350°F (180°C).
Par-boil the lasagne sheets (yes, even the pre-cooked ones) in salted oiled water - about half the time recommended for cooking them, or 3-4 minutes - then drain the sheets and plunge into cold water. Carefully separate them and lay them out to one side hanging from a rack or sides of a pan or colander.
Now make the sauce, which can be done using the all-in-one method. This means placing the milk, butter, flour and bay leaf together in a saucepan, giving it a good seasoning, then, over a medium heat, whisking the whole lot together continually until it comes to simmering point and has thickened. Now turn the heat down to its lowest possible setting and allow the sauce to cook gently for 5 minutes.
After that, stir in 2 oz (50 g) of the Parmesan, then remove it from the heat, discard the bay leaf and place some clingfilm over the surface to prevent a skin from forming. This really works - you only need to put the cling film across the top of the pan too Now you need to deal with the spinach. First of all remove and discard the stalks, then wash the leaves really thoroughly in 2 or 3 changes of cold water and shake them dry. Next, take your largest saucepan, pop the knob of butter in it, then pile the spinach leaves in on top, sprinkling them with a little salt as you go. Now place the pan over a medium heat, put a lid on and cook the spinach for about 2 minutes, turning the leaves over halfway through. After that, the leaves will have collapsed down and become tender.
Next drain the spinach in a colander and, when it's cool enough to handle, squeeze it in your hands to get rid of every last drop of liquid. Then place it on a chopping board and chop it finely. Now put it into a bowl, add the ricotta, then approximately 5 fl oz (150 ml) of the sauce. Give it a good seasoning of salt and pepper and add the grated nutmeg. Then mix everything together really thoroughly and, finally, fold in the crumbled Gorgonzola. Now you need to place a small frying pan over a medium heat, add the pine nuts and dry-fry them for about 1 minute, tossing them around to get them nicely toasted but being careful that they don't burn. Then remove the pan from the heat and assemble the lasagne.
To do this, spread a quarter of the sauce into the bottom of the dish and, on top of that, a third of the spinach mixture, followed by a scattering of toasted pine nuts. Now place sheets of pasta on top of this - you may need to tear some of them in half with your hands to make them fit. Now repeat the whole process, this time adding a third of the grated Mozzarella along with the pine nuts, then the lasagne sheets. Repeat again, finishing with a layer of pasta, the rest of the sauce and the remaining Parmesan and Mozzarella. When you are ready to cook the lasagne, place it on the middle shelf of the pre-heated oven and bake for 50-60 minutes, until the top is golden and bubbling. Then remove it from the oven and let it settle for about 10 minutes before serving.
Par-boil the lasagne sheets (yes, even the pre-cooked ones) in salted oiled water - about half the time recommended for cooking them, or 3-4 minutes - then drain the sheets and plunge into cold water. Carefully separate them and lay them out to one side hanging from a rack or sides of a pan or colander.
Now make the sauce, which can be done using the all-in-one method. This means placing the milk, butter, flour and bay leaf together in a saucepan, giving it a good seasoning, then, over a medium heat, whisking the whole lot together continually until it comes to simmering point and has thickened. Now turn the heat down to its lowest possible setting and allow the sauce to cook gently for 5 minutes.
Or you could make the sauce properly as I did!
After that, stir in 2 oz (50 g) of the Parmesan, then remove it from the heat, discard the bay leaf and place some clingfilm over the surface to prevent a skin from forming. This really works - you only need to put the cling film across the top of the pan too Now you need to deal with the spinach. First of all remove and discard the stalks, then wash the leaves really thoroughly in 2 or 3 changes of cold water and shake them dry. Next, take your largest saucepan, pop the knob of butter in it, then pile the spinach leaves in on top, sprinkling them with a little salt as you go. Now place the pan over a medium heat, put a lid on and cook the spinach for about 2 minutes, turning the leaves over halfway through. After that, the leaves will have collapsed down and become tender.
Next drain the spinach in a colander and, when it's cool enough to handle, squeeze it in your hands to get rid of every last drop of liquid. Then place it on a chopping board and chop it finely. Now put it into a bowl, add the ricotta, then approximately 5 fl oz (150 ml) of the sauce. Give it a good seasoning of salt and pepper and add the grated nutmeg. Then mix everything together really thoroughly and, finally, fold in the crumbled Gorgonzola. Now you need to place a small frying pan over a medium heat, add the pine nuts and dry-fry them for about 1 minute, tossing them around to get them nicely toasted but being careful that they don't burn. Then remove the pan from the heat and assemble the lasagne.
To do this, spread a quarter of the sauce into the bottom of the dish and, on top of that, a third of the spinach mixture, followed by a scattering of toasted pine nuts. Now place sheets of pasta on top of this - you may need to tear some of them in half with your hands to make them fit. Now repeat the whole process, this time adding a third of the grated Mozzarella along with the pine nuts, then the lasagne sheets. Repeat again, finishing with a layer of pasta, the rest of the sauce and the remaining Parmesan and Mozzarella. When you are ready to cook the lasagne, place it on the middle shelf of the pre-heated oven and bake for 50-60 minutes, until the top is golden and bubbling. Then remove it from the oven and let it settle for about 10 minutes before serving.
This went down pretty well with everyone, despite complaints that the pine nuts reminded them too much of maggots.
Goes nicely with a salad and freshly baked french bread. Personally I'm a big fan of lasagne or macaroni cheese with chips, but then I too have philistine tendencies.
Goes nicely with a salad and freshly baked french bread. Personally I'm a big fan of lasagne or macaroni cheese with chips, but then I too have philistine tendencies.
Tagliatelle Carbonara For Philistines

After a tough but satisfying May Day bank holiday babysitting the girlies,
this was their choice of dinner - and I must admit it went down a storm.
Ready in bare minutes (well O.K. an hour, but it was the first time we made it and Georgina did all the work), and chock full of creamy Philadelphian goodness - their busily masticating little faces say it all really.
Ready in bare minutes (well O.K. an hour, but it was the first time we made it and Georgina did all the work), and chock full of creamy Philadelphian goodness - their busily masticating little faces say it all really.
Ideal for philistines,
this comes with a BIG Georgina seal of approval!
this comes with a BIG Georgina seal of approval!
Tagliatelle Carbonara with Philadelphia Cream Cheese
main pasta cheese
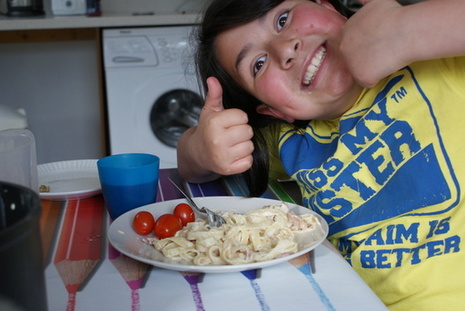
Serves 4
Ingredients
250g Tagliatelle (12 nests)
4 rashers (200g) thick-slice bacon
150g Philadelphia cream cheese
2 egg yolks
200ml boiling water with ½ chicken stock cube
3 cloves garlic
sun-dried tomatoes, sliced (for the sophisticated philistine)
Method
4 rashers (200g) thick-slice bacon
150g Philadelphia cream cheese
2 egg yolks
200ml boiling water with ½ chicken stock cube
3 cloves garlic
sun-dried tomatoes, sliced (for the sophisticated philistine)
Dissolve half a chicken (or vegetable) stock cube in 200ml boiling water.
Slice your bacon into bite-sized pieces
Peel and chop the garlic into chunks
Separate the eggs and blend the cream cheese with the yolks
Slice the sun-dried tomatoes if you're having them.
Boil a large pot of salted, oiled water for the pasta
Put the pasta in the boiling water and simmer until tender (8 minutes).
Meanwhile cook the bacon in a large oiled frying pan until starting to colour, add the garlic pieces, and fry until done. Set aside.
When the pasta is ready, strain it and set it on one side to drain.
Meanwhile return the pot to the hob and pour in the stock and add the bacon mixture.
Reheat, then add the pasta back in and stir through.
Finally, turn off the heat, add the cream cheese and egg yolk mixture, mix thoroughly and serve, dressed with side-salad, fresh tomatoes or anything else vaguely healthy that your children will contemplate eating for that warm five-a-day glow..
Add the sun-dried tomatoes, olives or anything else you fancy as a topping if you are adventurous!
Sit back and glory in the approval.
Another Oxo triumph!
Warm the plates first if you want to avoid the worst of the congealing sauce issues.
Warm the plates first if you want to avoid the worst of the congealing sauce issues.